FOUNDATION PAPER PIECING TUTORIAL FOR BEGINNERS
Do you want to learn foundation paper piecing (FPP), or are you looking for a method that makes it easier and more accurate? In this step-by-step tutorial I will show you the basics of FPP and the way I like to work, with photos of every step. You can sew along with the free Origami Bird pattern below.
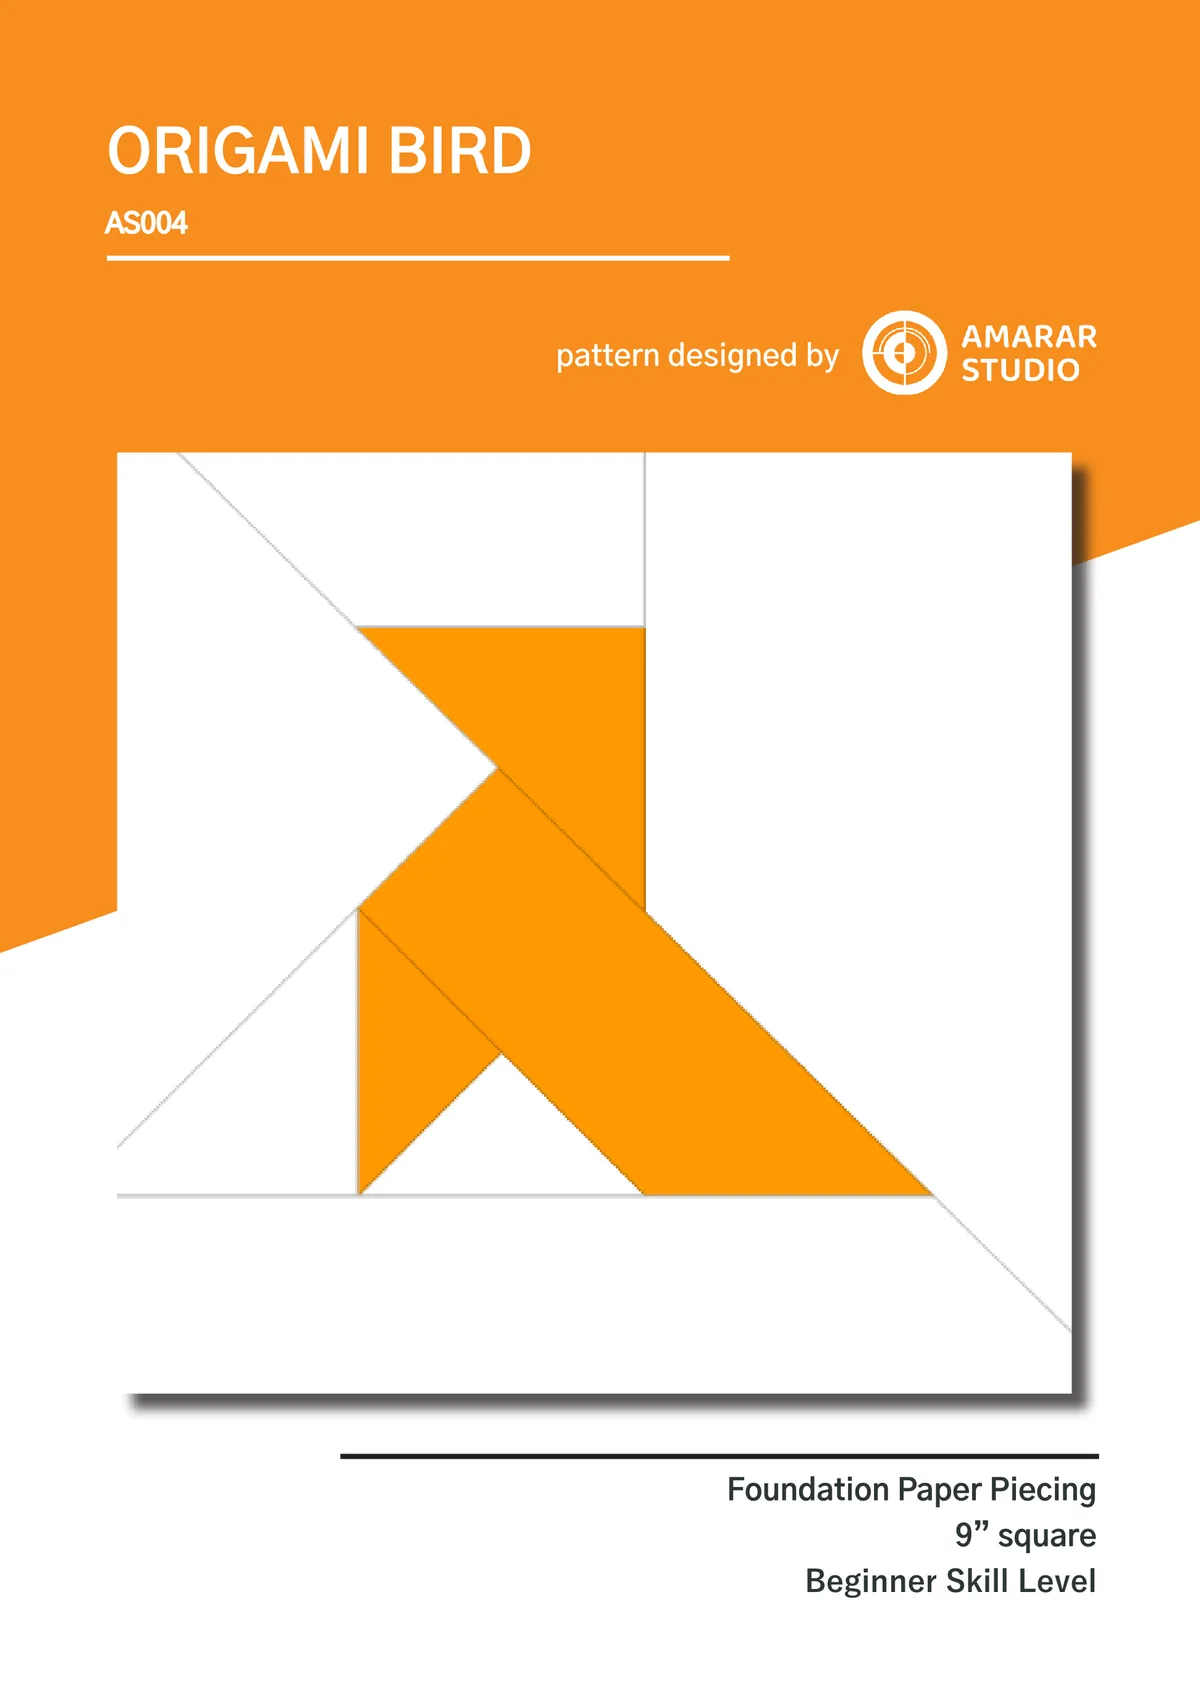
Free Foundation Paper Piecing Pattern: Origami Bird
The Origami Bird is a quick, simple block that is perfect for a first FPP project. The finished block measures 9" (23 cm). Download the version you need, print it at 100% (actual size) and follow along.
Origami Bird: English, US Letter Origami Bird: English, A4 Origami Bird: Spanish, A4 Origami Bird: Catalan, A4
What Is Foundation Paper Piecing?
Foundation paper piecing (FPP) is a quilting technique in which you sew the fabric pieces directly onto a paper foundation. The lines printed on the paper tell you exactly where to stitch, so you can sew sharp points and complex shapes with great accuracy, even small ones.
FPP is not the same as English paper piecing (EPP). In EPP each piece of fabric is wrapped around its own paper template and the pieces are sewn together by hand. In FPP the whole design is printed on the paper and you sew through paper and fabric with your sewing machine.
In this tutorial we will make an Origami Bird block. The paper foundation is included in the free pattern above.
4 Things to Know Before You Start
These four ideas come up in every FPP pattern. Some of them may sound strange at first, but they will make sense as soon as you start sewing.
1. The pattern is a mirror image
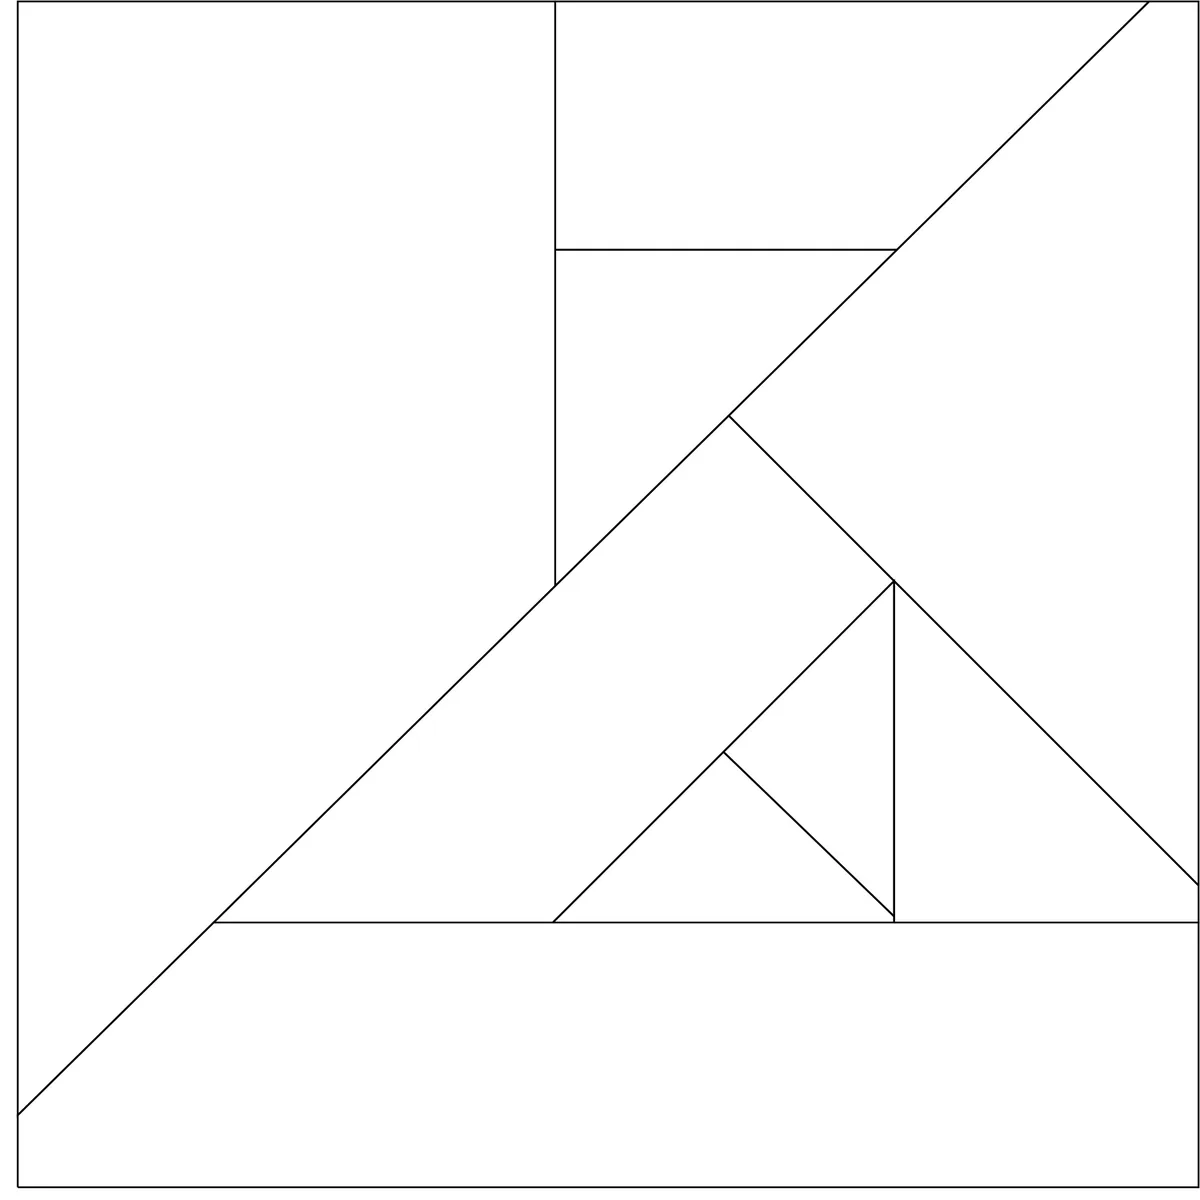
The drawing on the paper is reversed (mirrored). This is because the fabric is sewn to the back of the paper. When the block is finished and you turn it over, the design faces the right way.
All FPP patterns are printed in reverse, so there is nothing wrong with your pattern.
2. Sections and units
In FPP the paper is the base on which the fabrics are joined. A simple design fits on a single piece of paper. A more complex design is divided into several pieces of paper, called sections.
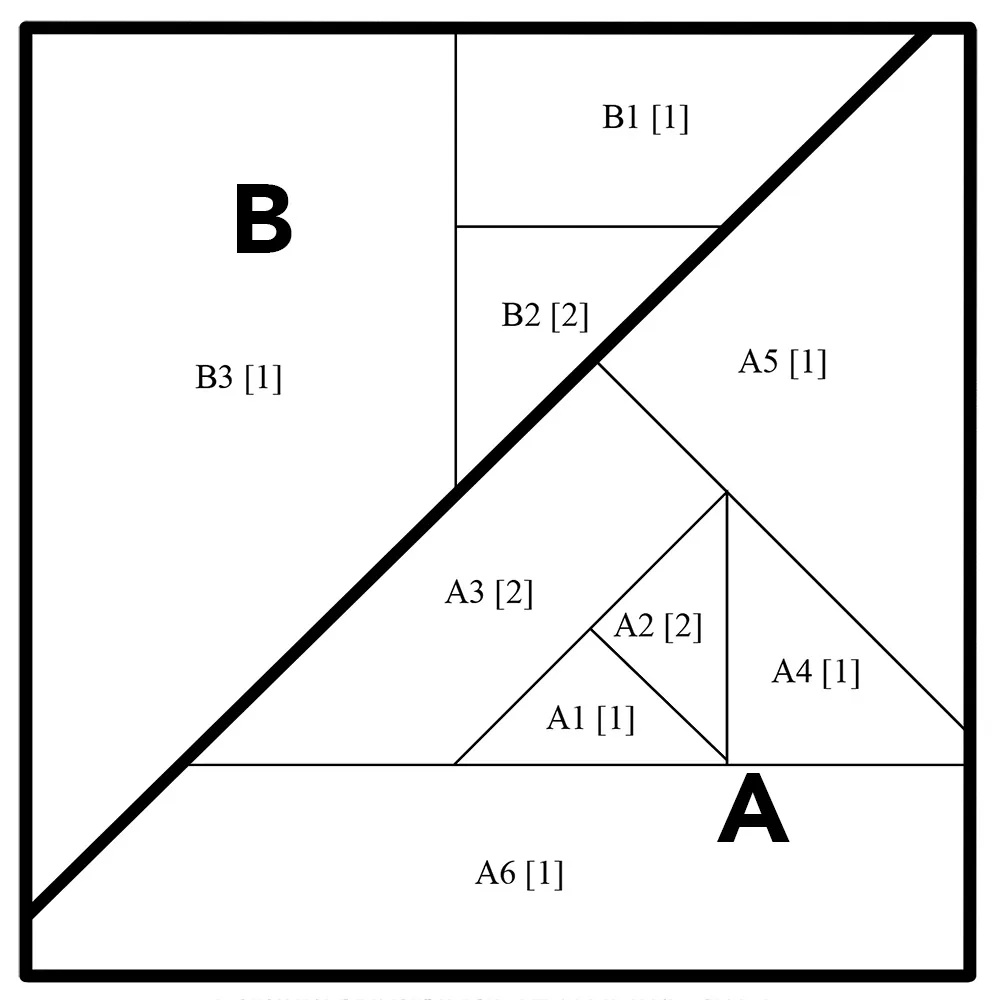
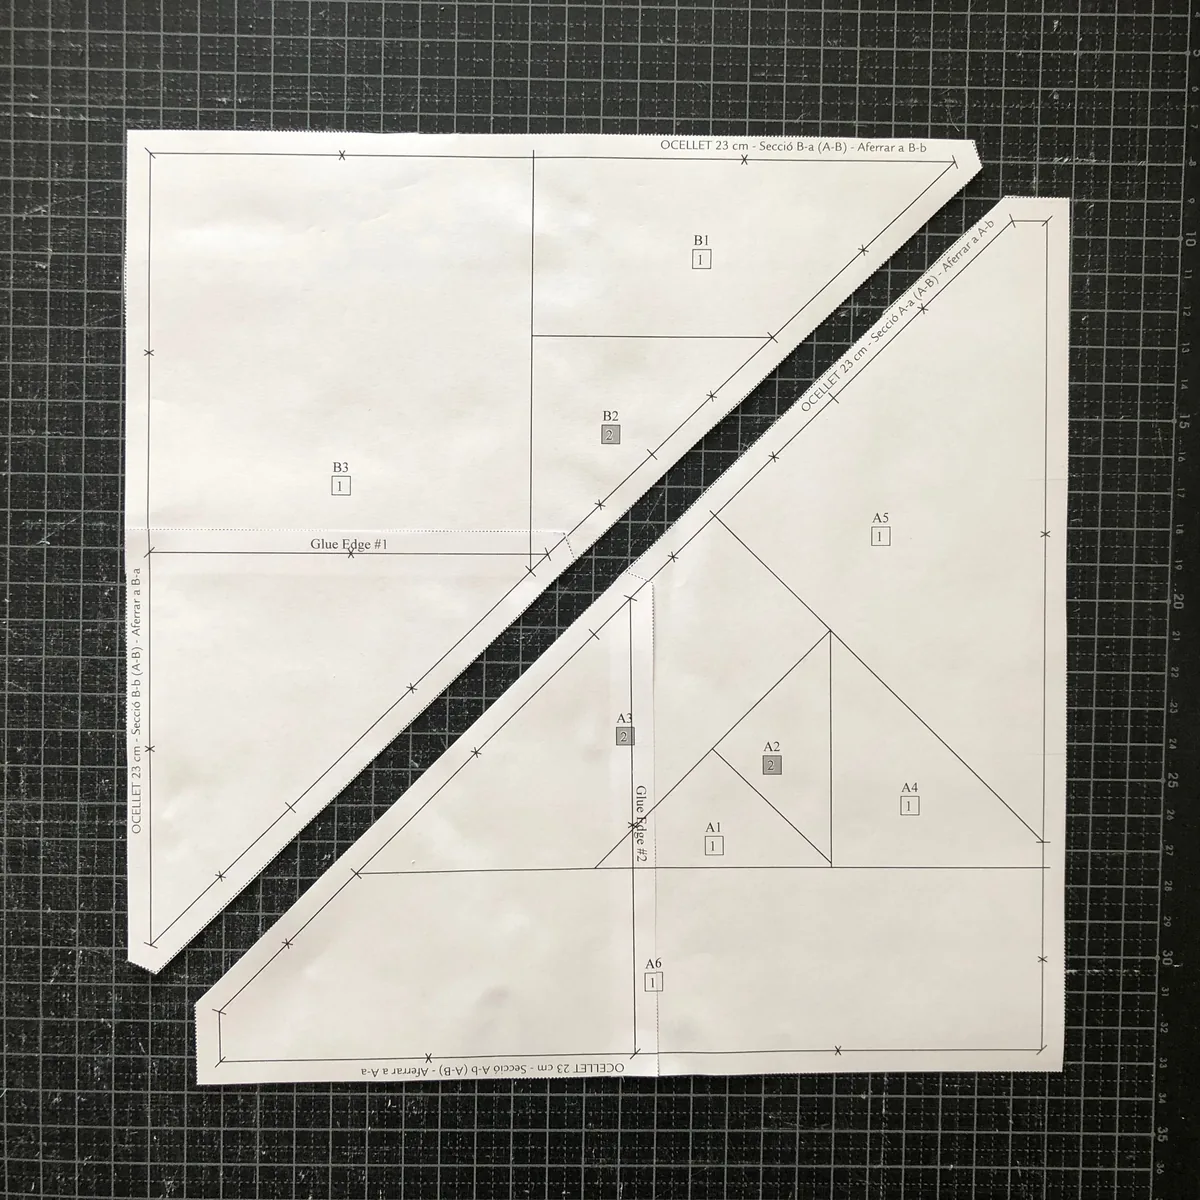
I chose a pattern with more than one section so that you learn how to work with them. The Origami Bird has two sections, A and B. Each section is divided into shapes. Every shape is one piece of fabric, and we call it a unit.
Each unit has a letter and a number. The letter is the section and the number is the sewing order. Unit A3, for example, is the third fabric you add to Section A. The small number in a box tells you which fabric to use: [1] is the background and [2] is the bird.
3. Templates and section papers
The pattern has two kinds of paper pieces:
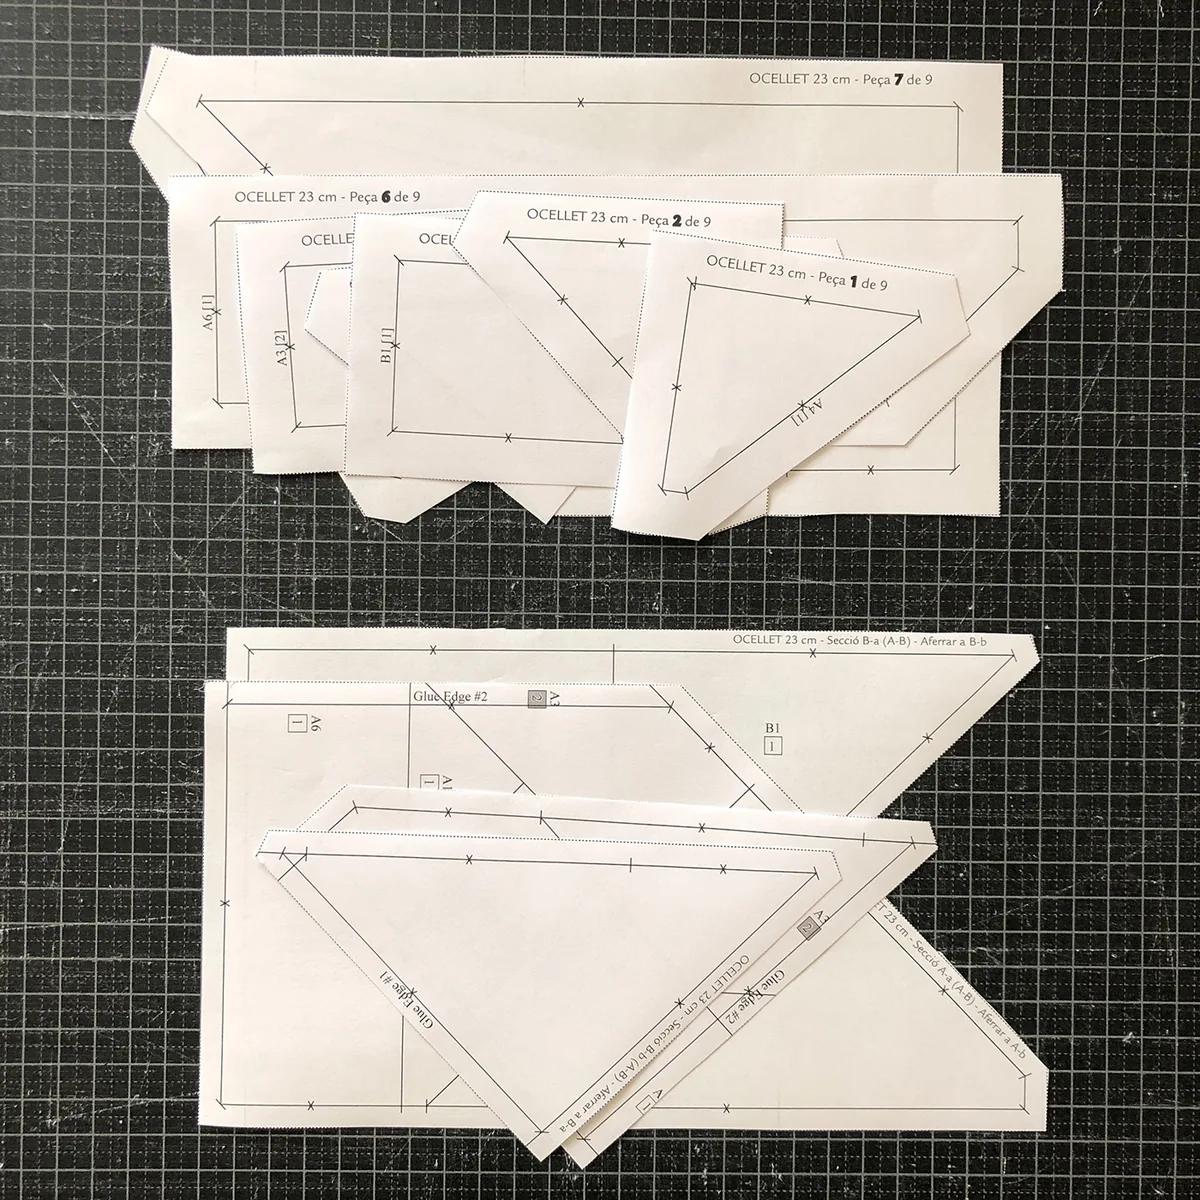
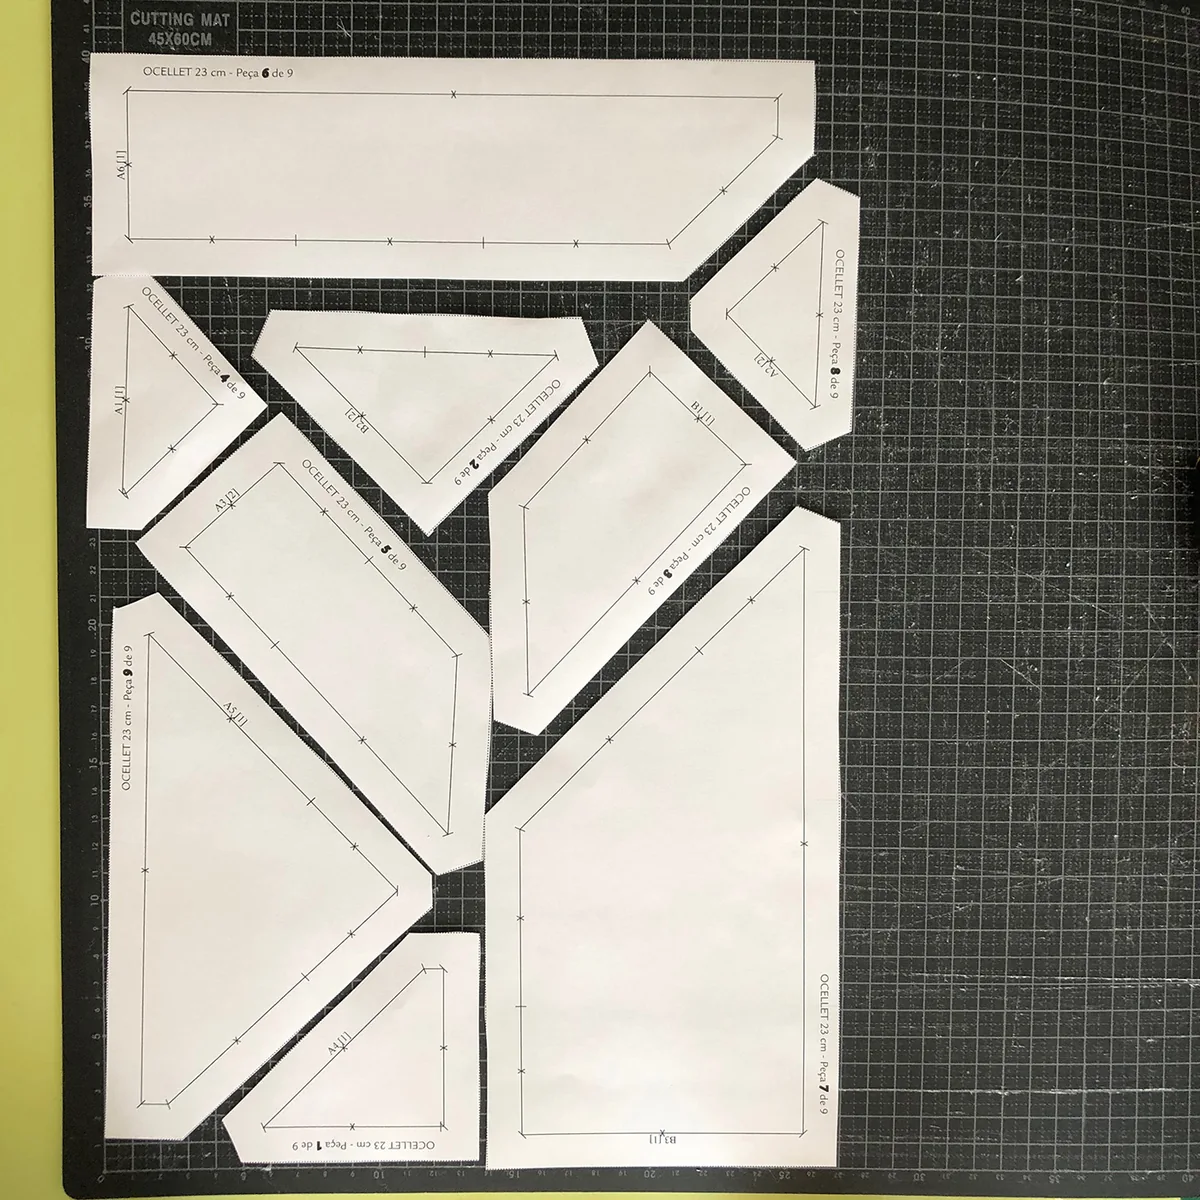
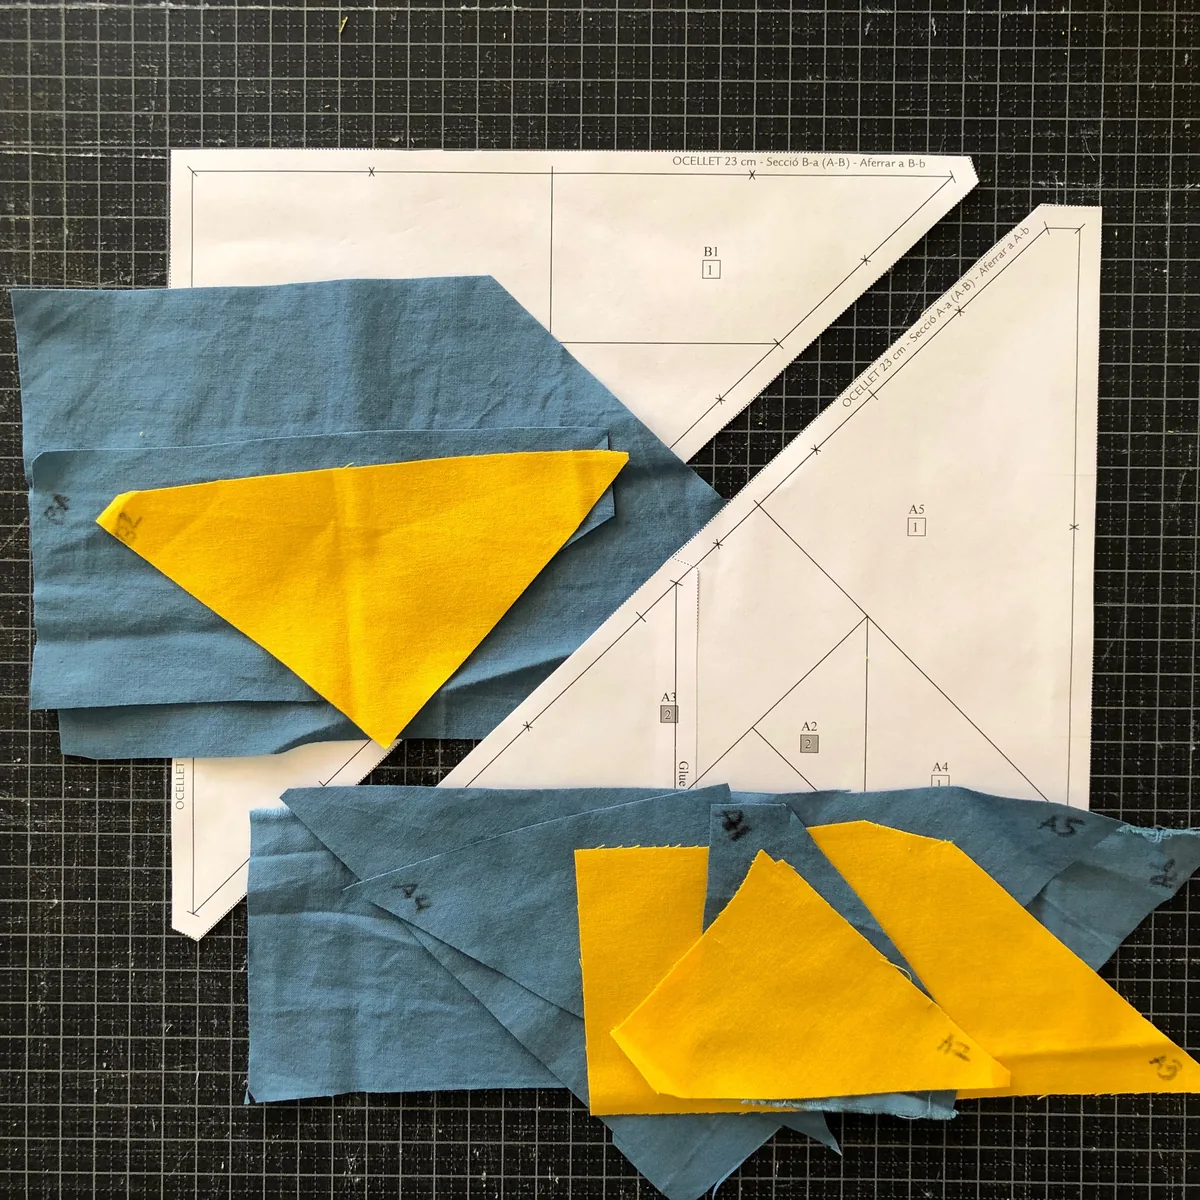
- Fabric cutting templates (top of the photo). You use them to cut the fabric for each unit. They include a generous 1/2" (1.3 cm) margin. Not every FPP pattern has them, but I have included them here so that you learn how to use them.
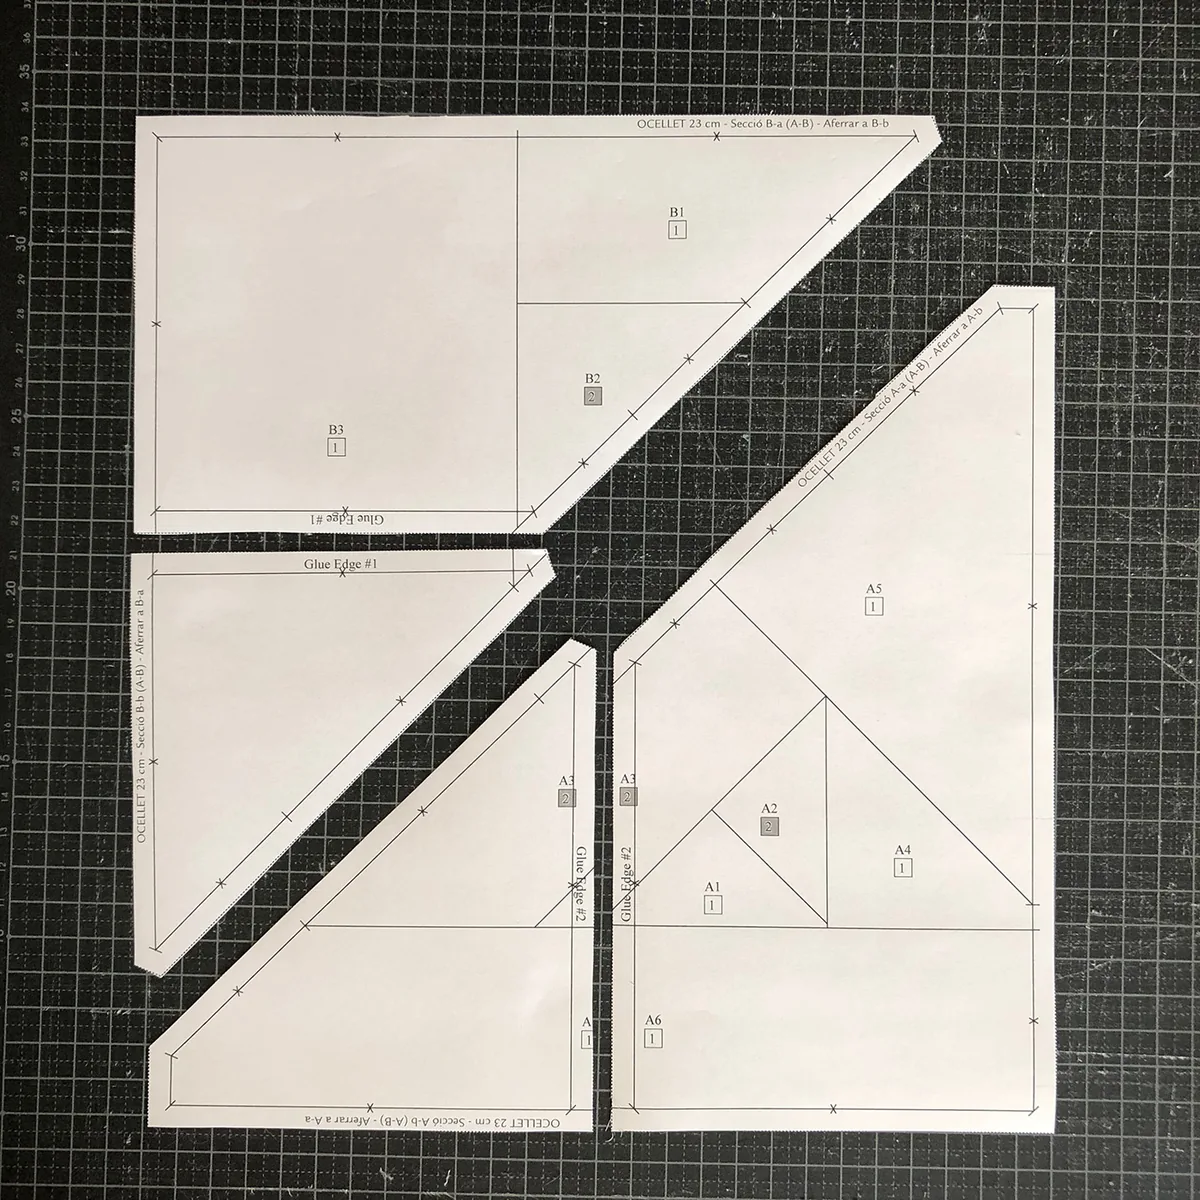
- Section papers (bottom of the photo). These are the foundations you sew on. They have a 1/4" (6 mm) seam allowance all around.
4. How the fabrics are sewn
- The fabric goes on the unprinted side of the paper, with its wrong side against the paper and its right side facing out.
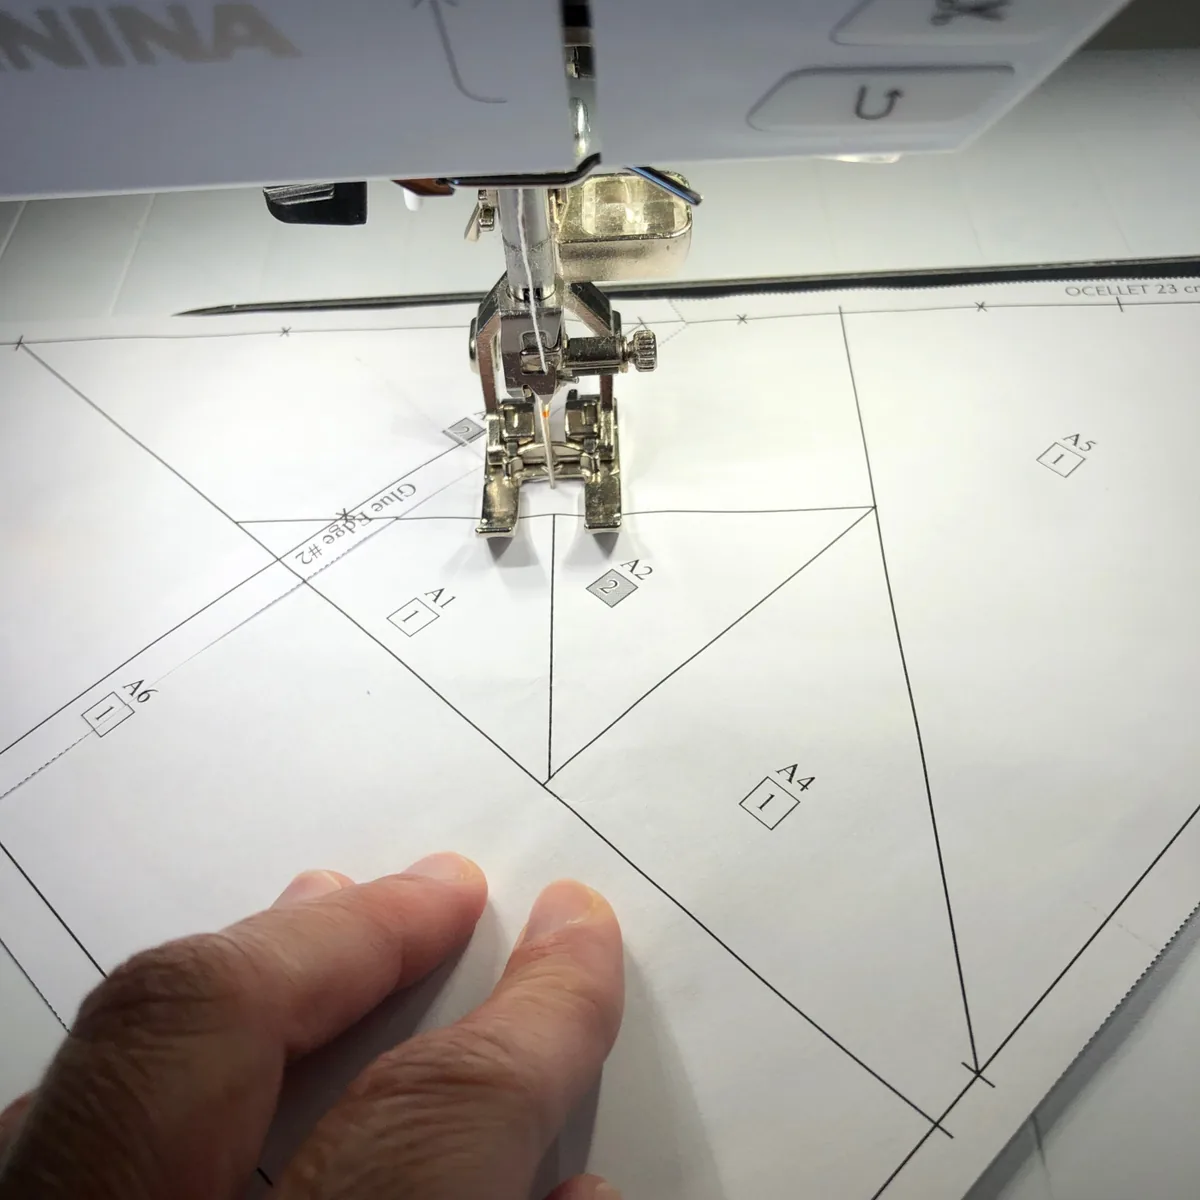
- To join two fabrics, stitch on the printed line between the two units.
- Sew with the printed side of the paper facing up and the fabrics underneath.
- Start a couple of stitches before the line begins and finish a couple of stitches after it ends.
- Use a short stitch length, about 1.5 to 2 mm. The paper will tear away much more easily at the end.
Preparing Your Materials
Step 1: Cut out the papers
Start by cutting out the section papers and the fabric cutting templates.
Cut along the dotted line around each piece. Do not cut off the space between the dotted line and the drawing. That space is the margin, and you need it:
- On the section papers it is the 1/4" (6 mm) seam allowance used to join the sections to each other.
- On the templates it gives you extra fabric to work with. The seam allowance you really need is 1/4" (6 mm), but I have made it 1/2" (1.3 cm) so that you always have enough fabric.
A rotary cutter and a ruler are much faster than scissors. Keep one blade for paper and a different one for fabric, because paper dulls the blade.
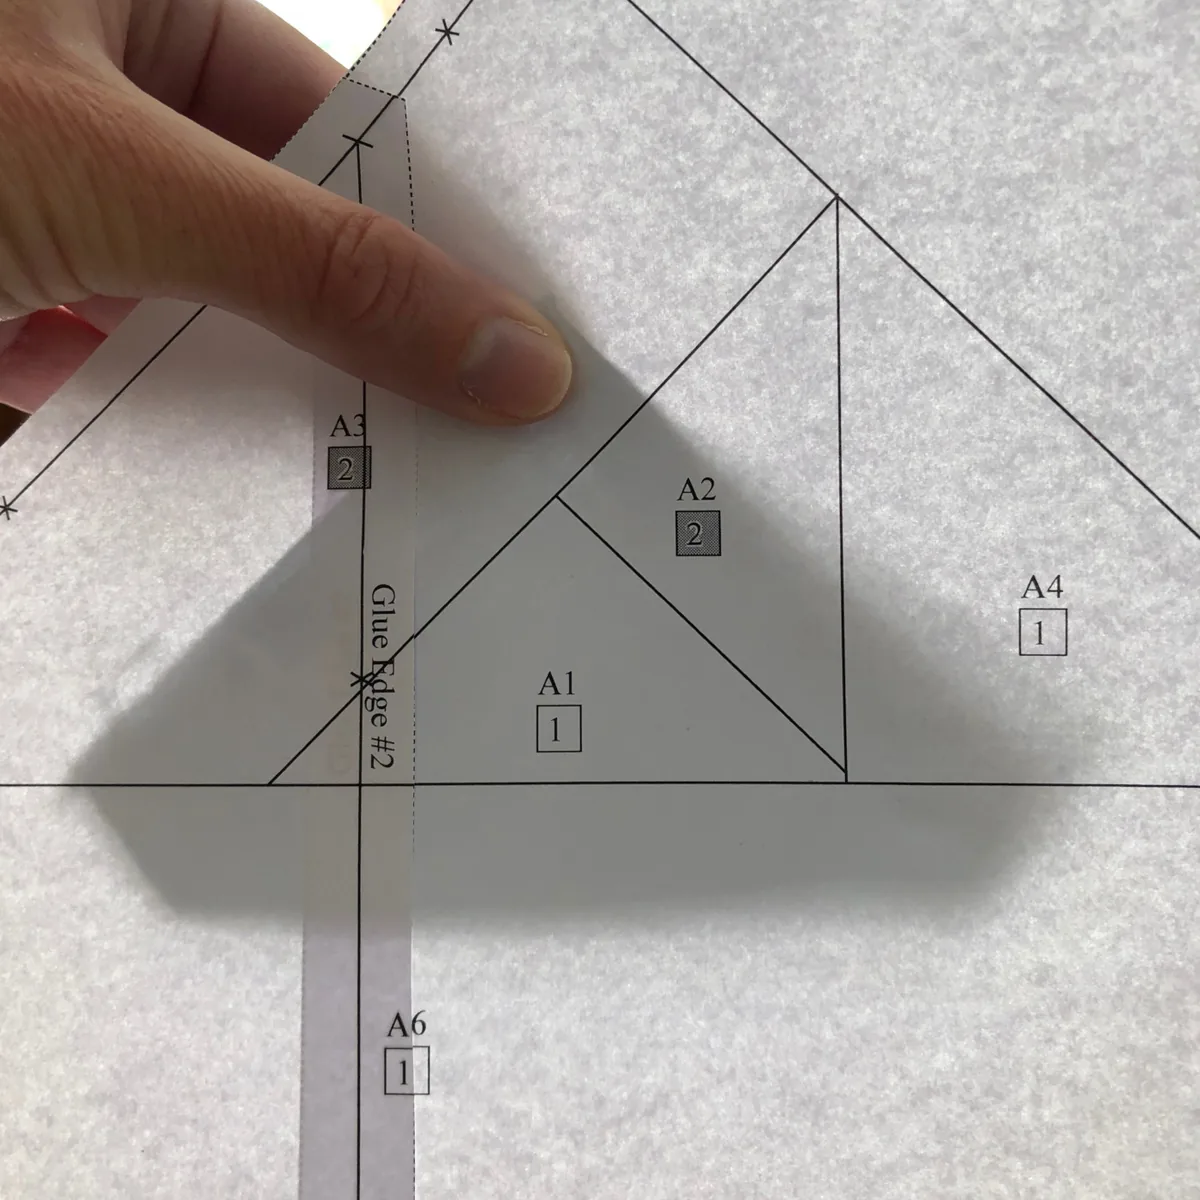
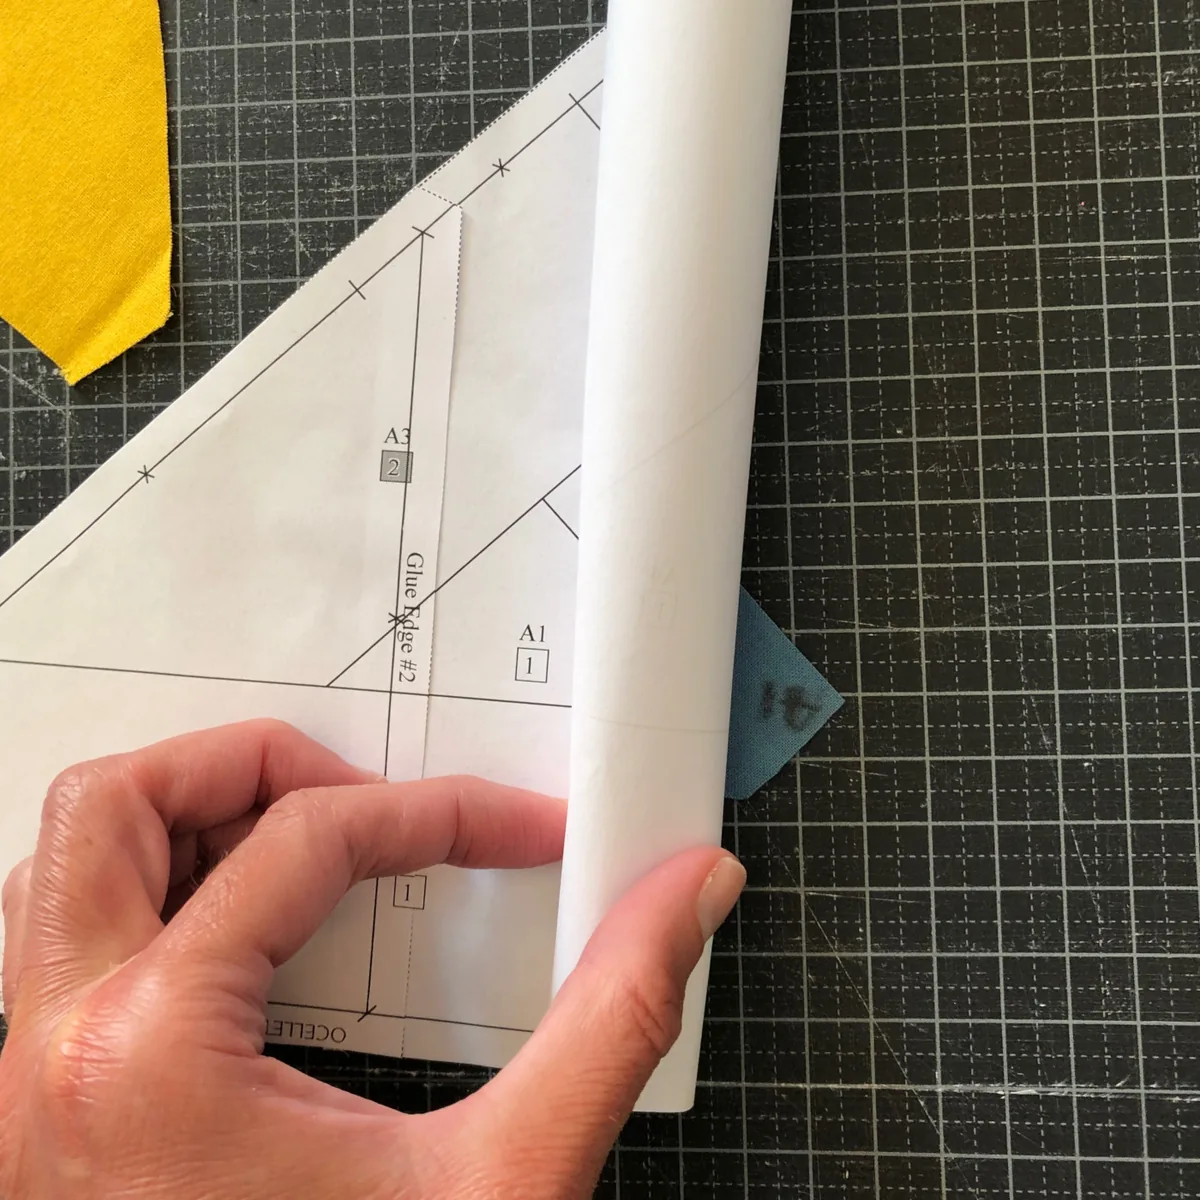
The photos show all the paper pieces you should have. The templates are at the top of the first photo and in the second photo. The section papers are at the bottom of the first photo and in the third photo.
Step 2: Join the papers
Each paper piece has a label, for example: BIRD 9" – Section B-a (A-B) – Glue to B-b. It tells you:
- The pattern name: BIRD 9" (23 cm).
- The section this paper belongs to: Section B-a.
- All the sections in the pattern: (A-B) means there are two, A and B.
A lowercase letter means that the section is printed on more than one piece of paper and the pieces have to be glued together. Section B, for example, is made of B-a and B-b, joined at the edge marked "Glue Edge" and its number.
In this pattern both sections are made of two papers, so you need to join A-a to A-b and B-a to B-b:
- Glue the papers together at the marked edges: Glue Edge #2 for Section A and Glue Edge #1 for Section B.
- Hold the papers up to the light and check that the lines match perfectly from one paper to the next.
The photos show the papers before and after joining. The templates in this pattern do not need to be joined.
Step 3: Cut the fabrics
Now we cut the fabrics using the paper templates. You could also work without templates, measuring each unit and cutting the pieces one by one, but the templates make it quicker.
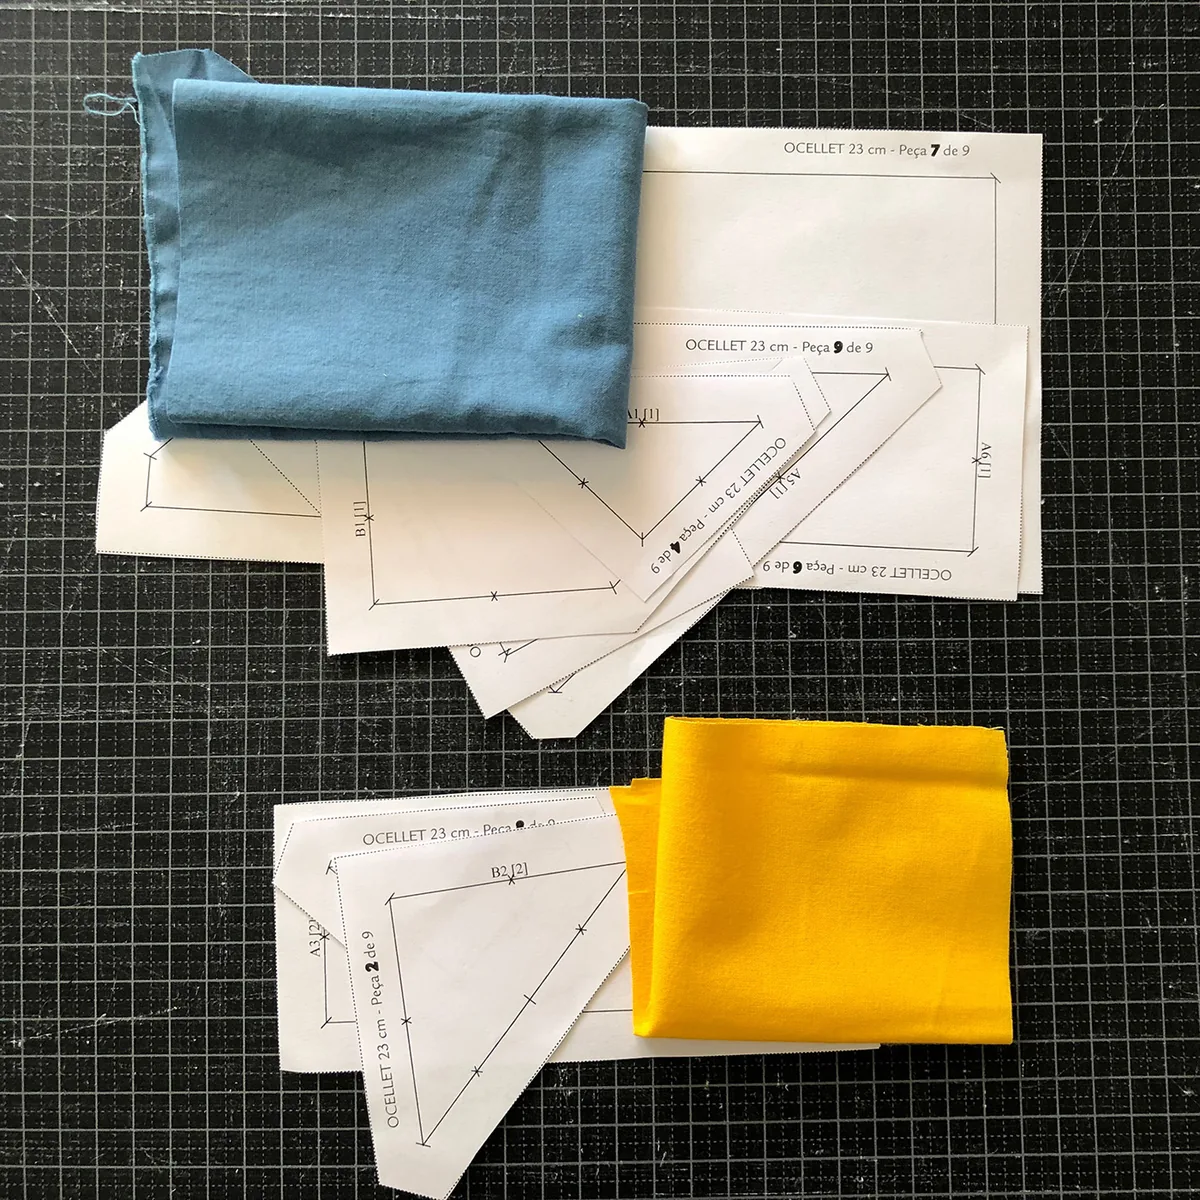
3.1 Sort the templates by fabric
Each template is marked with its unit and its fabric number, for example A6 [1]:
- A6 is the unit: piece number 6 of Section A.
- [1] is the fabric. This pattern uses two: [1] for the background and [2] for the bird.
Make two groups: all the [1] templates for the background fabric and all the [2] templates for the bird fabric.
3.2 Cut the fabrics
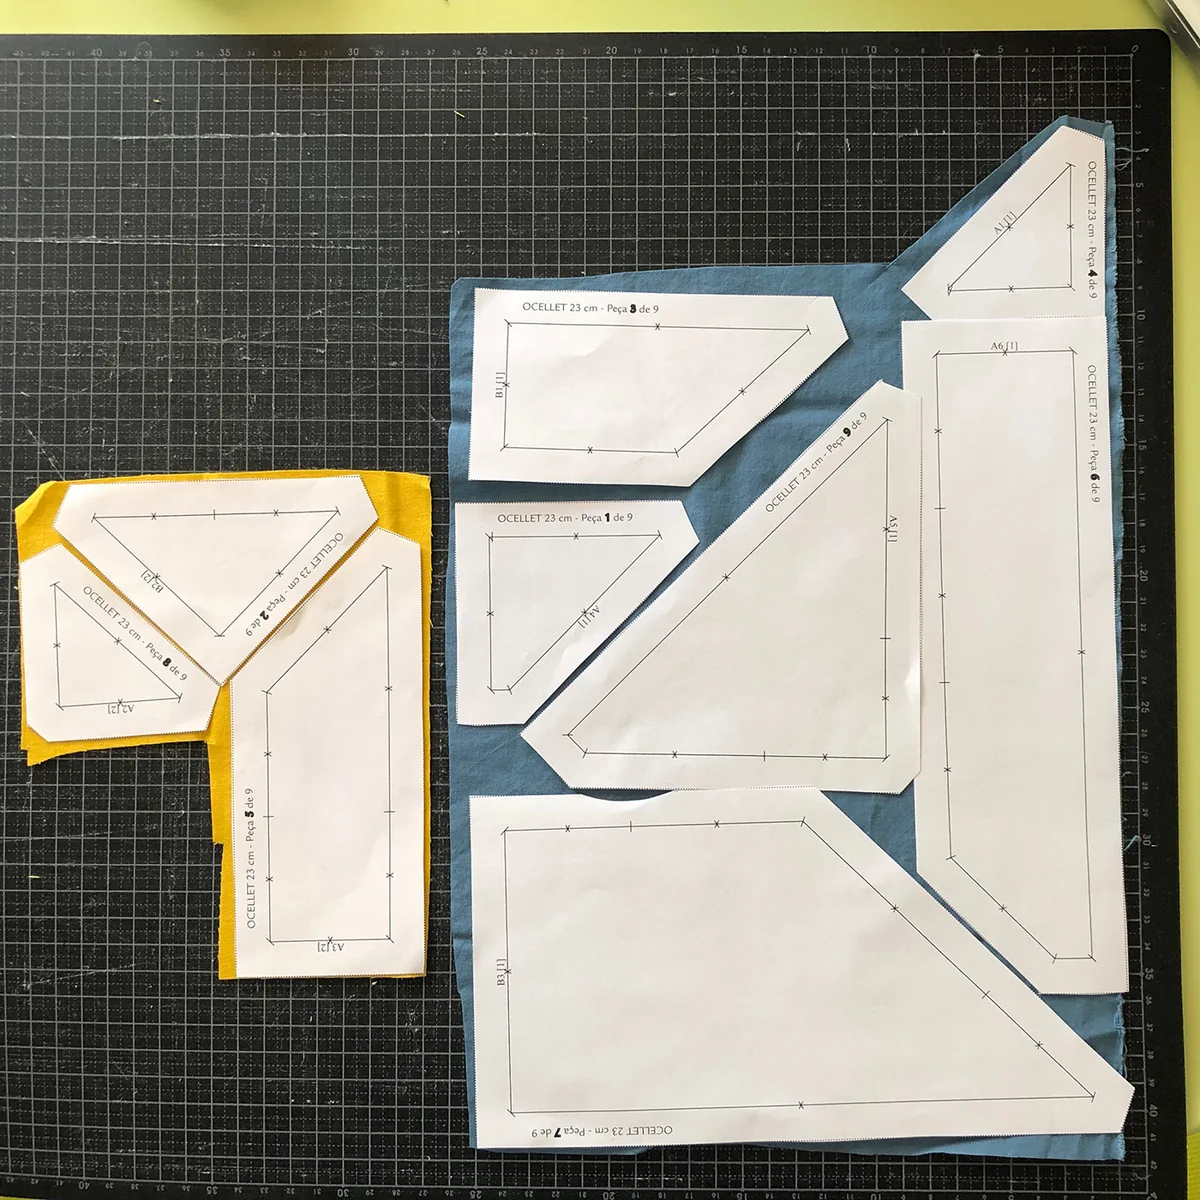
Important: the templates are mirrored, just like the section papers. That means you have to cut with the template on the wrong side of the fabric.
- Lay the fabric with the right side facing down.
- Place the templates on the fabric, as close together as you can, so you waste as little as possible.
- If you like, hold the templates in place with small pins or a little temporary spray adhesive.
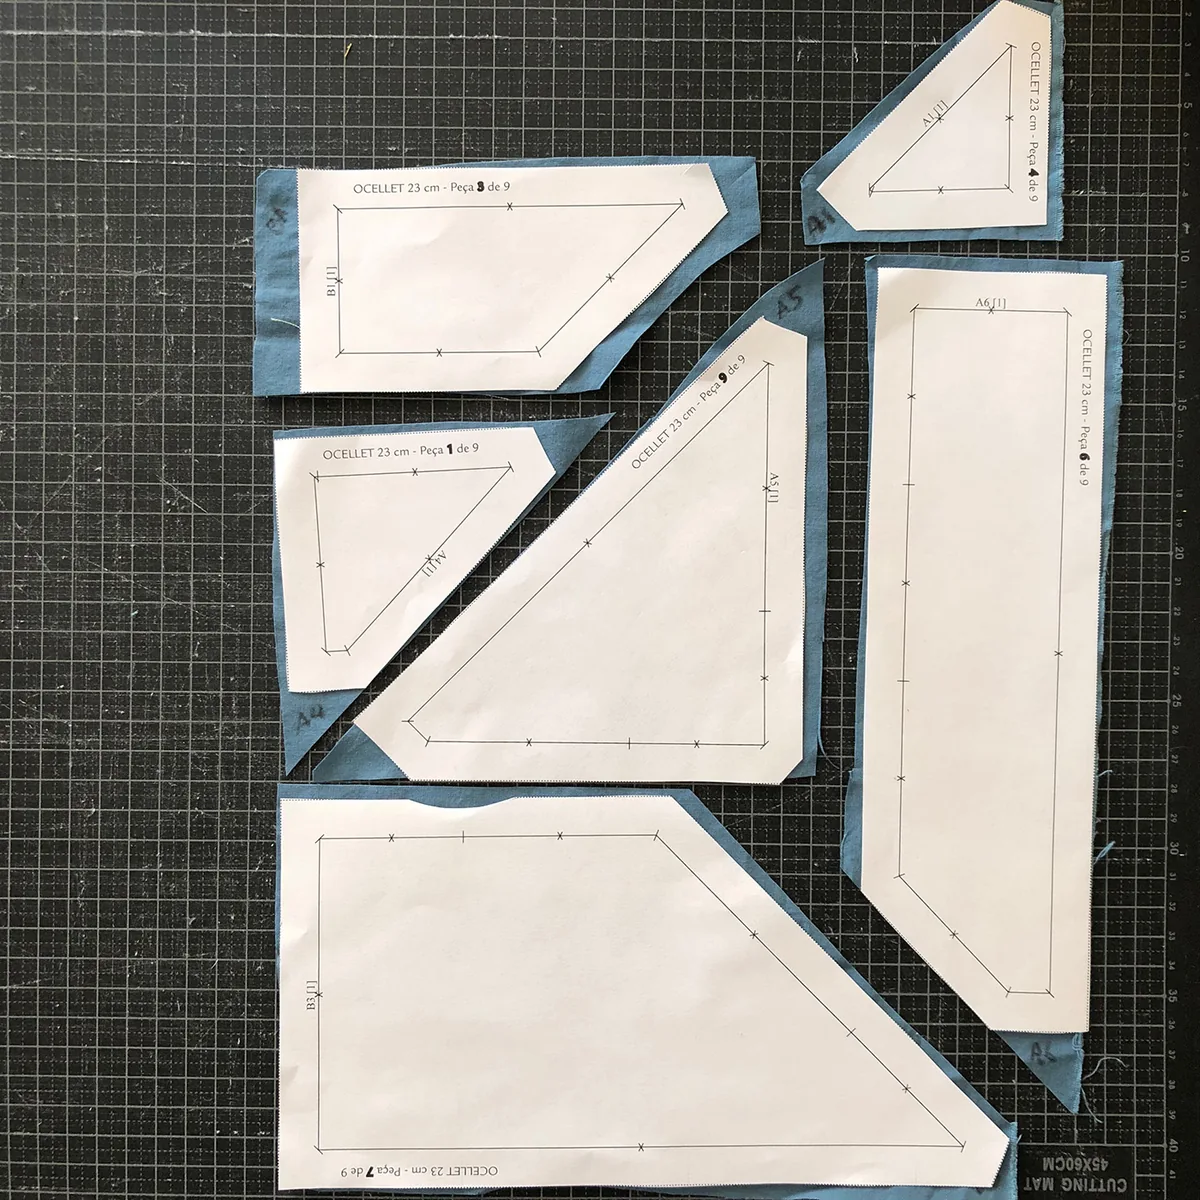
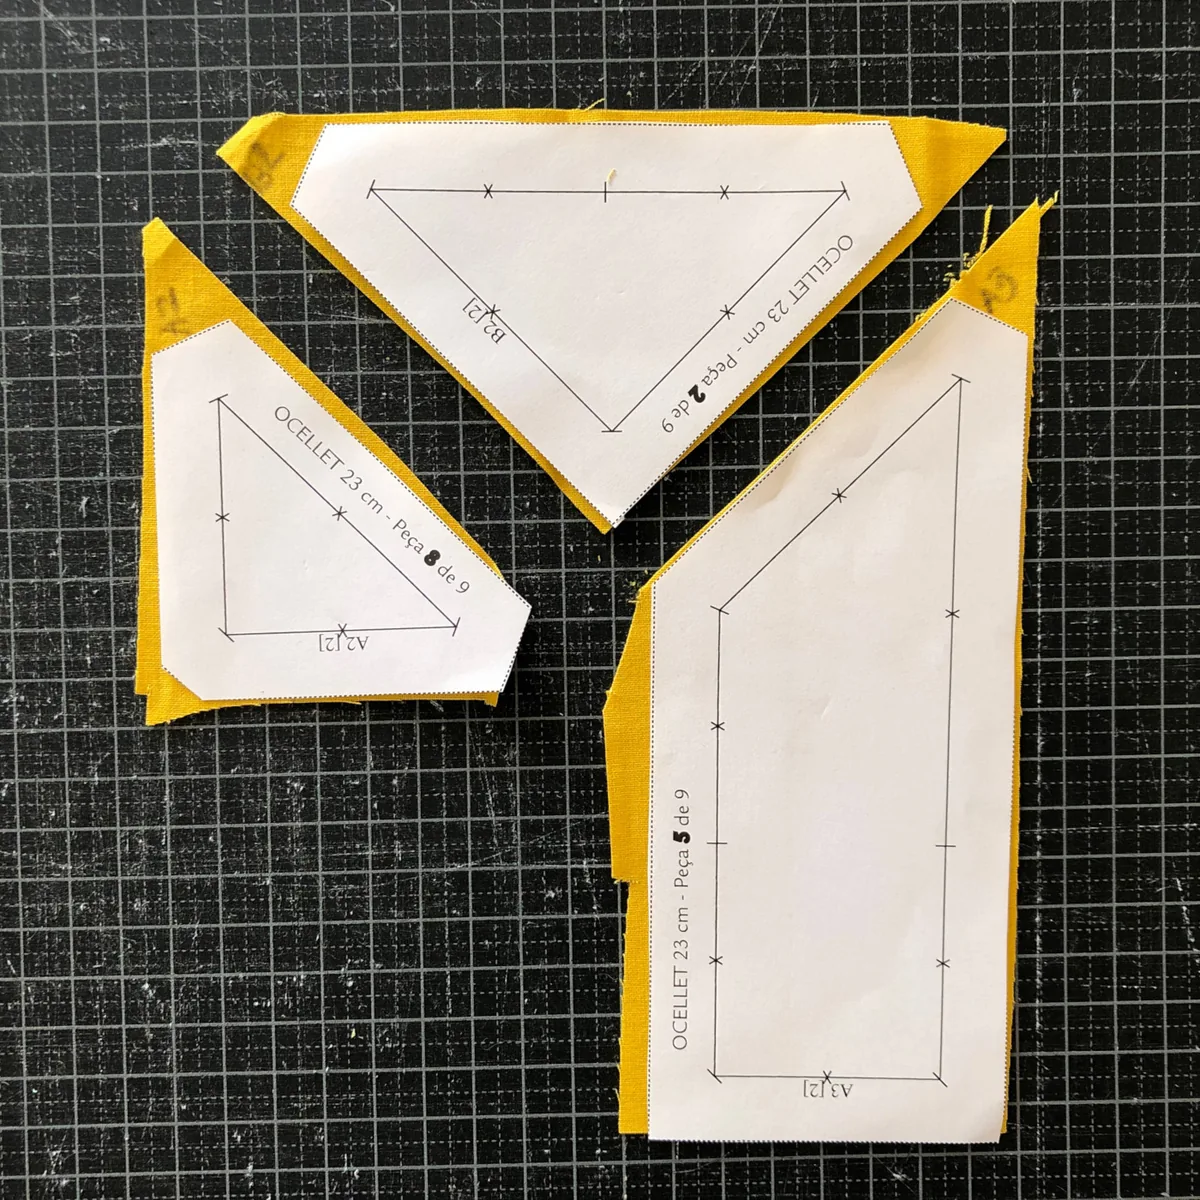
- Cut around each template with your rotary cutter and ruler.
The cuts do not need to be exact. The pieces will be trimmed to their final size as you sew.
3.3 Label the fabrics
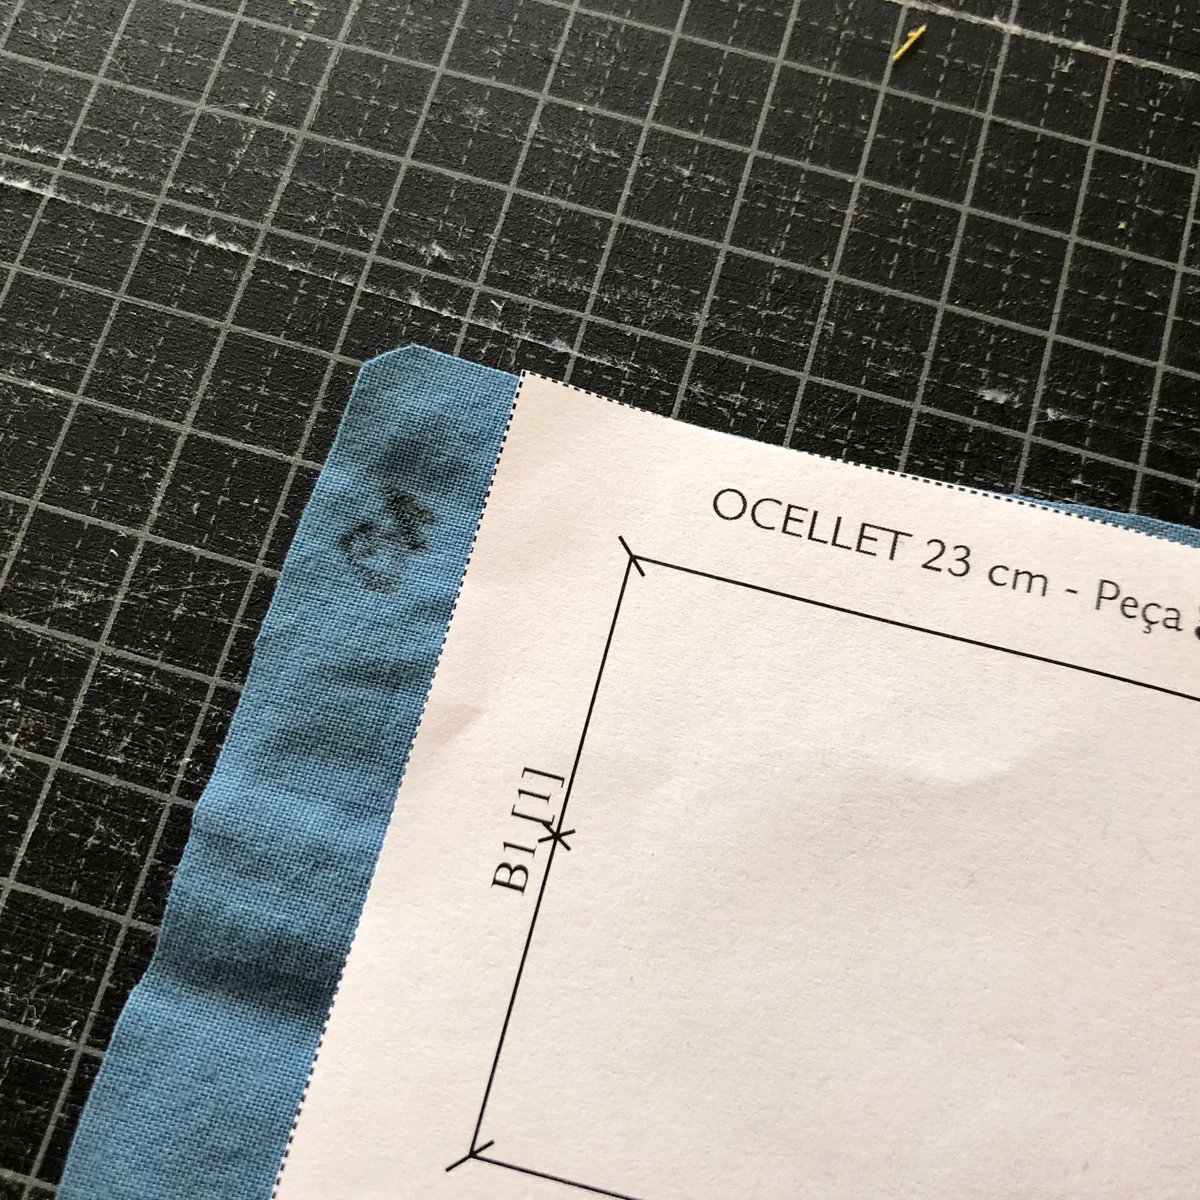
Before you take the templates off, write the unit on each piece of fabric (A6, for example).
- Write it in a corner that will be trimmed away, so the mark never shows in the finished block.
- You are writing on the wrong side of the fabric. With solid fabrics this is a real help, because later you will know at a glance which side is the right side.
3.4 Sort the fabrics by section
Make one pile for Section A and one for Section B, and put the pieces of each pile in number order. Everything will be at hand, in the order you need it.
Your materials are ready. Time to sew!
Sewing the Sections
This is the fun part, because you can watch the bird appear as you sew. We will join the fabrics on the paper one by one, in the number order given by the pattern.
You will need:
- Sewing machine
- Cutting mat
- Rotary cutter
- Quilting ruler
- Pins
- Iron or seam roller
Section A: Joining A1 and A2
1. Place the fabrics
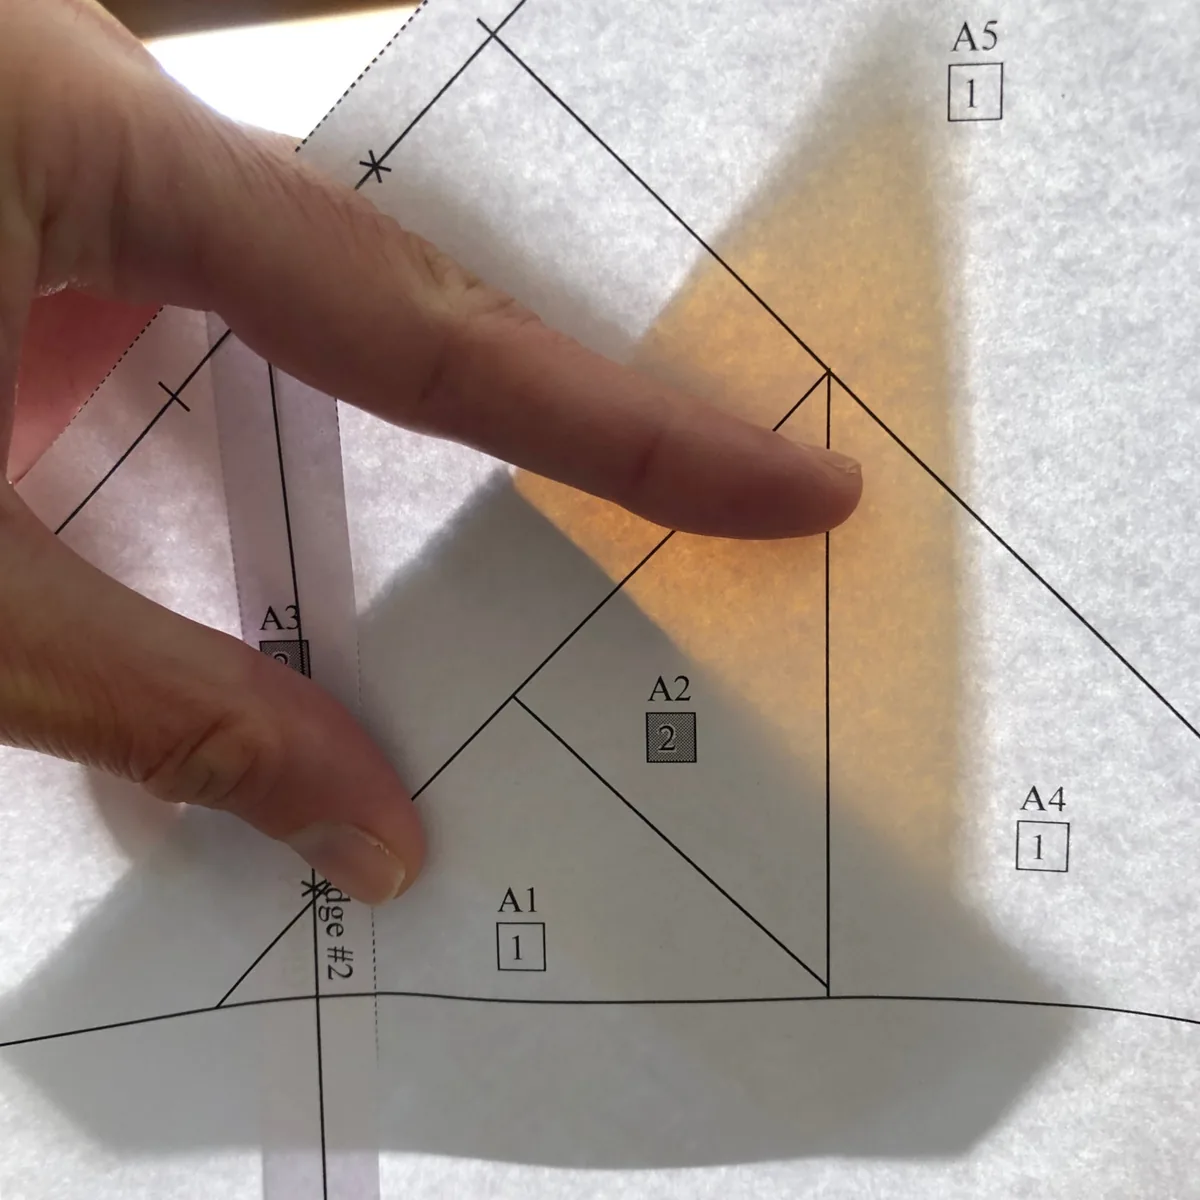
- Hold the paper up to the light so that you can see the lines through it.
- Place fabric A1 on the back (unprinted side) of the paper, with the wrong side of the fabric against the paper.
- Check that A1 covers the whole of unit A1, with at least 1/4" (6 mm) of extra fabric all around.
- Keep A1 in place. Your fingers are enough for a small piece. For a larger one, use a pin or a dab of fabric glue.
- Without moving A1, place fabric A2 on the back of the paper in the same way, with its wrong side against the paper.
- Check that A2 covers the whole of unit A2, again with at least 1/4" (6 mm) of extra fabric all around.
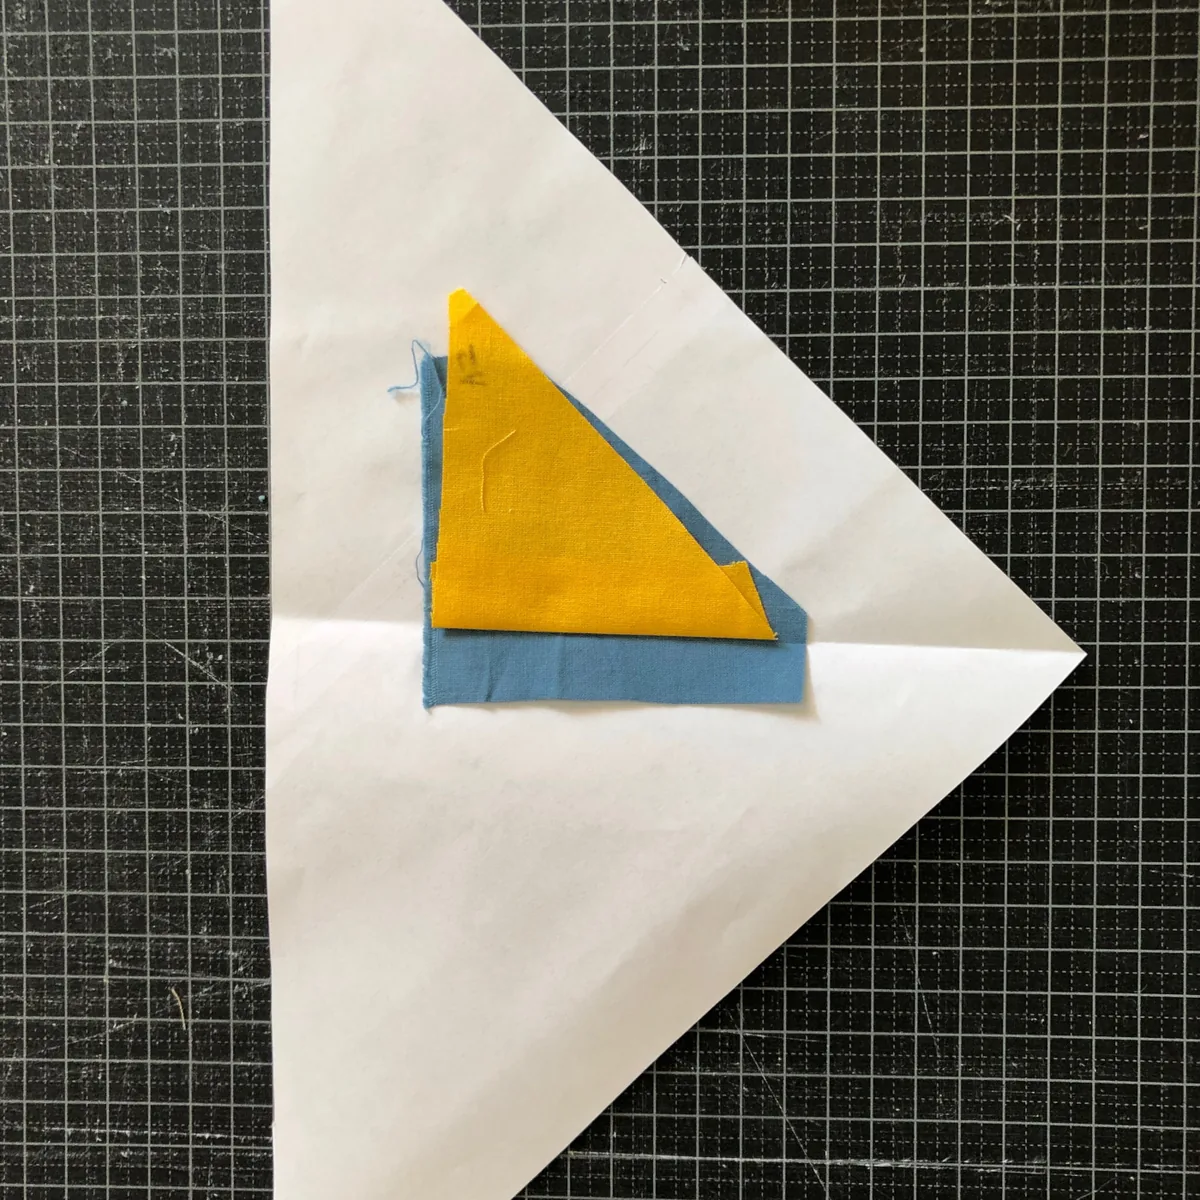
2. Flip A2 onto A1
- Fold the paper along the line between A1 and A2, with the fabrics inside the fold. Make sure they do not move. This leaves a crease in both fabrics, right on the sewing line.
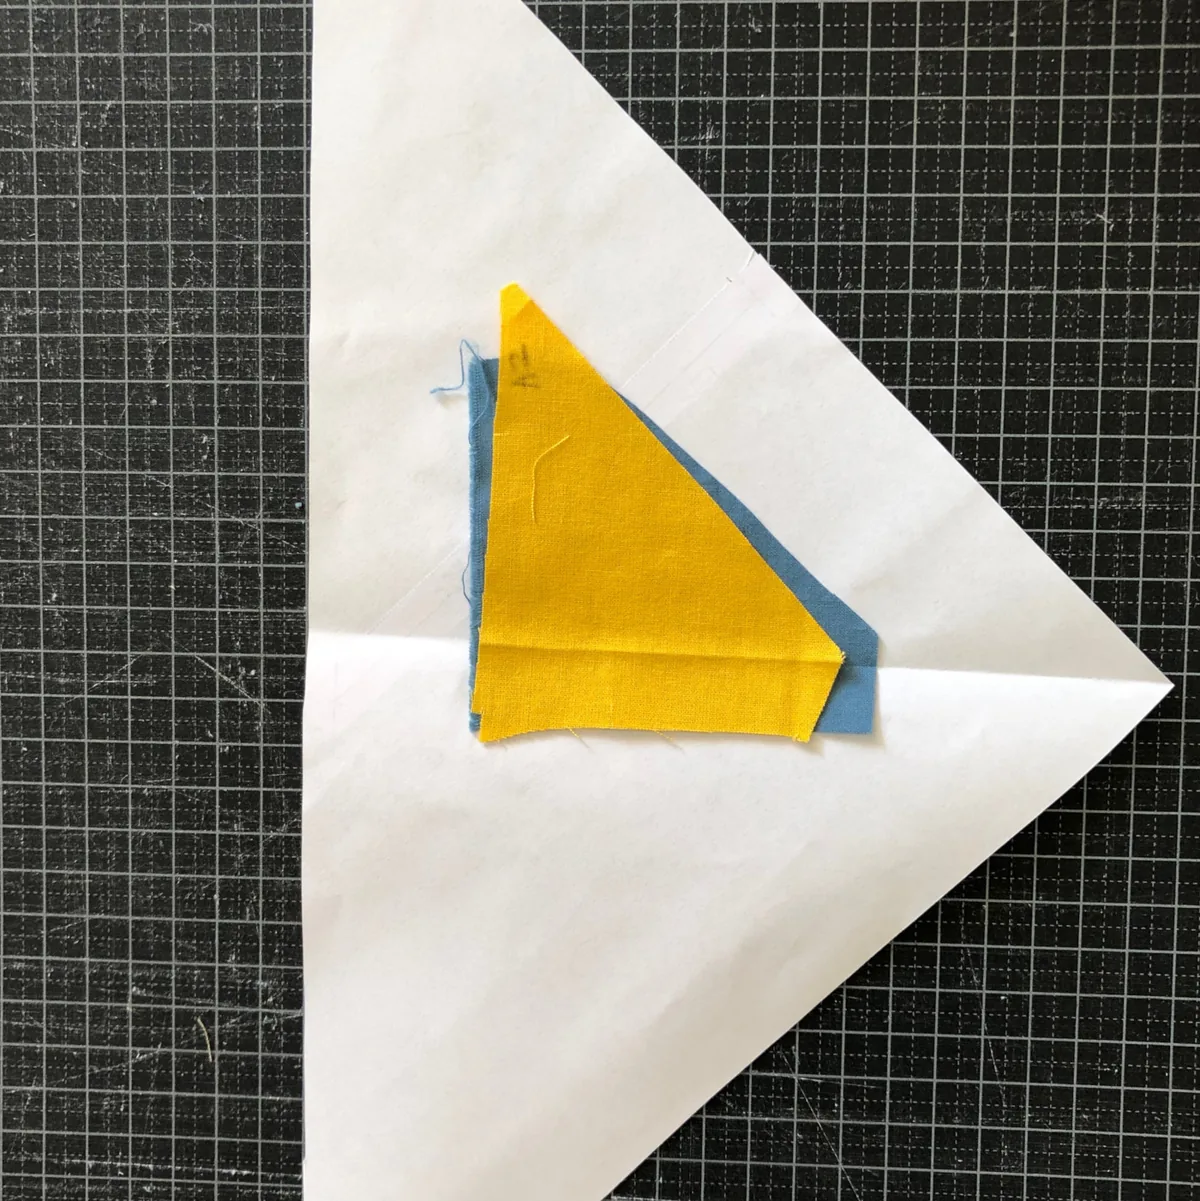
- Open the paper and flip A2 over onto A1, right sides together.
- Keep the crease of A2 exactly on the crease of A1 and the fold of the paper. The small part of A2 beyond the crease is your seam allowance.
- Pin the fabrics to the paper, or take them straight to the sewing machine if you can do it without anything shifting.
3. Stitch A1 to A2
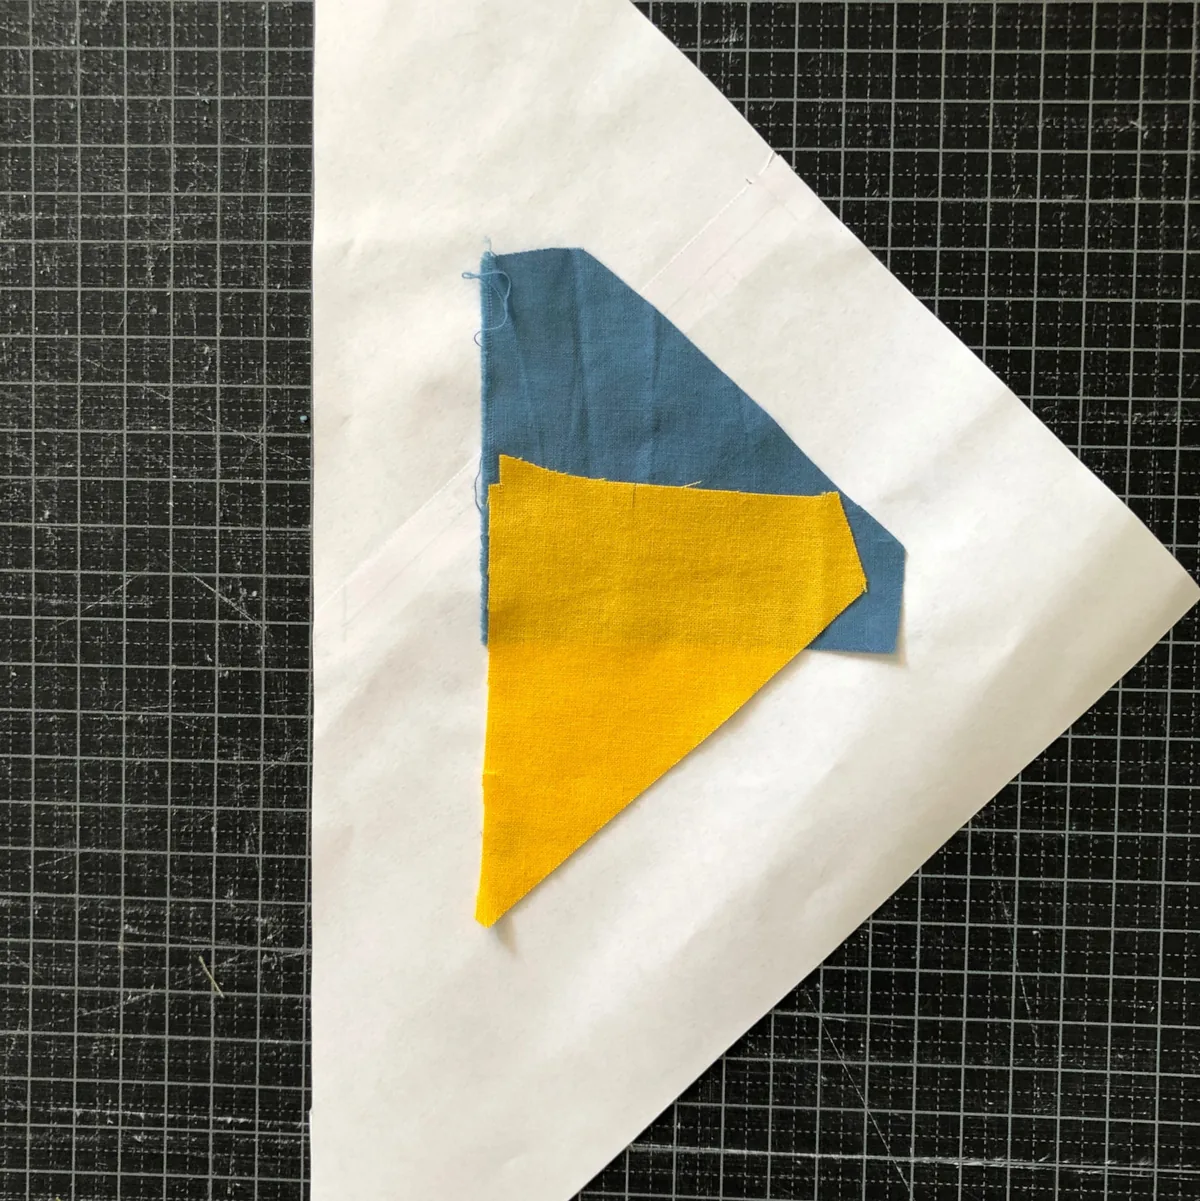
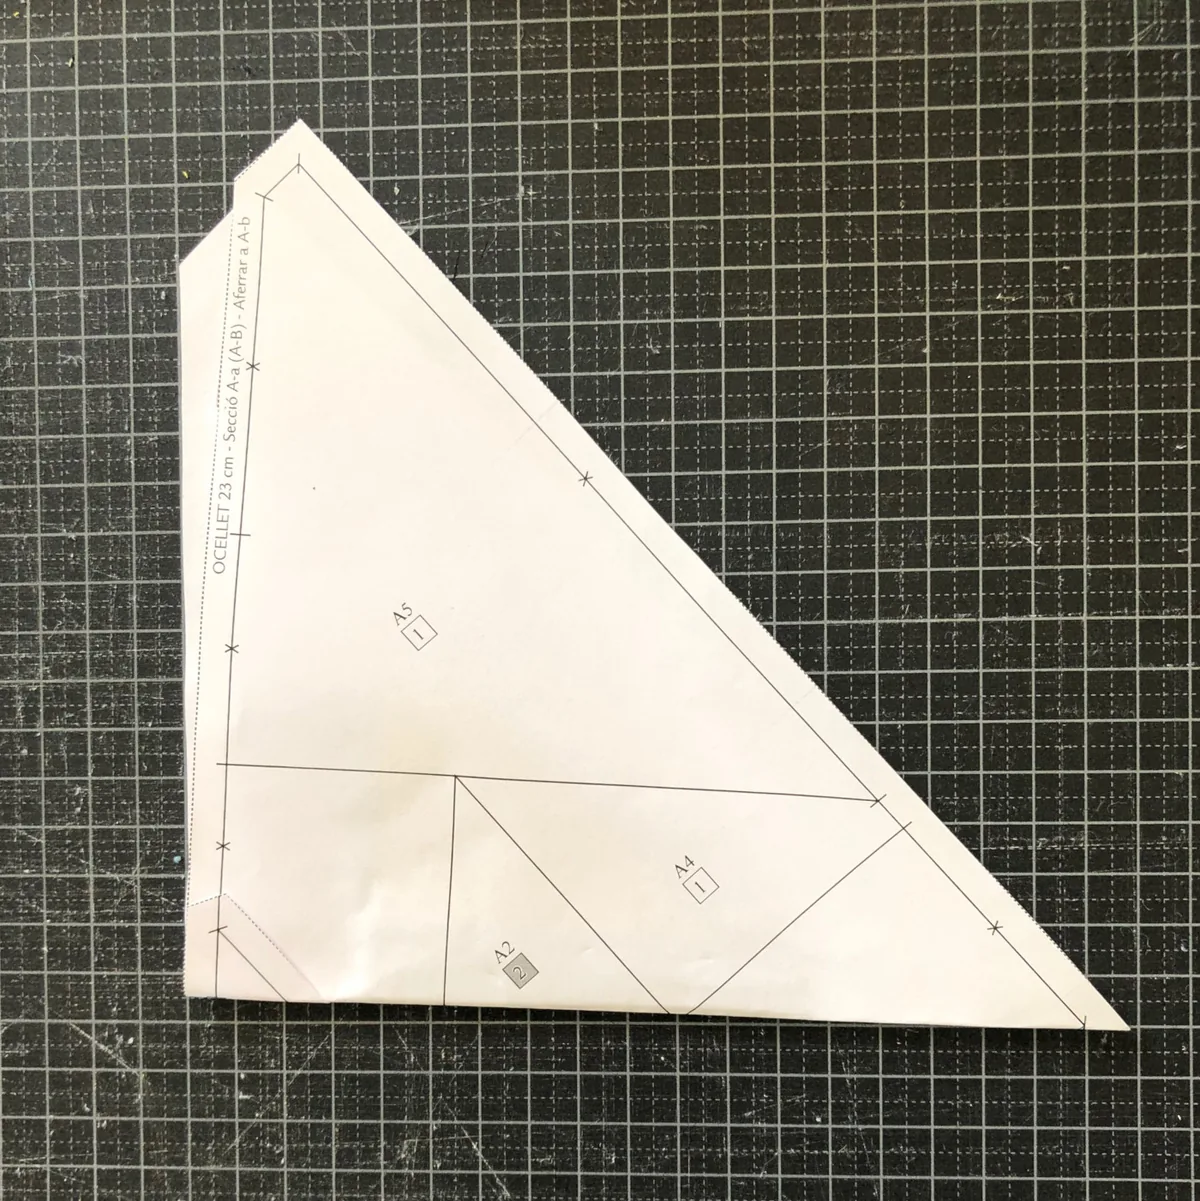
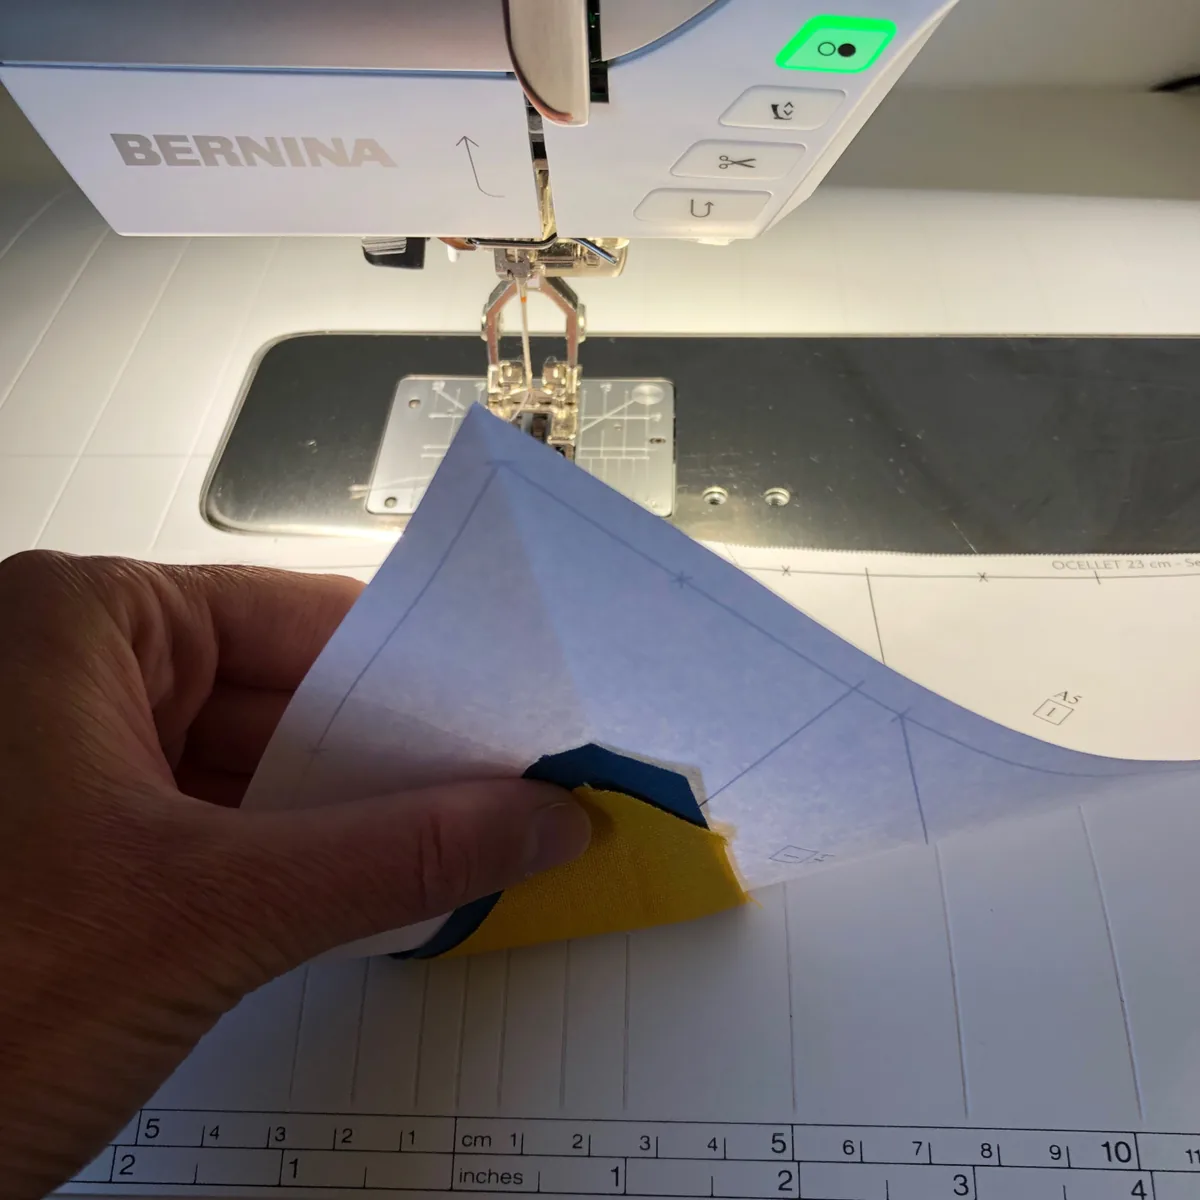
- With the printed side of the paper facing up and the fabrics underneath, sew on the line between A1 and A2.
- Start a little before the line begins and finish a little after it ends.
- Use a short stitch length (1.5 to 2 mm) so the paper is easy to remove later.
- Fold A2 back into place, right side up, and hold the piece up to the light. A2 should cover its whole unit. If it does not, unpick the seam and sew it again.
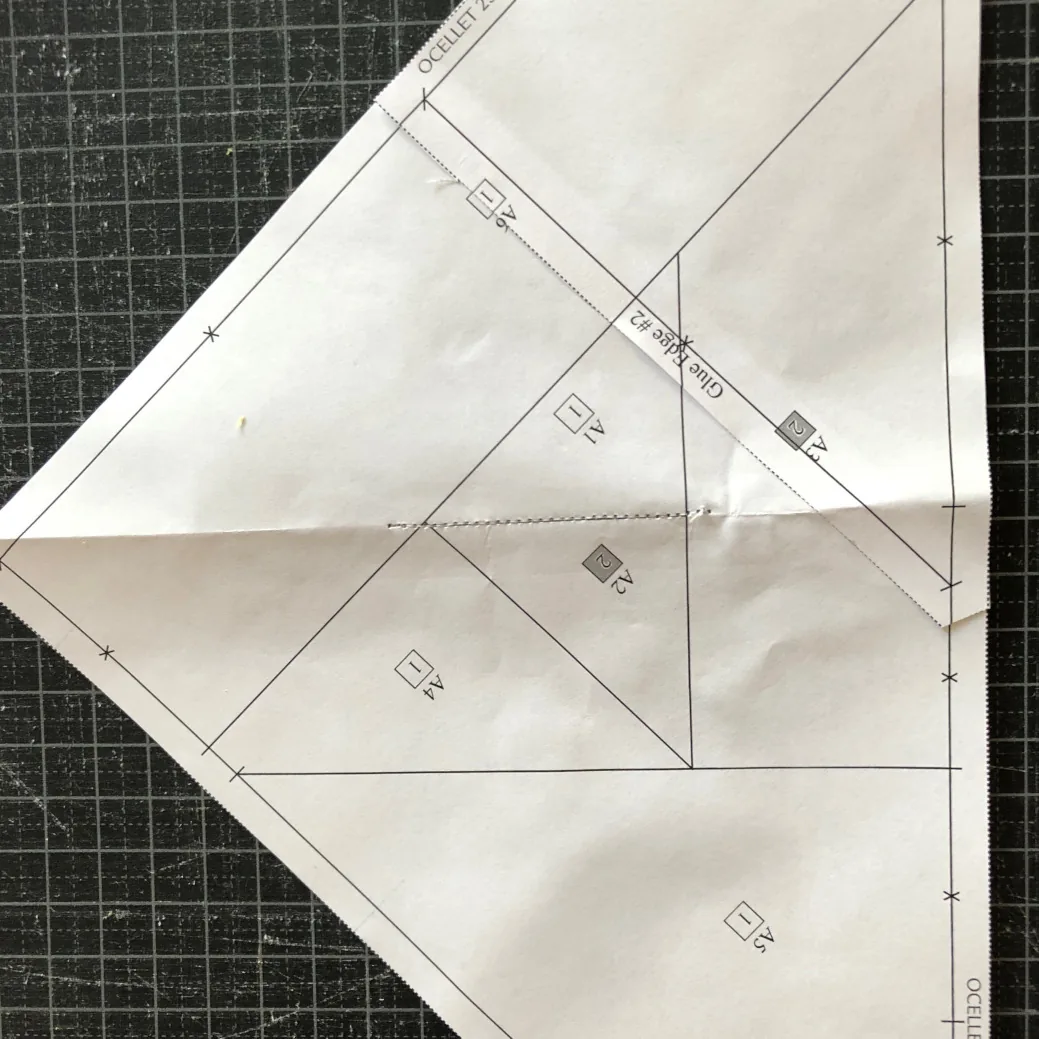
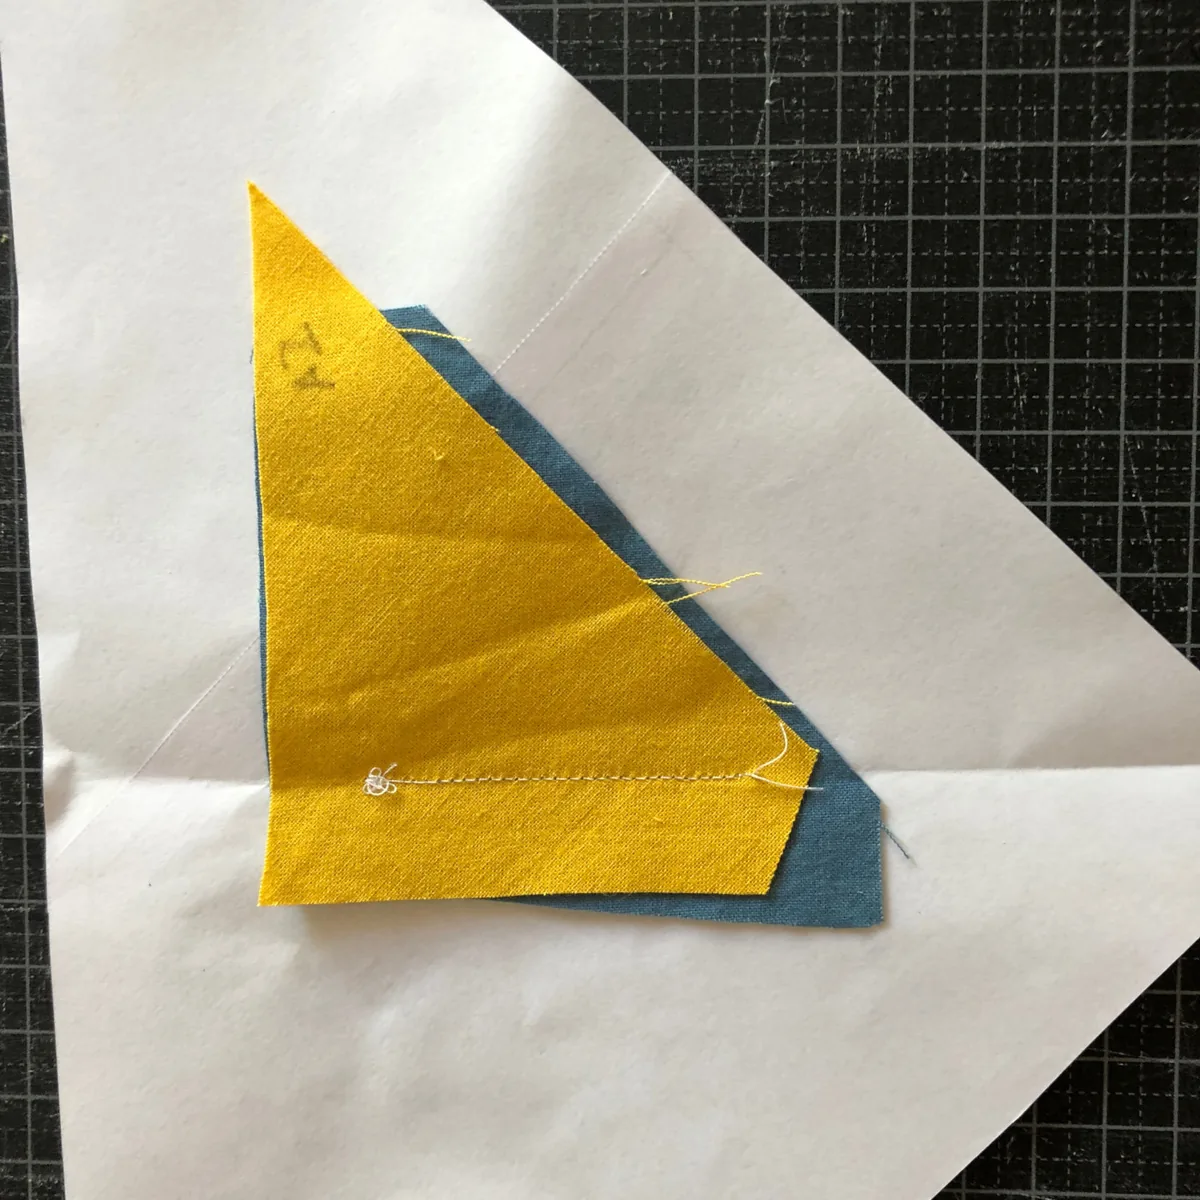
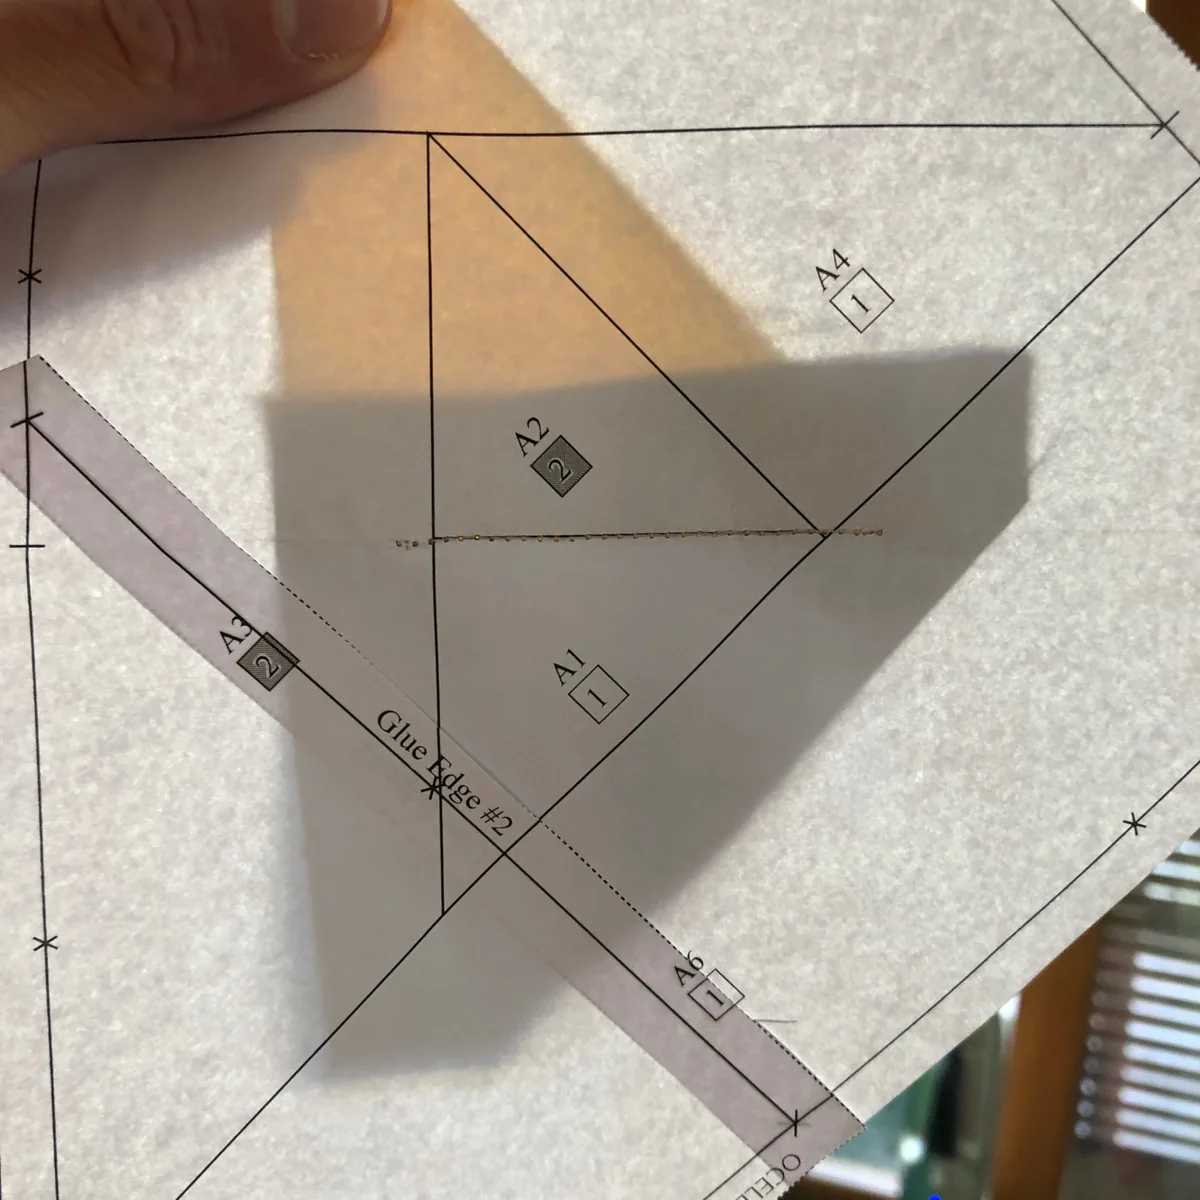
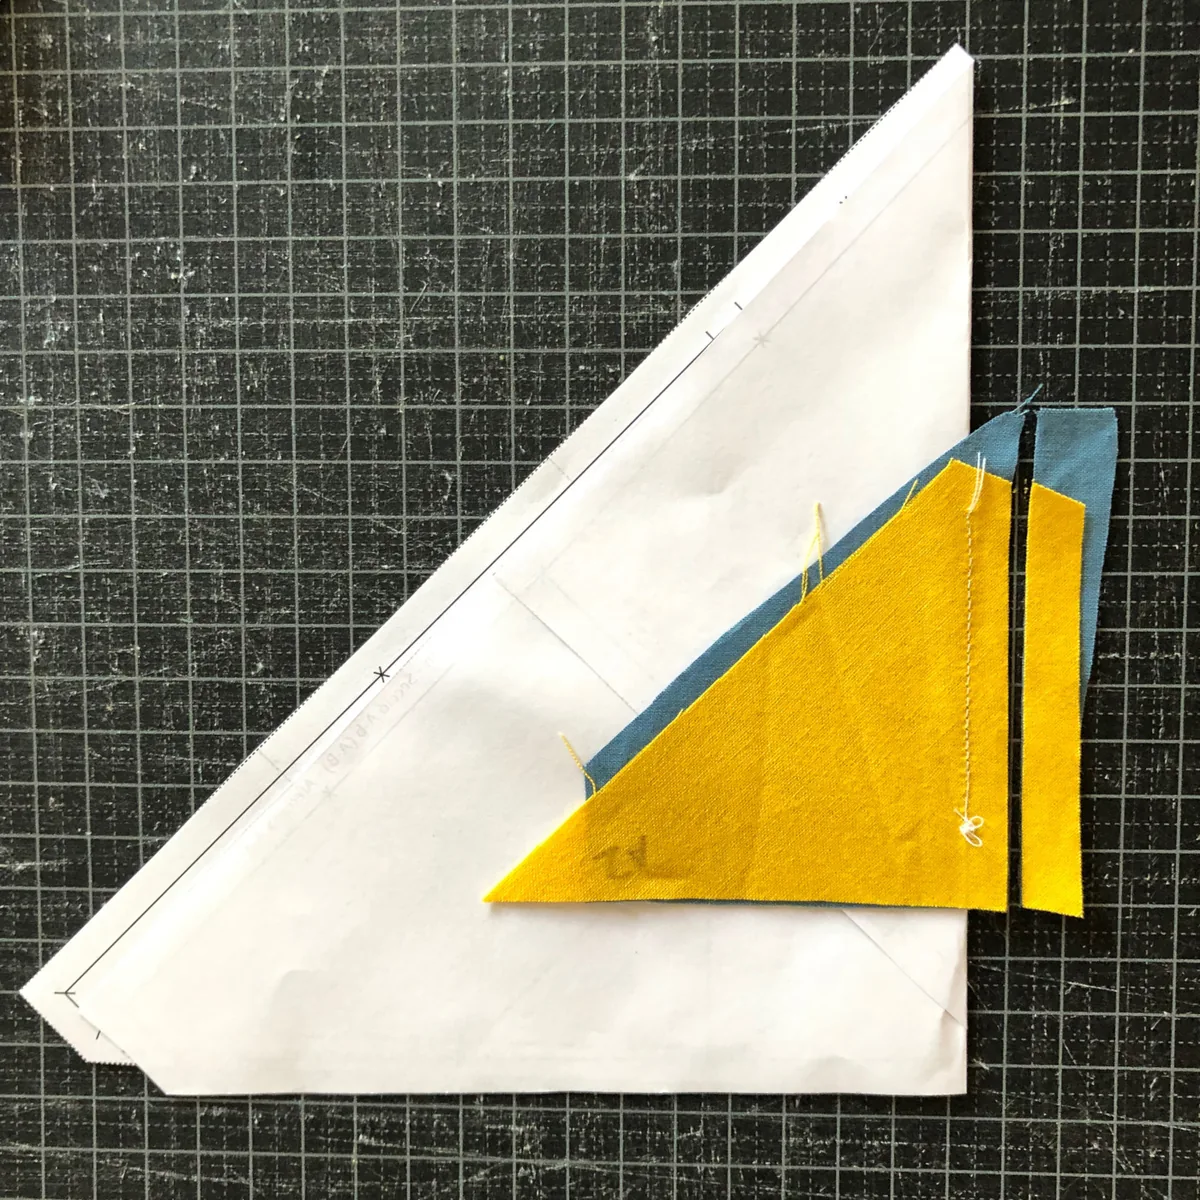
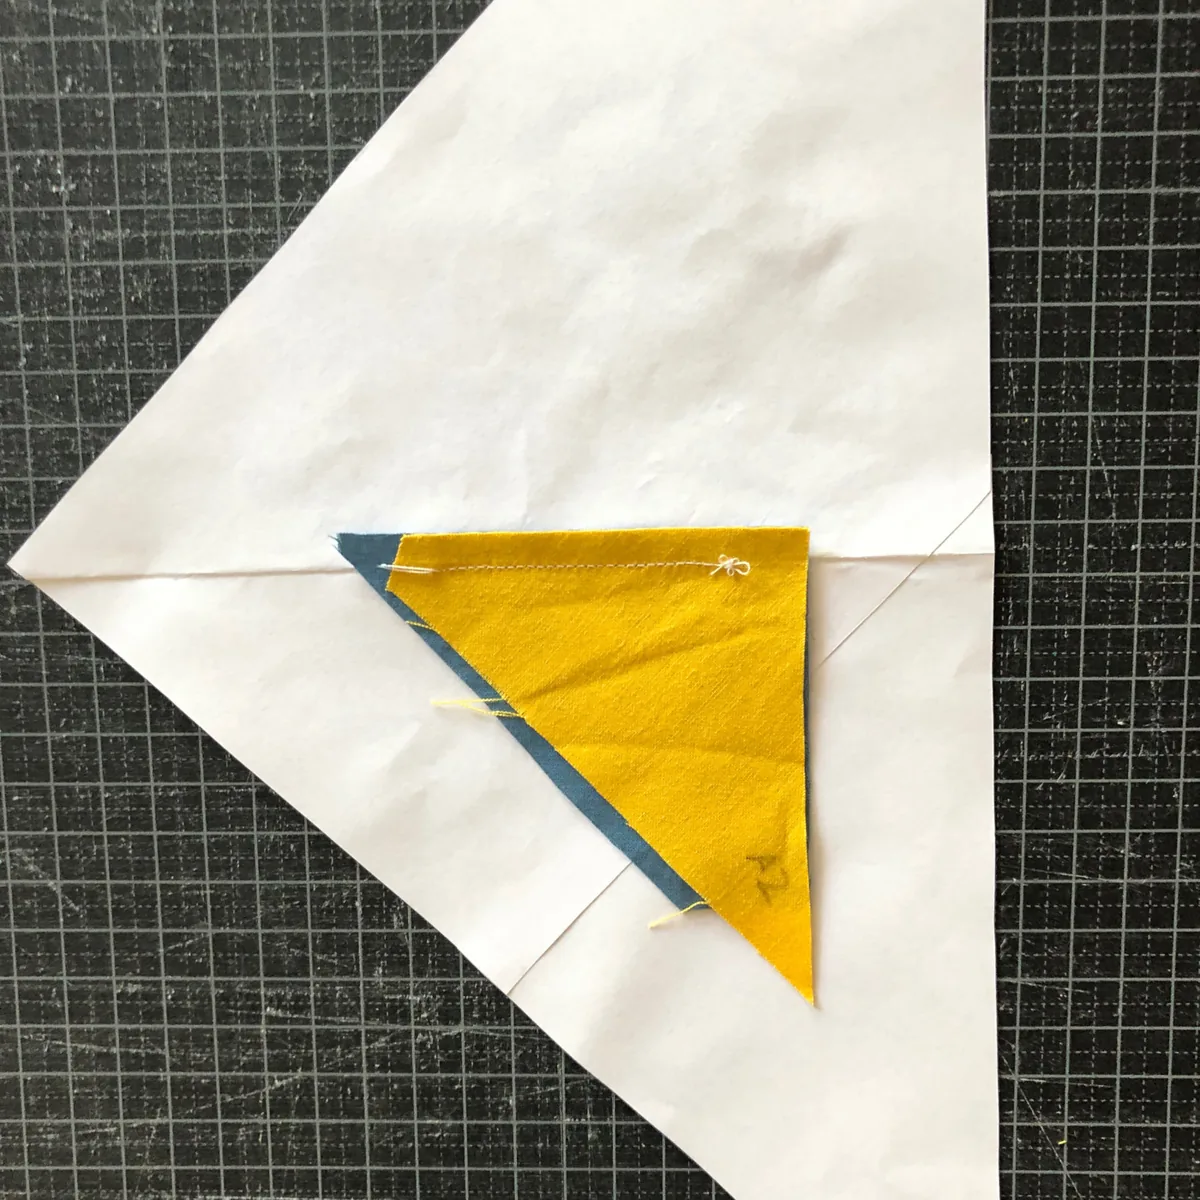
4. Trim the seam allowance
- Fold the paper back along the seam you have just sewn. The seam allowance stays on one side, and the paper and the rest of the fabric on the other.
- Place the ruler parallel to the seam.
- Trim the extra fabric 1/4" (6 mm) from the seam.
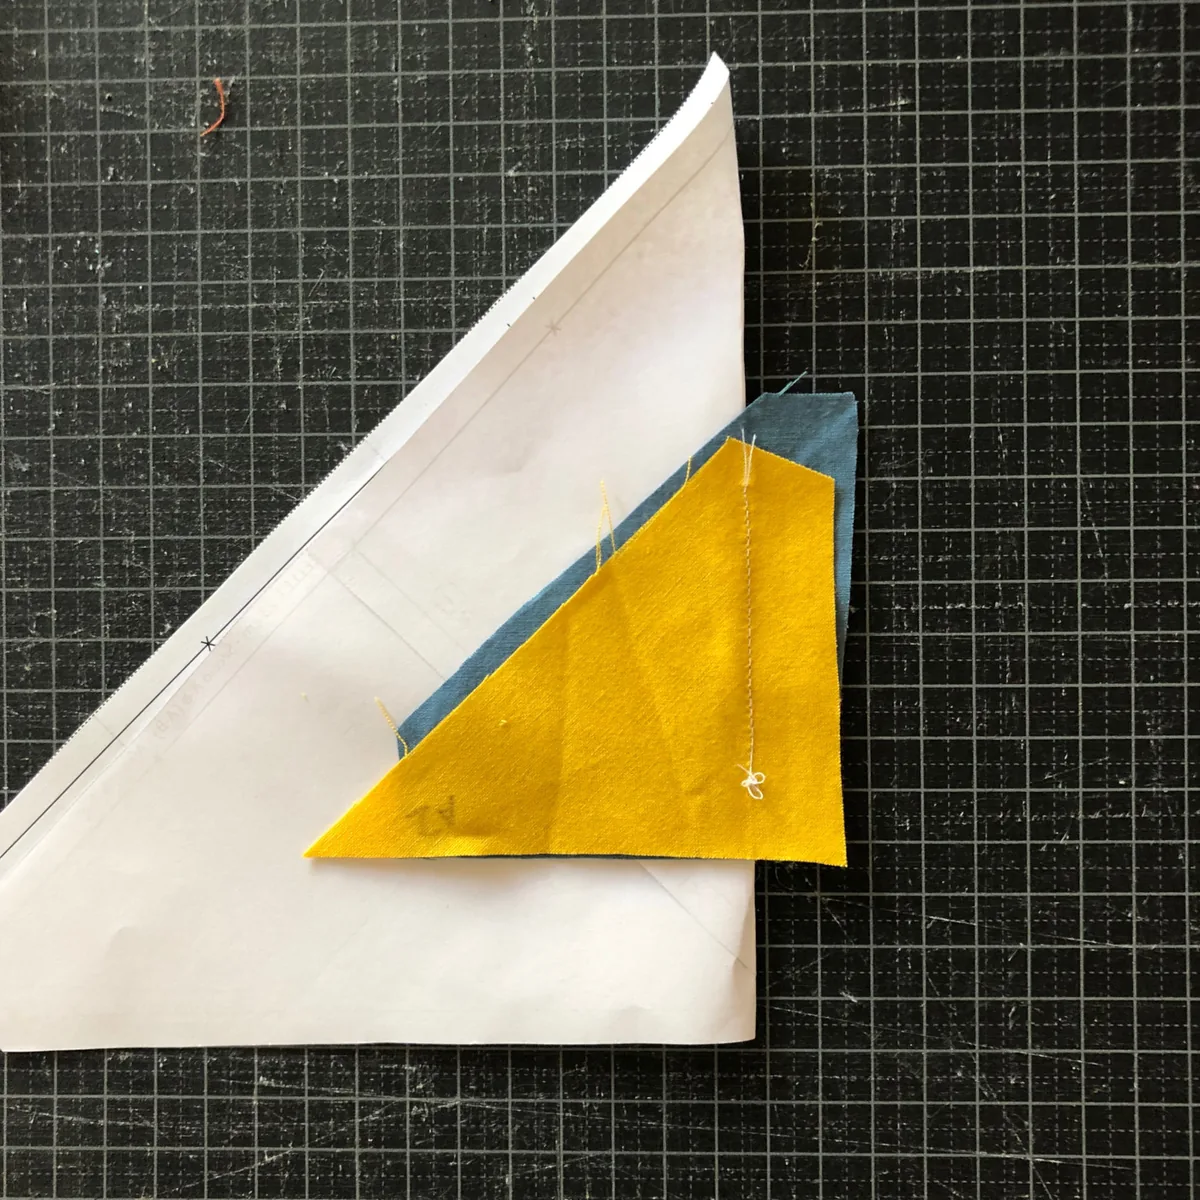
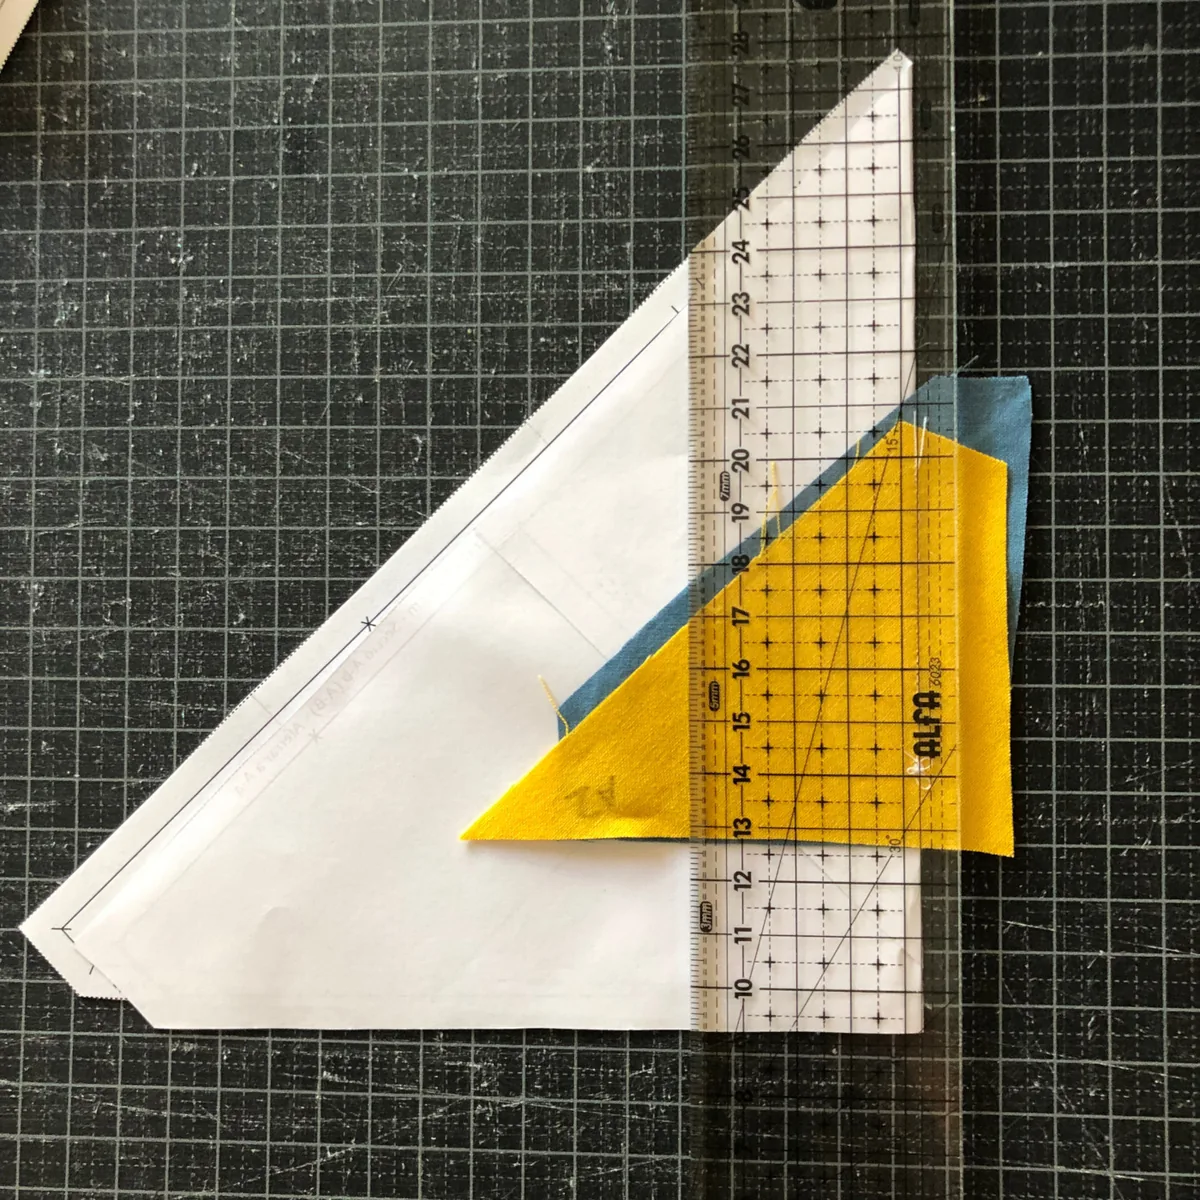
5. Press the seam
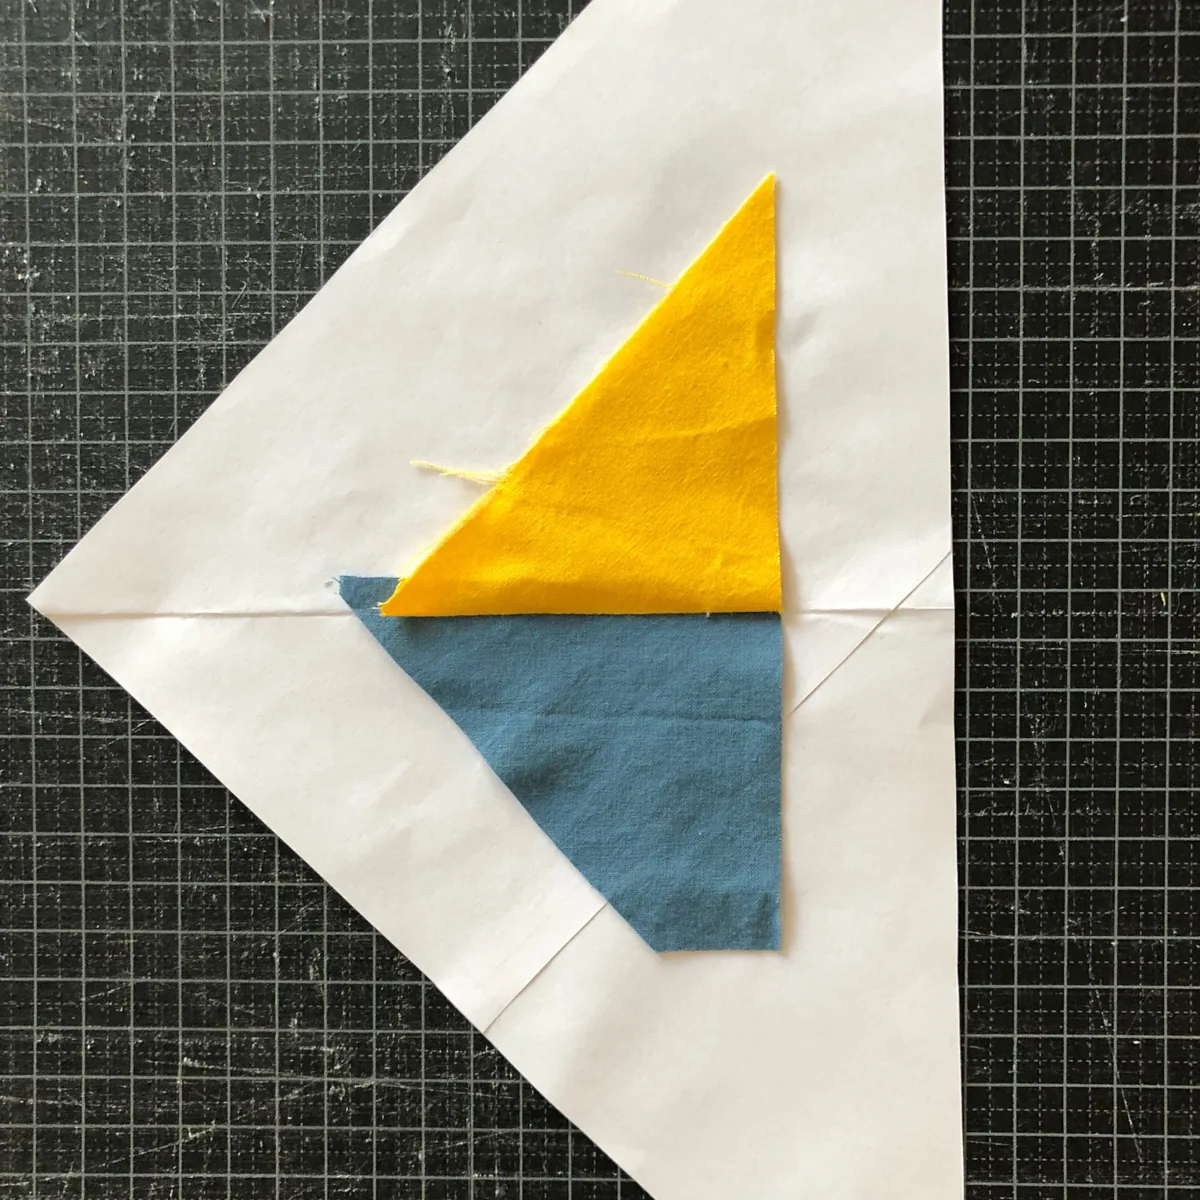
- Unfold the paper.
- Fold A2 over along the seam, so that its right side faces up.
- Press the seam flat with an iron, a seam roller or your fingers.
Fabrics A1 and A2 are in place.
Section A: Adding A3
Fabric A3 is added to A1 and A2 with exactly the same five steps.
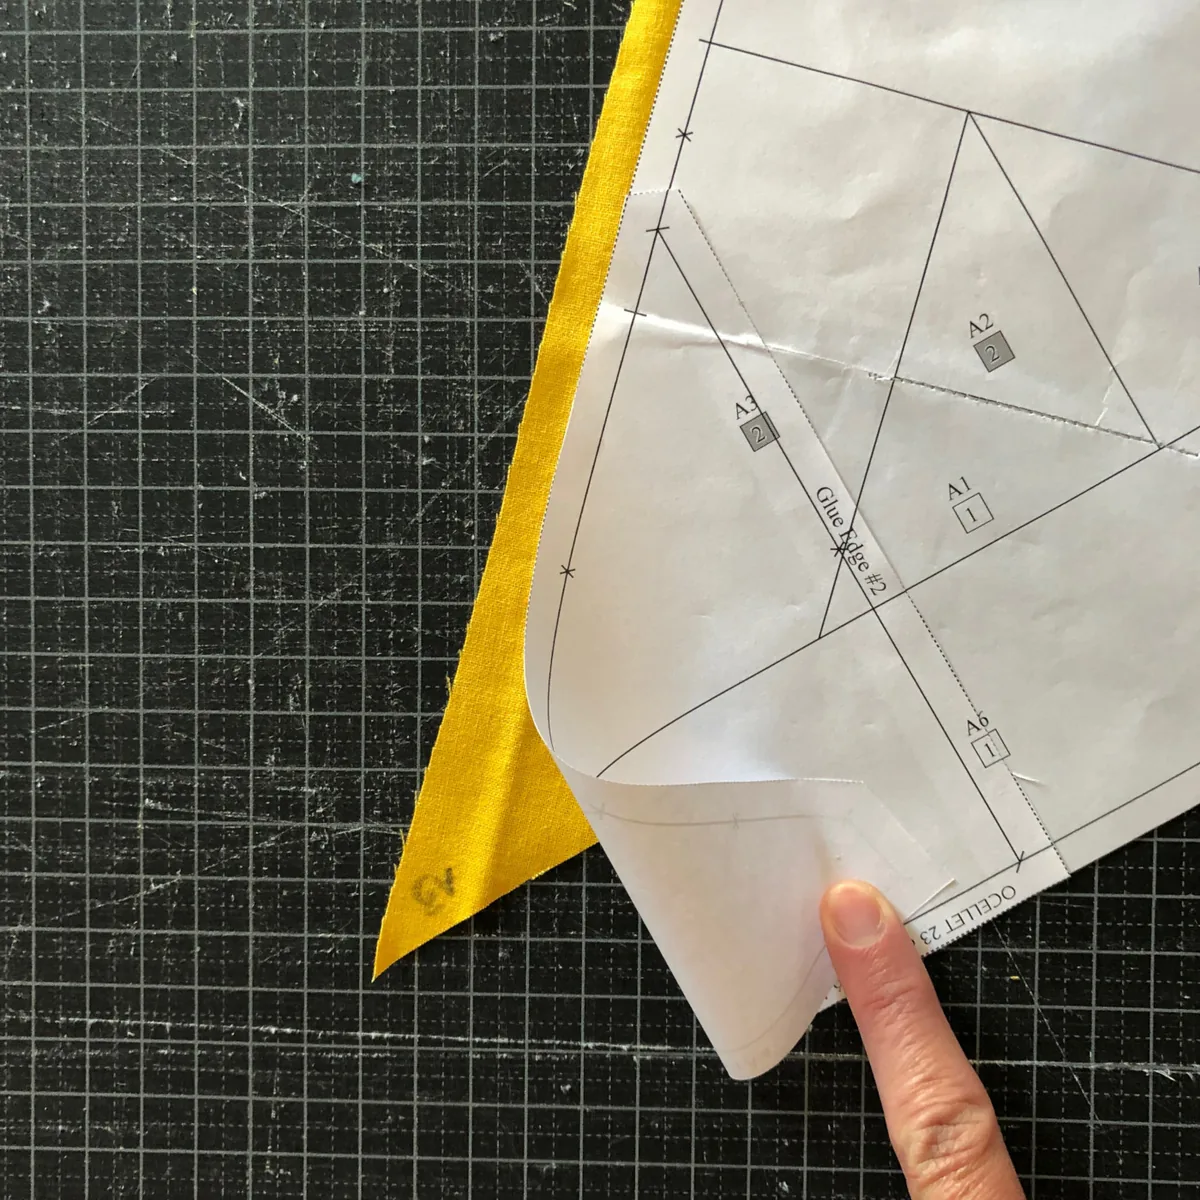
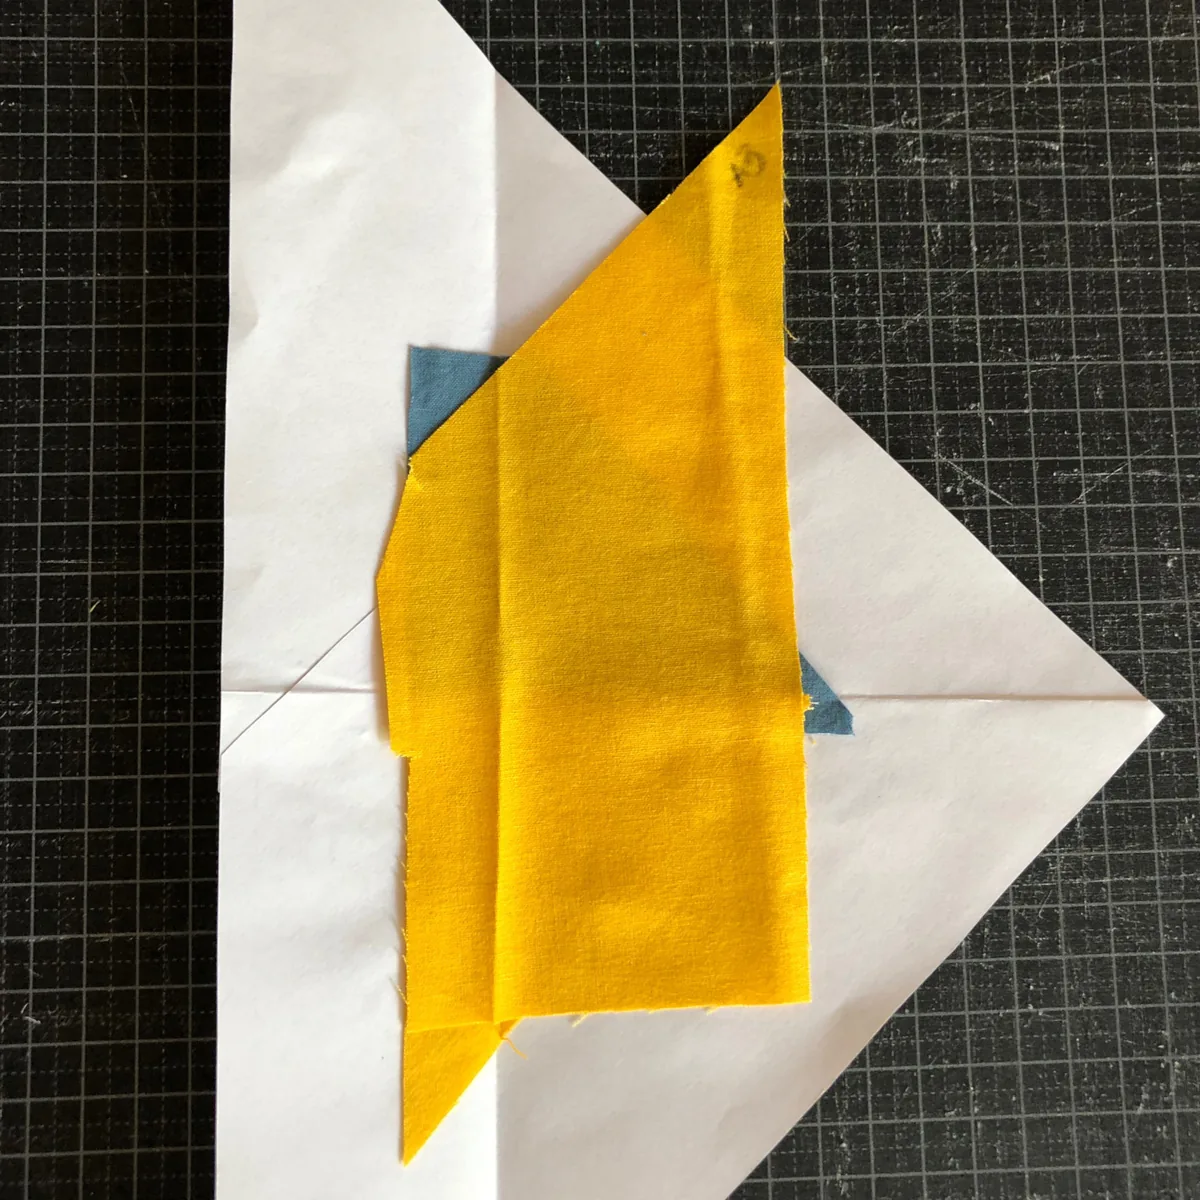
1. Place A3
Place fabric A3 on the back of the paper, wrong side against the paper, over unit A3. Check that it covers the whole unit, with at least 1/4" (6 mm) of extra fabric all around.
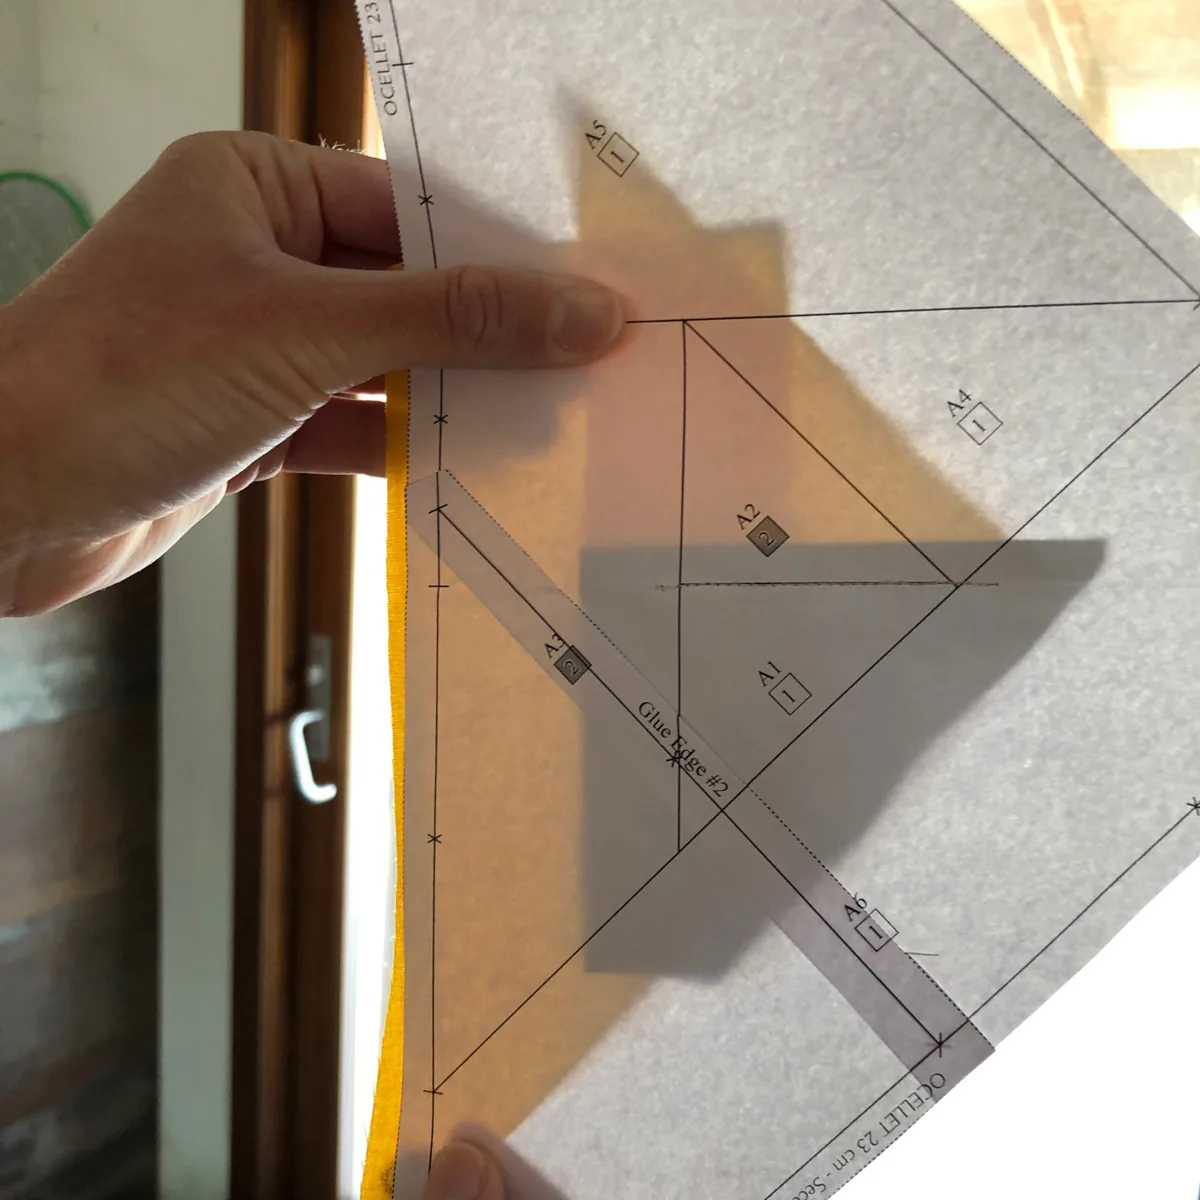
2. Flip A3 onto A1-A2
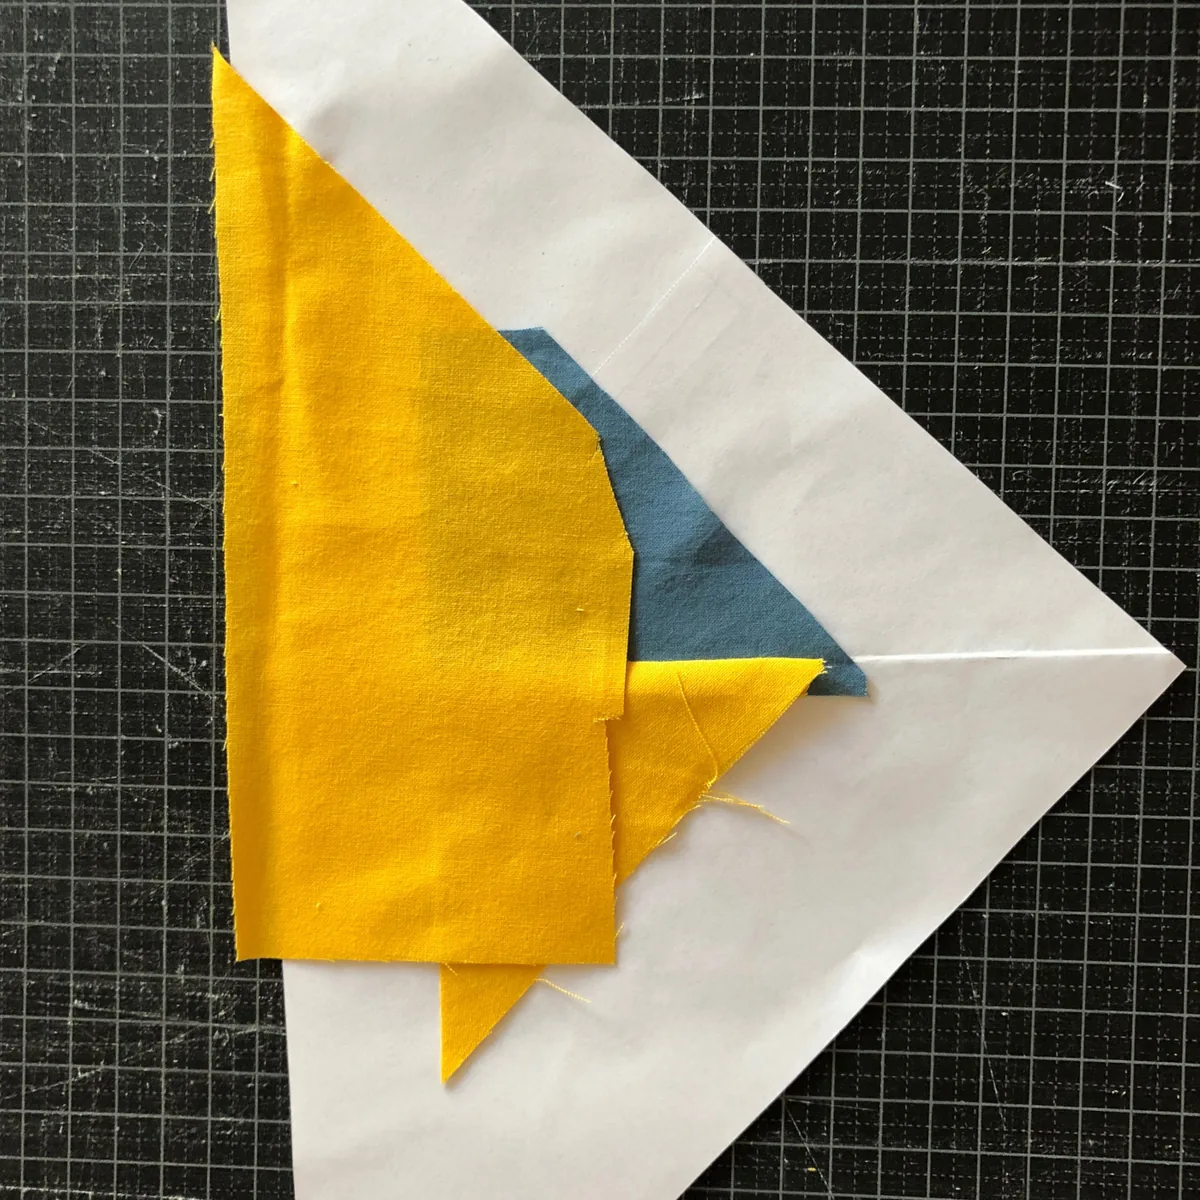
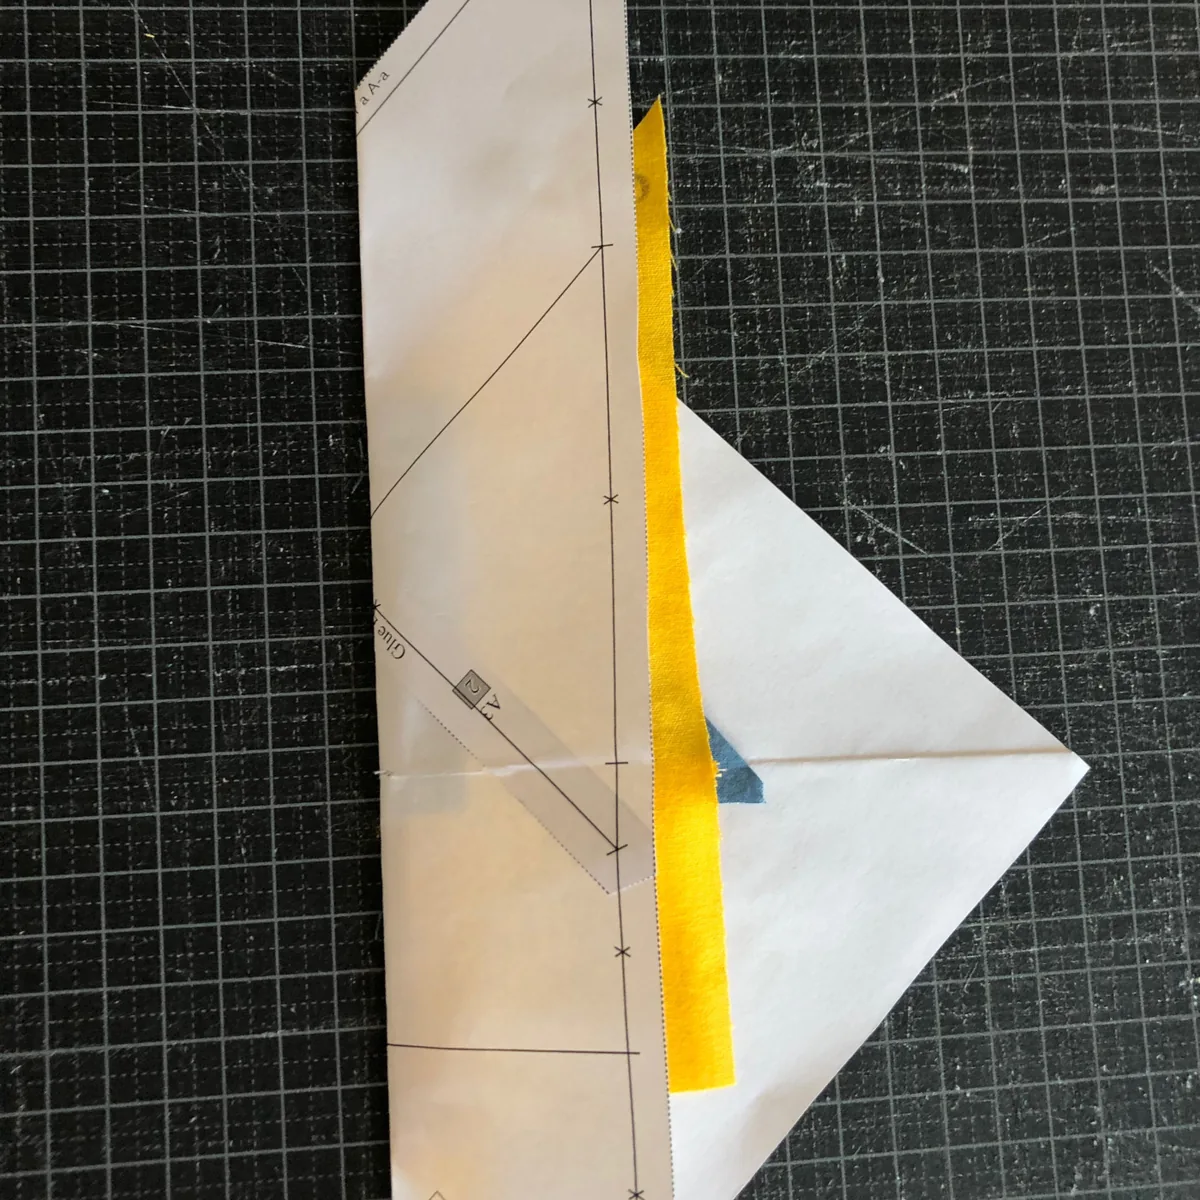
- Fold the paper and the fabrics along the line where A3 joins A1-A2, with the fabrics inside the fold.
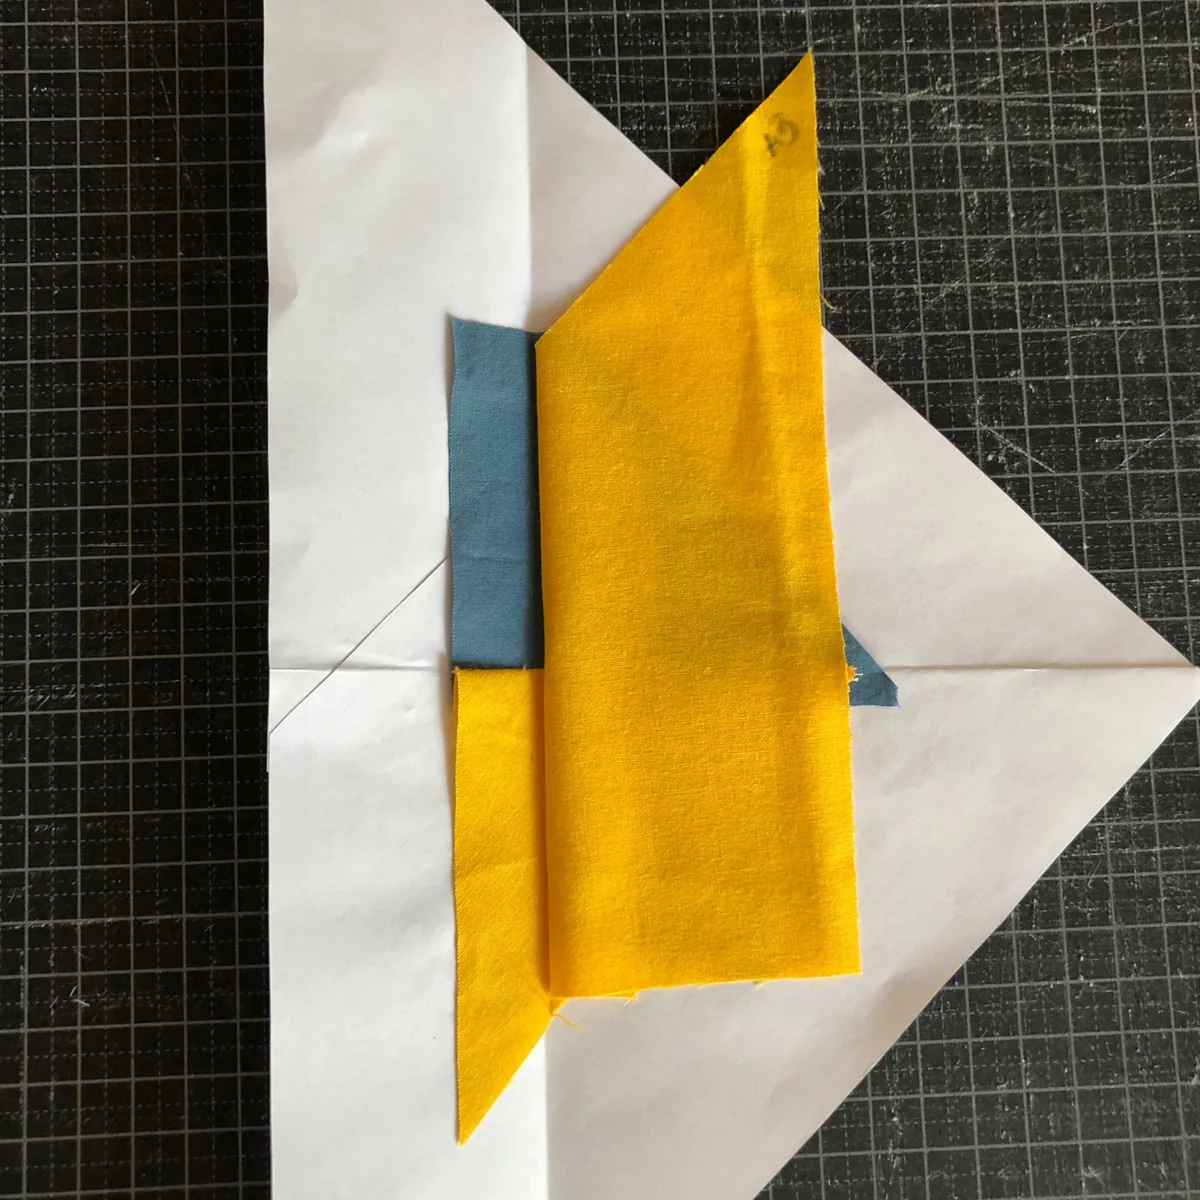
- Open the paper and flip A3 over onto A1-A2, right sides together.
- Keep the crease of A3 on the crease of A1-A2 and the fold of the paper.
- Pin the fabrics to the paper, or take them straight to the sewing machine without letting anything shift.
3. Stitch A3
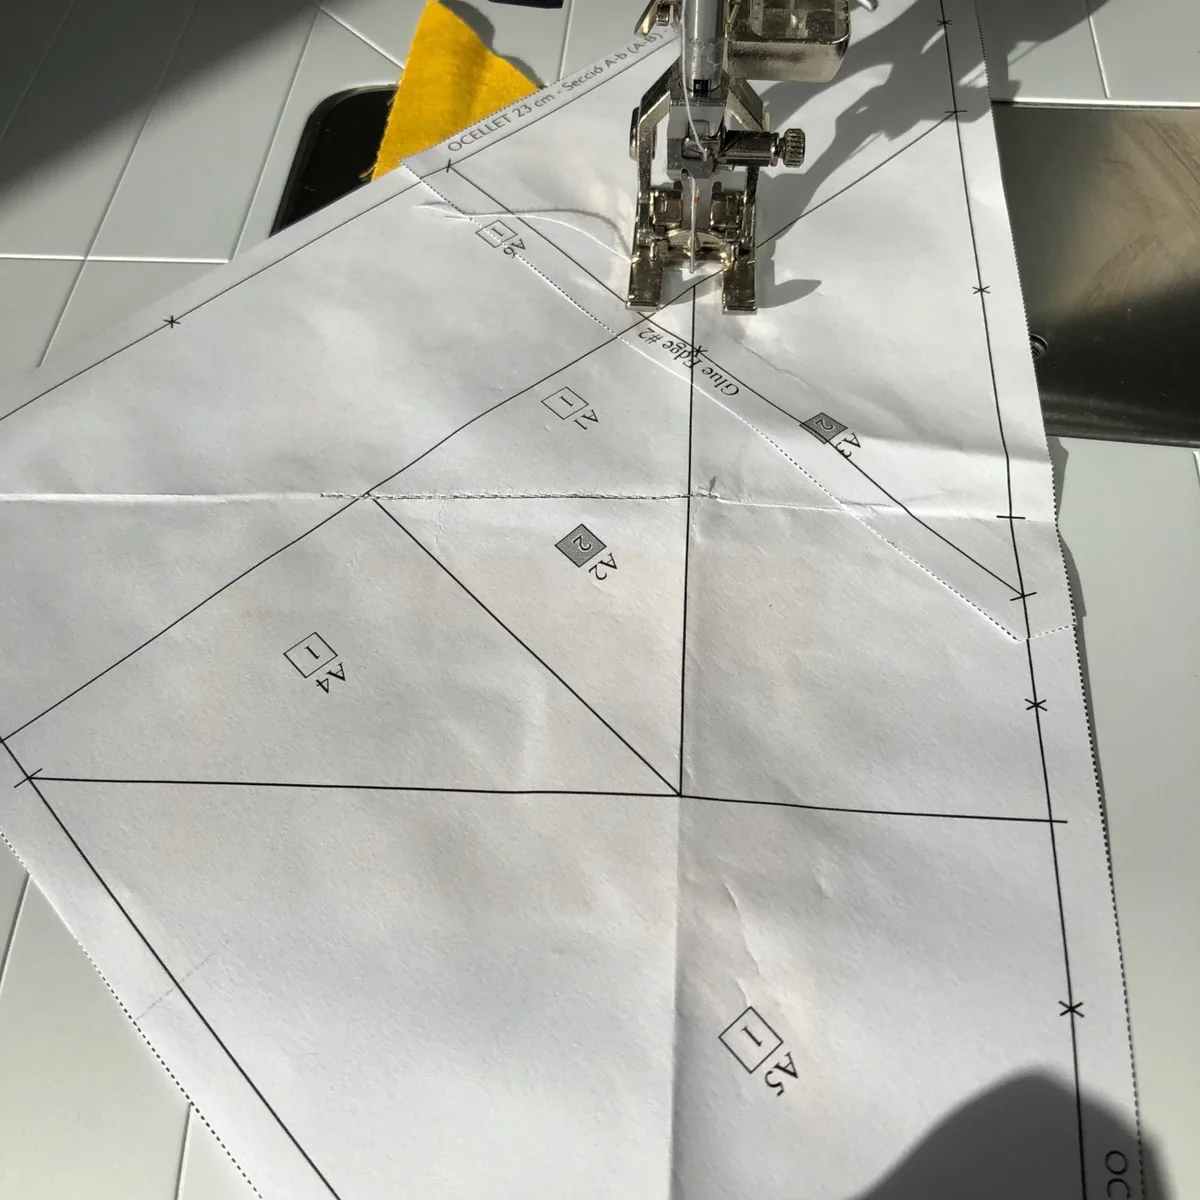
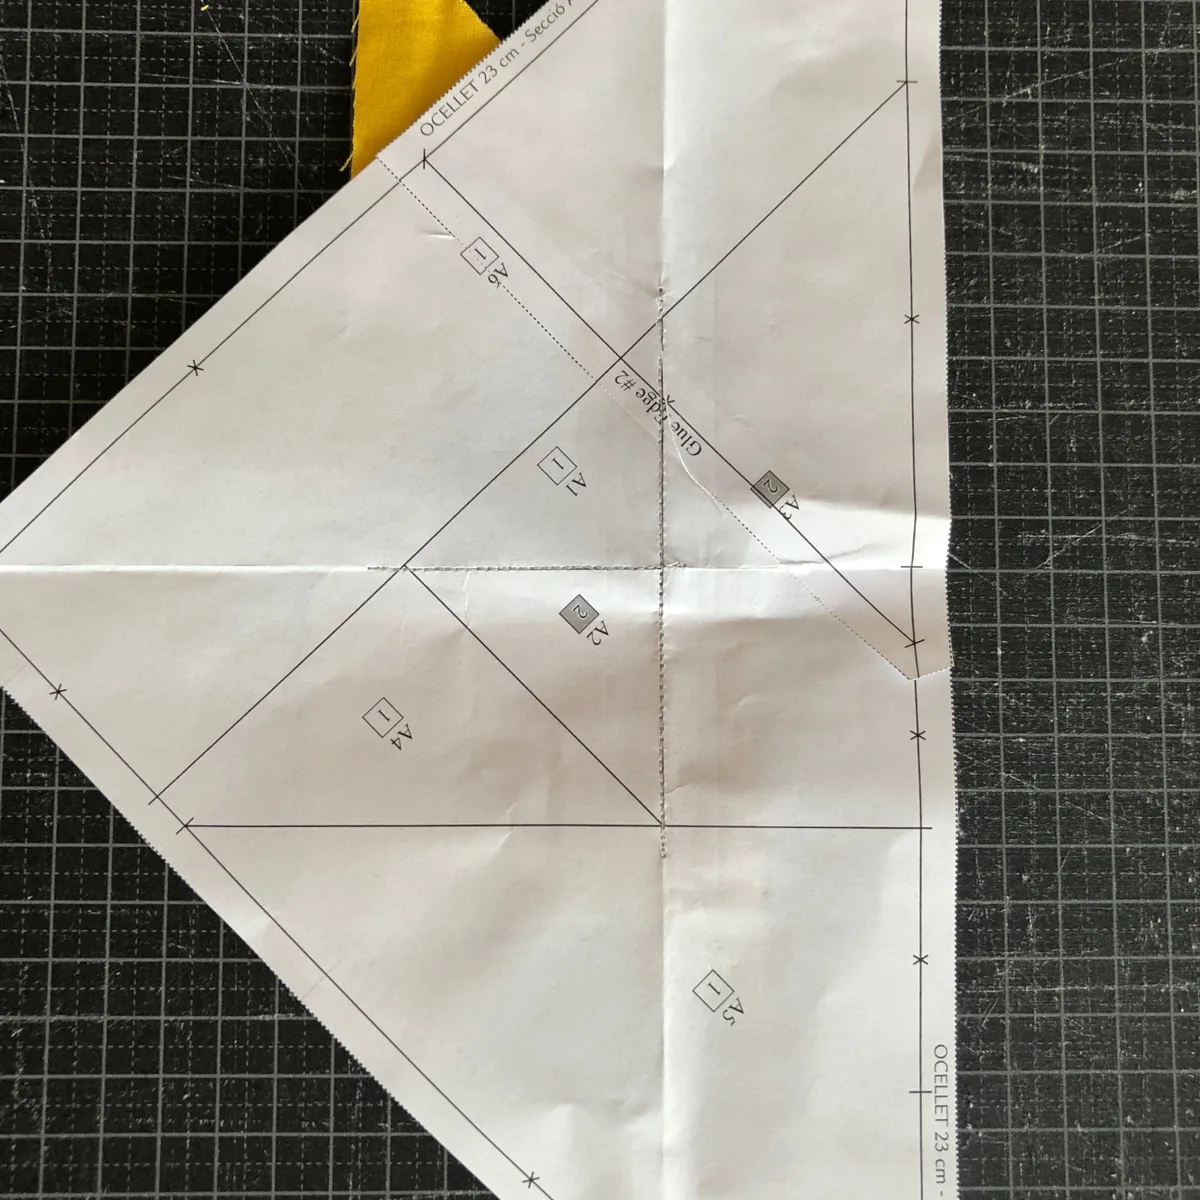
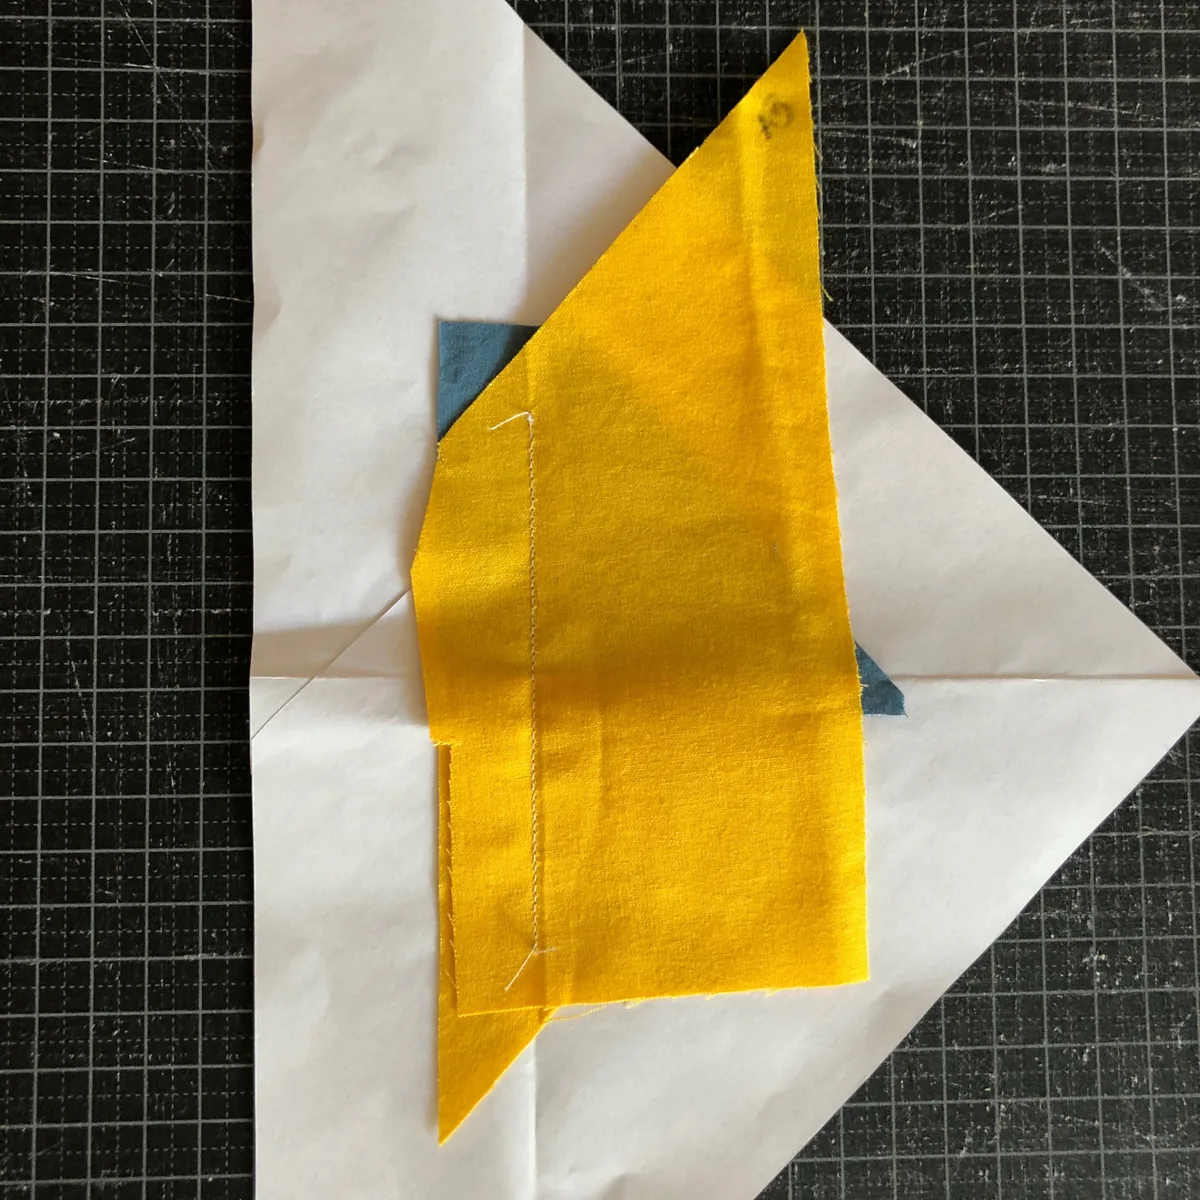
- Sew on the line that joins A3 to A1-A2, with the paper on top and the fabrics underneath.
- Start a little before the line begins and finish a little after it ends.
- Fold A3 back, right side up, and hold the piece up to the light to check that it is in the right place.
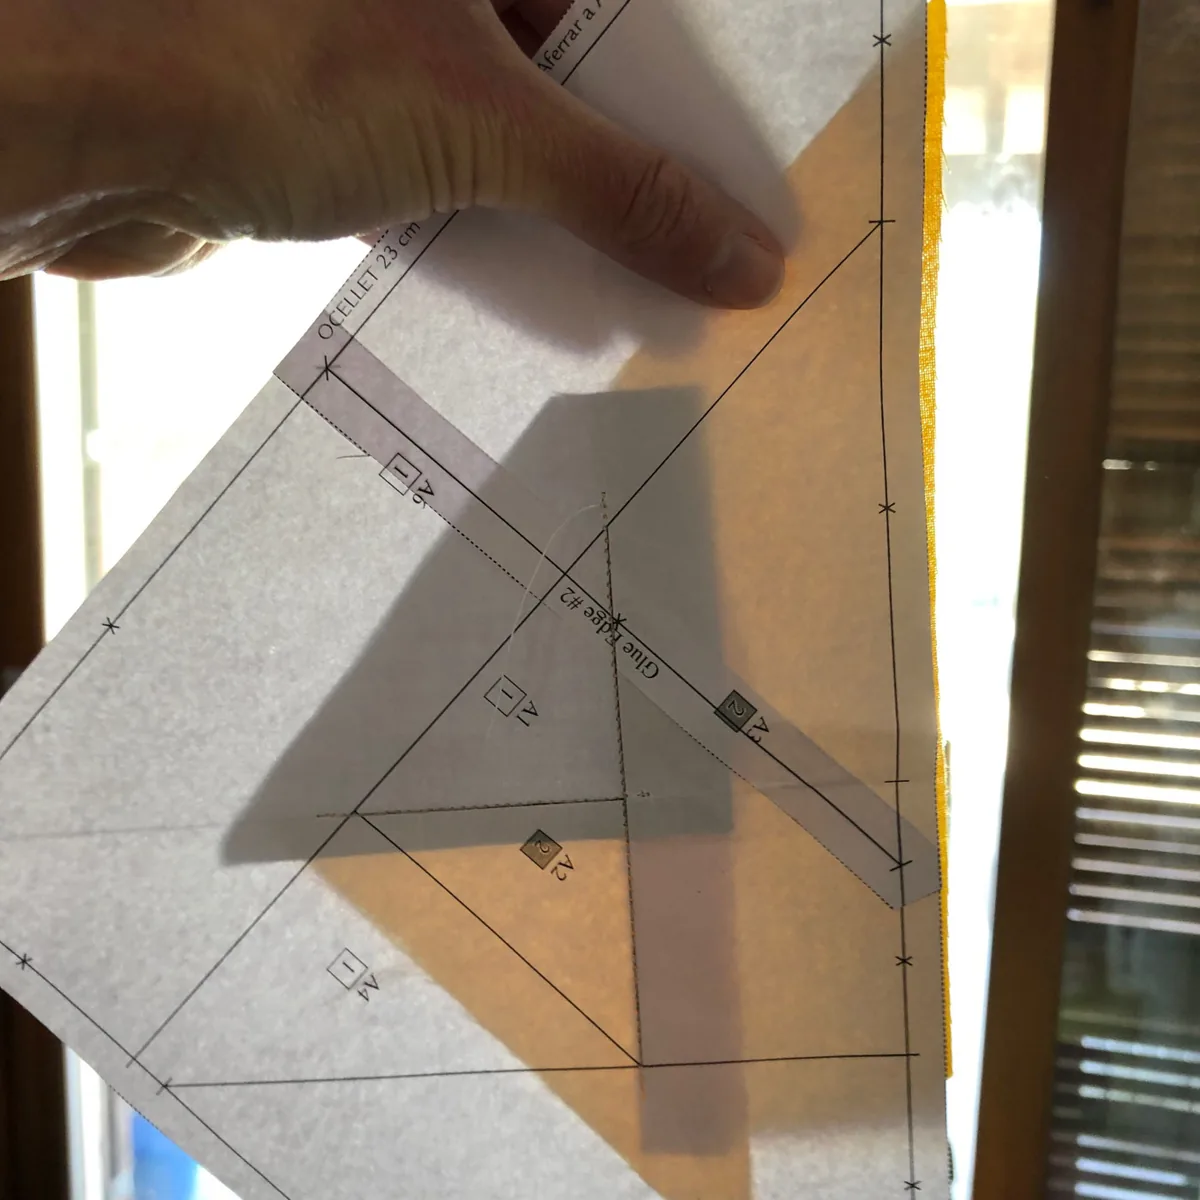
4. Trim the seam allowance
Fold the paper back along the seam, place the ruler parallel to it and trim the extra fabric 1/4" (6 mm) from the stitching.
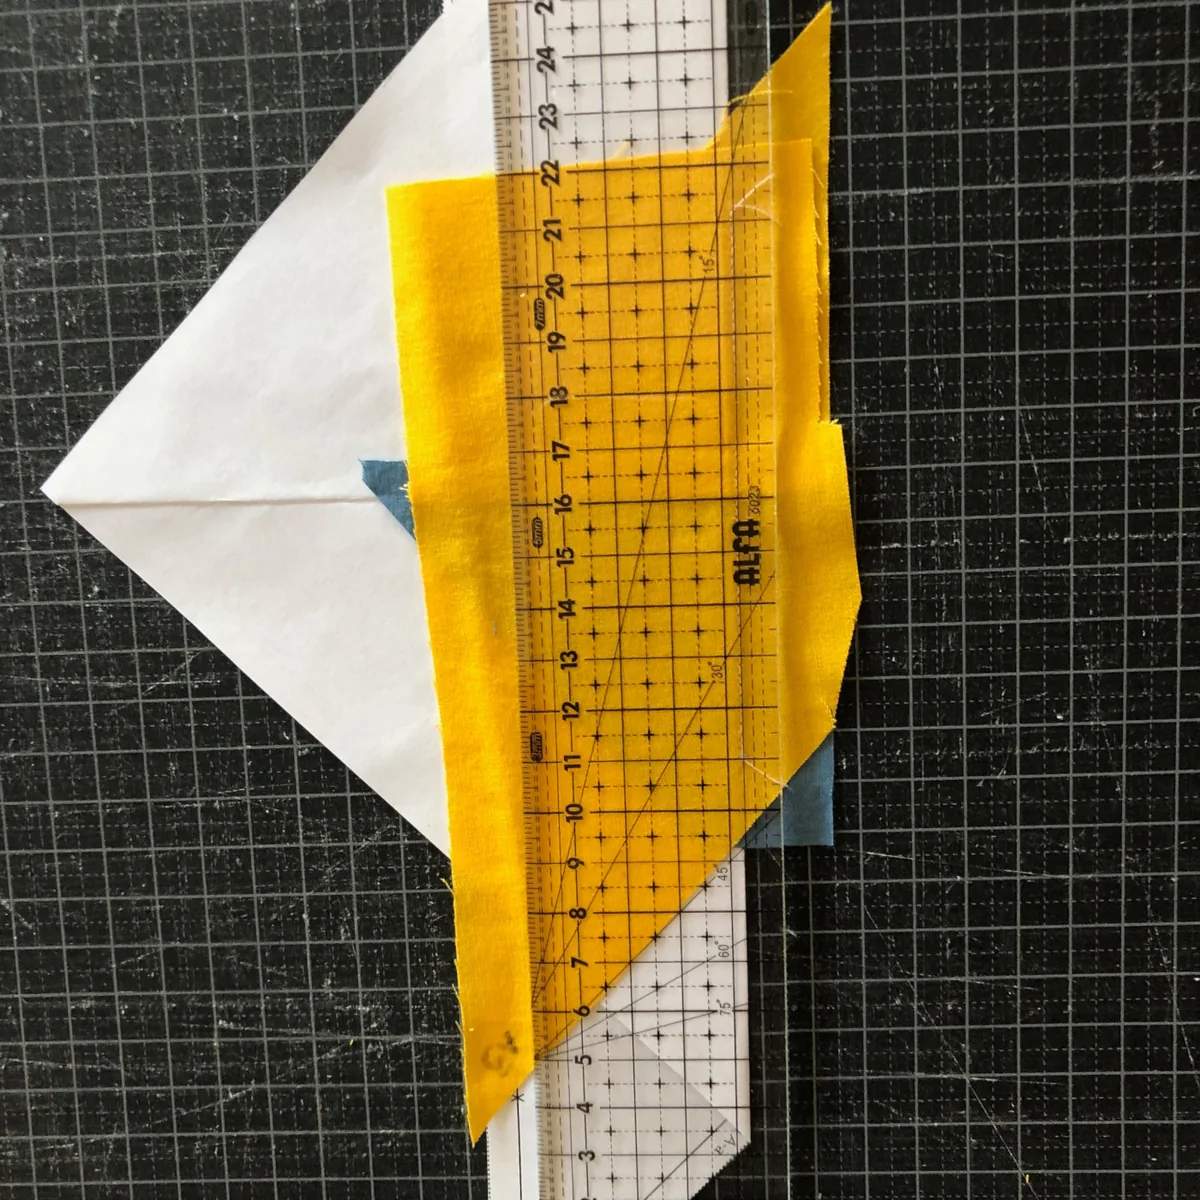
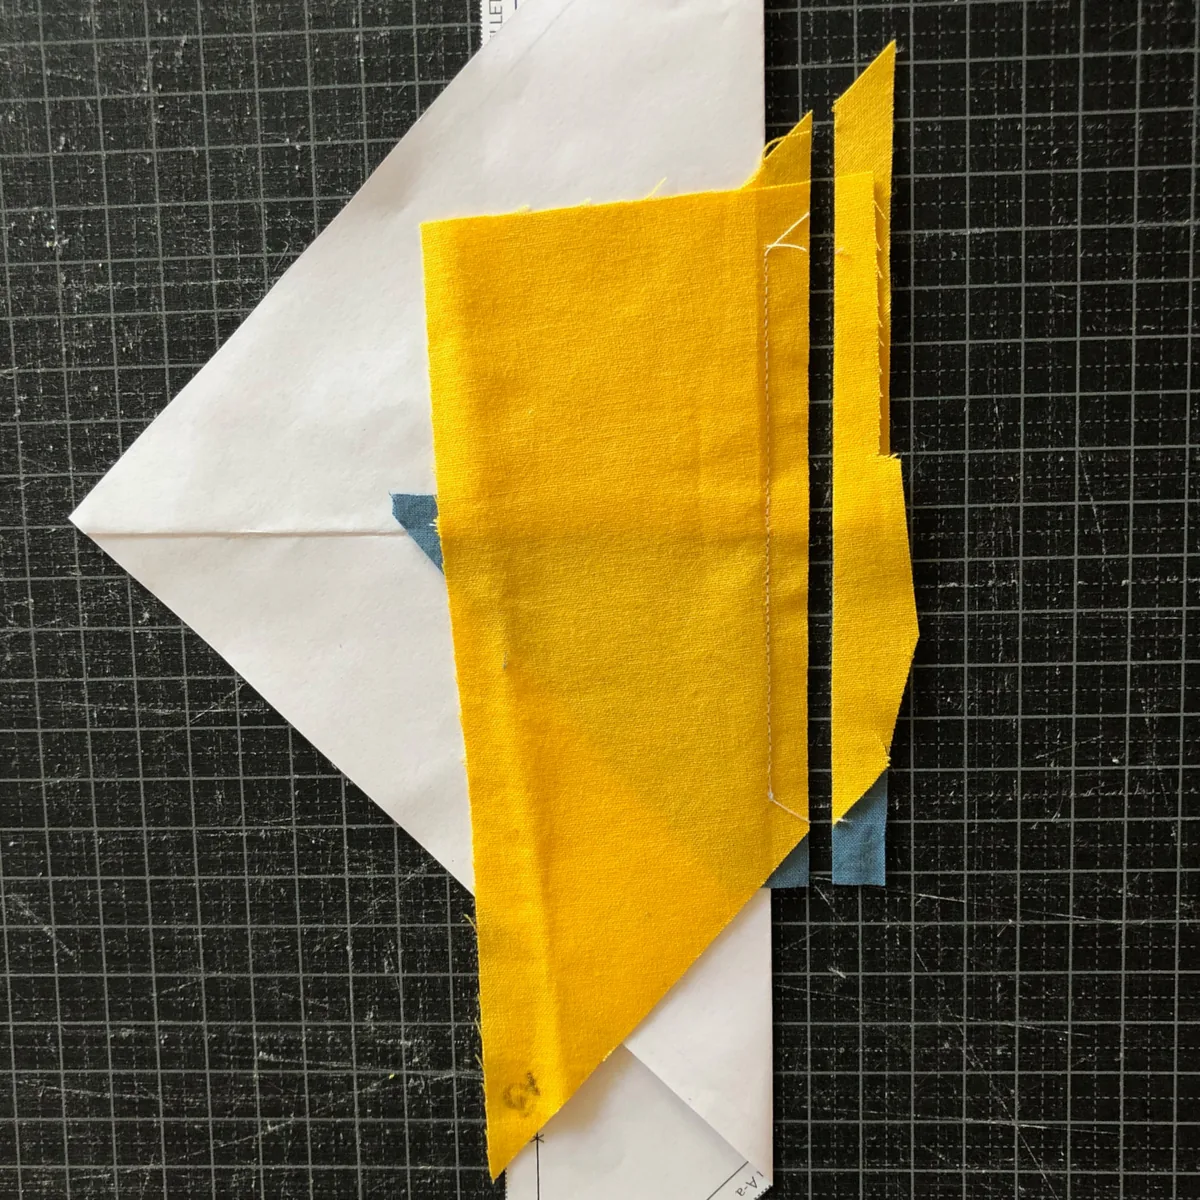
5. Press the seam
Unfold the paper, fold A3 over along the seam with its right side up, and press the seam flat with an iron, a seam roller or your fingers.
Fabrics A1, A2 and A3 are in place.
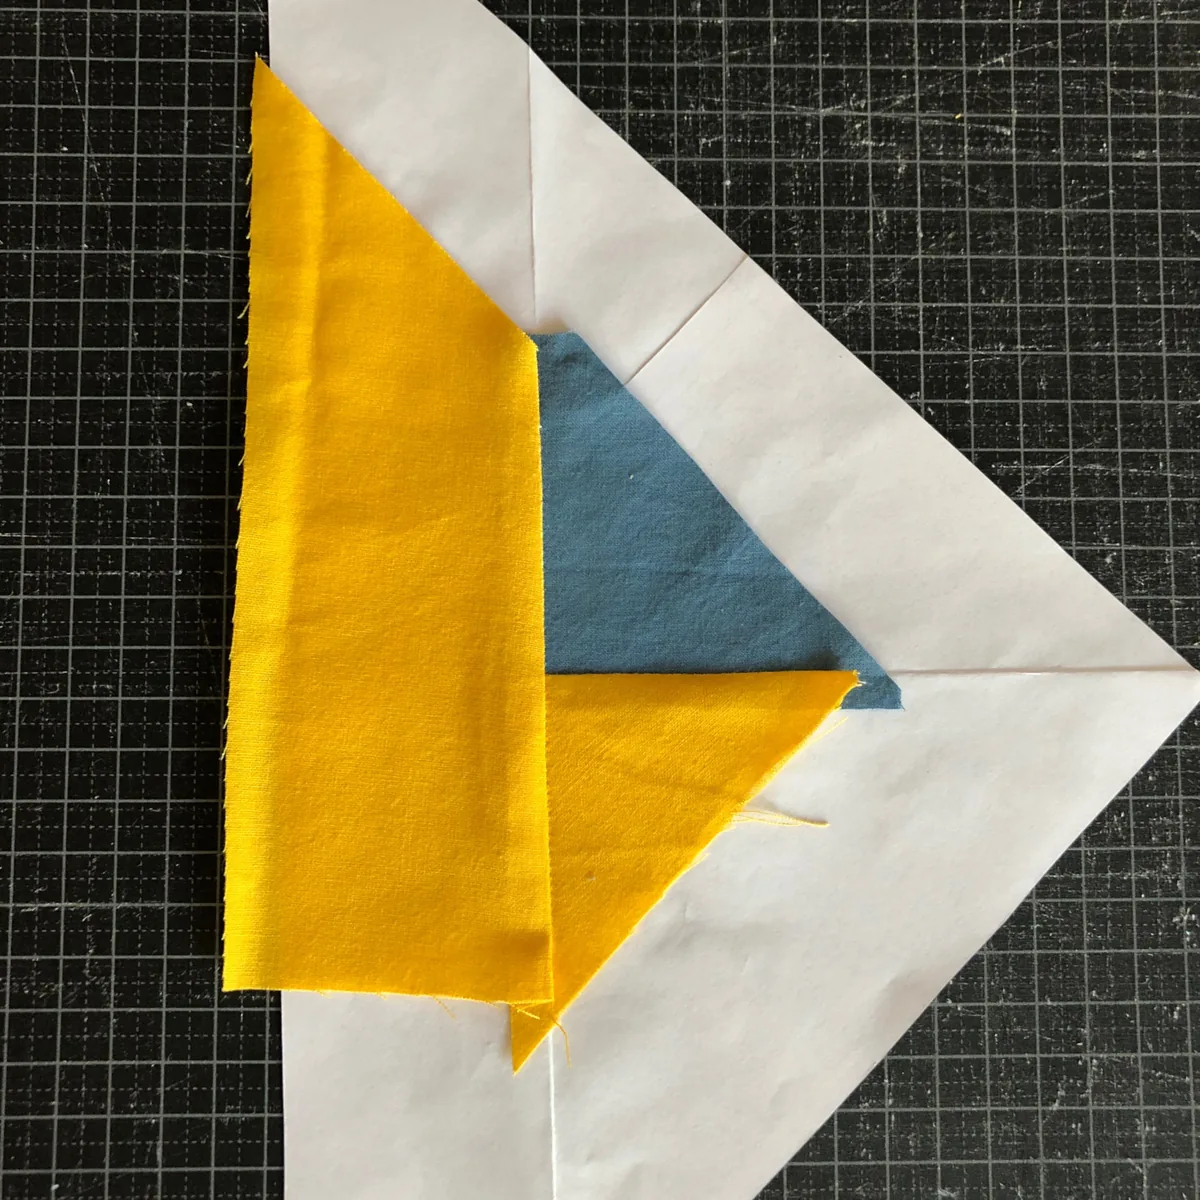
Finish Section A and Sew Section B
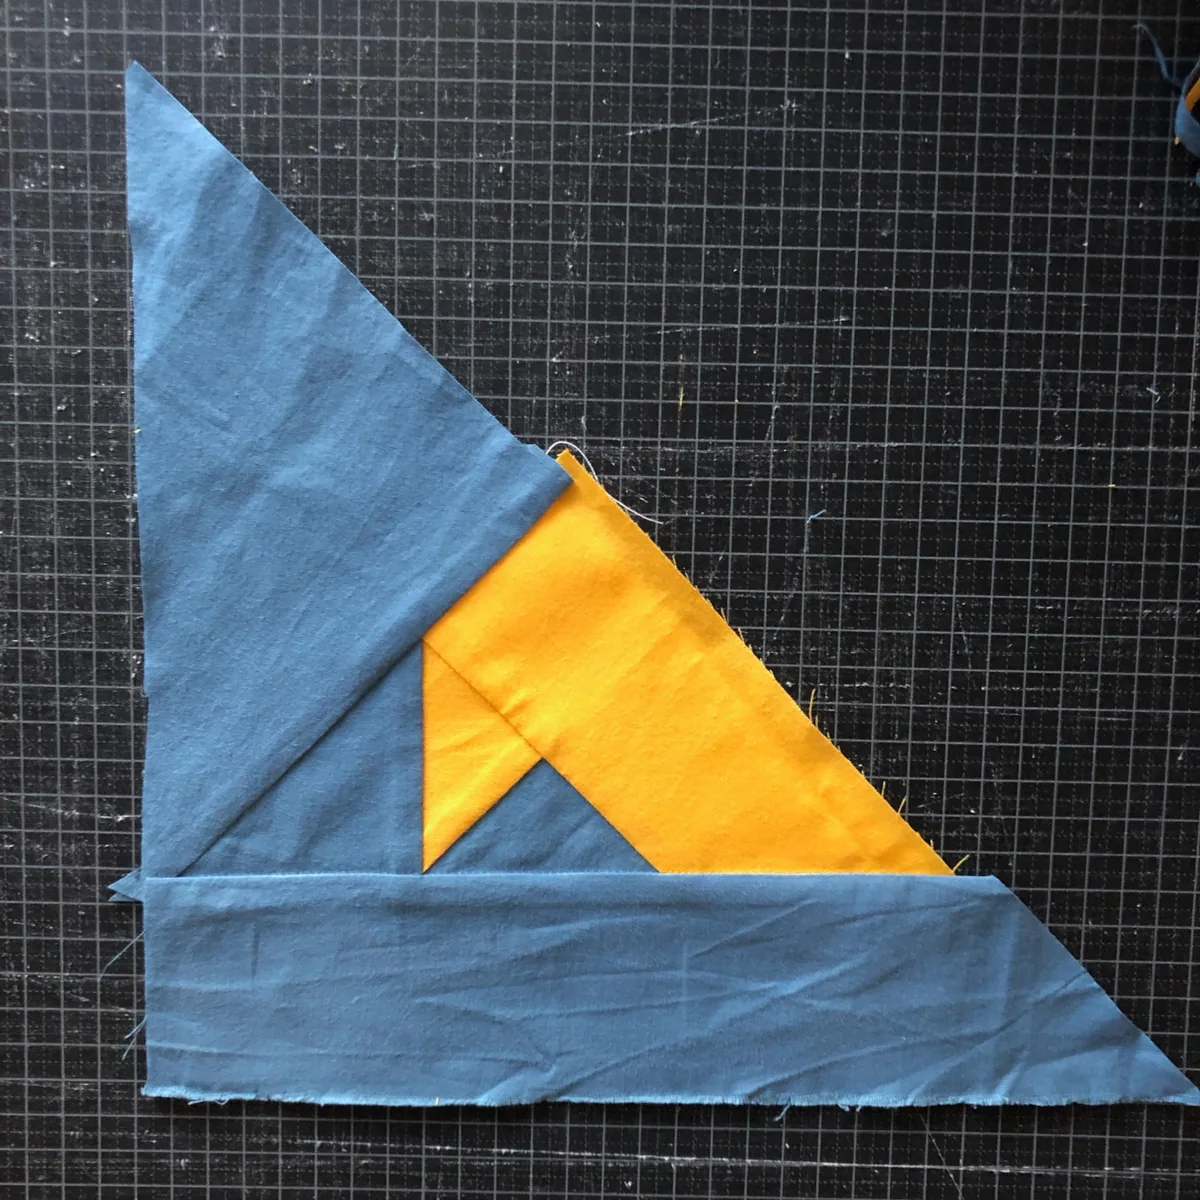
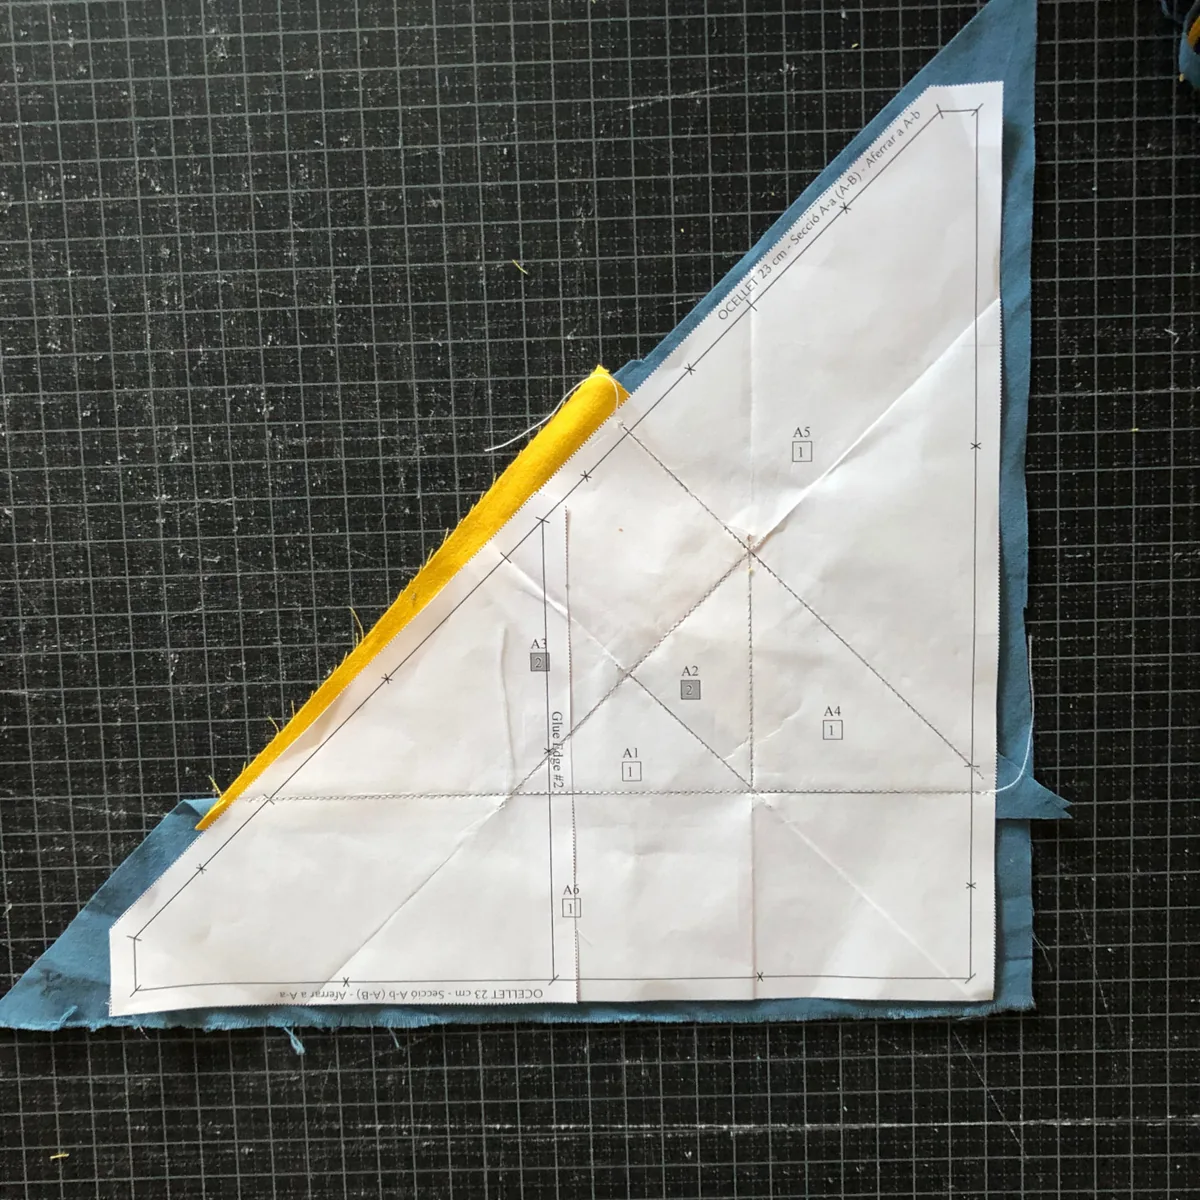
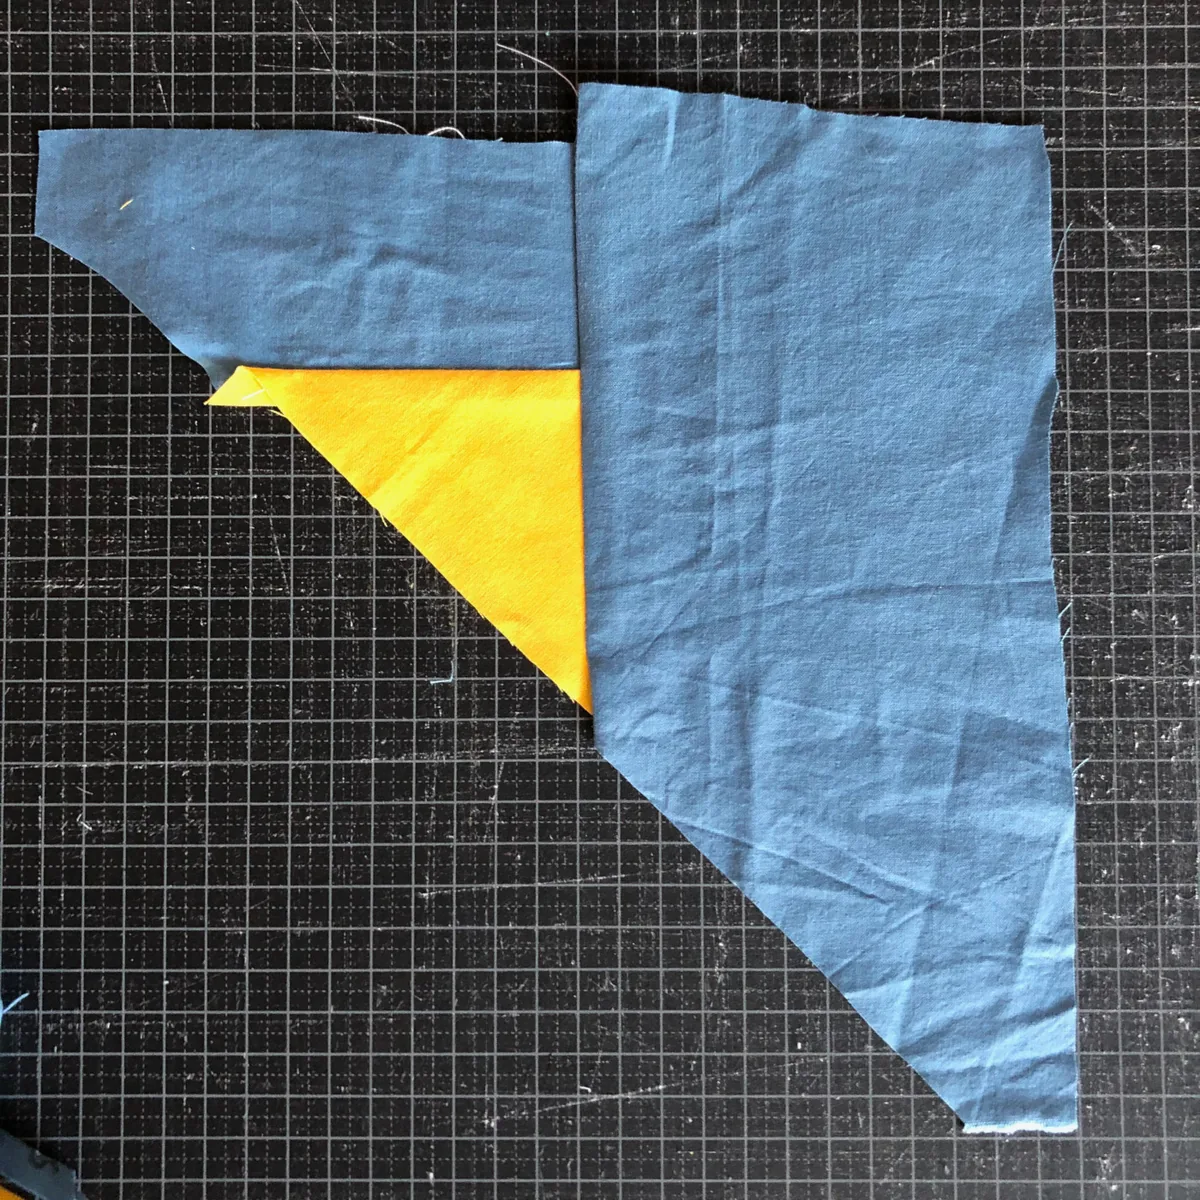
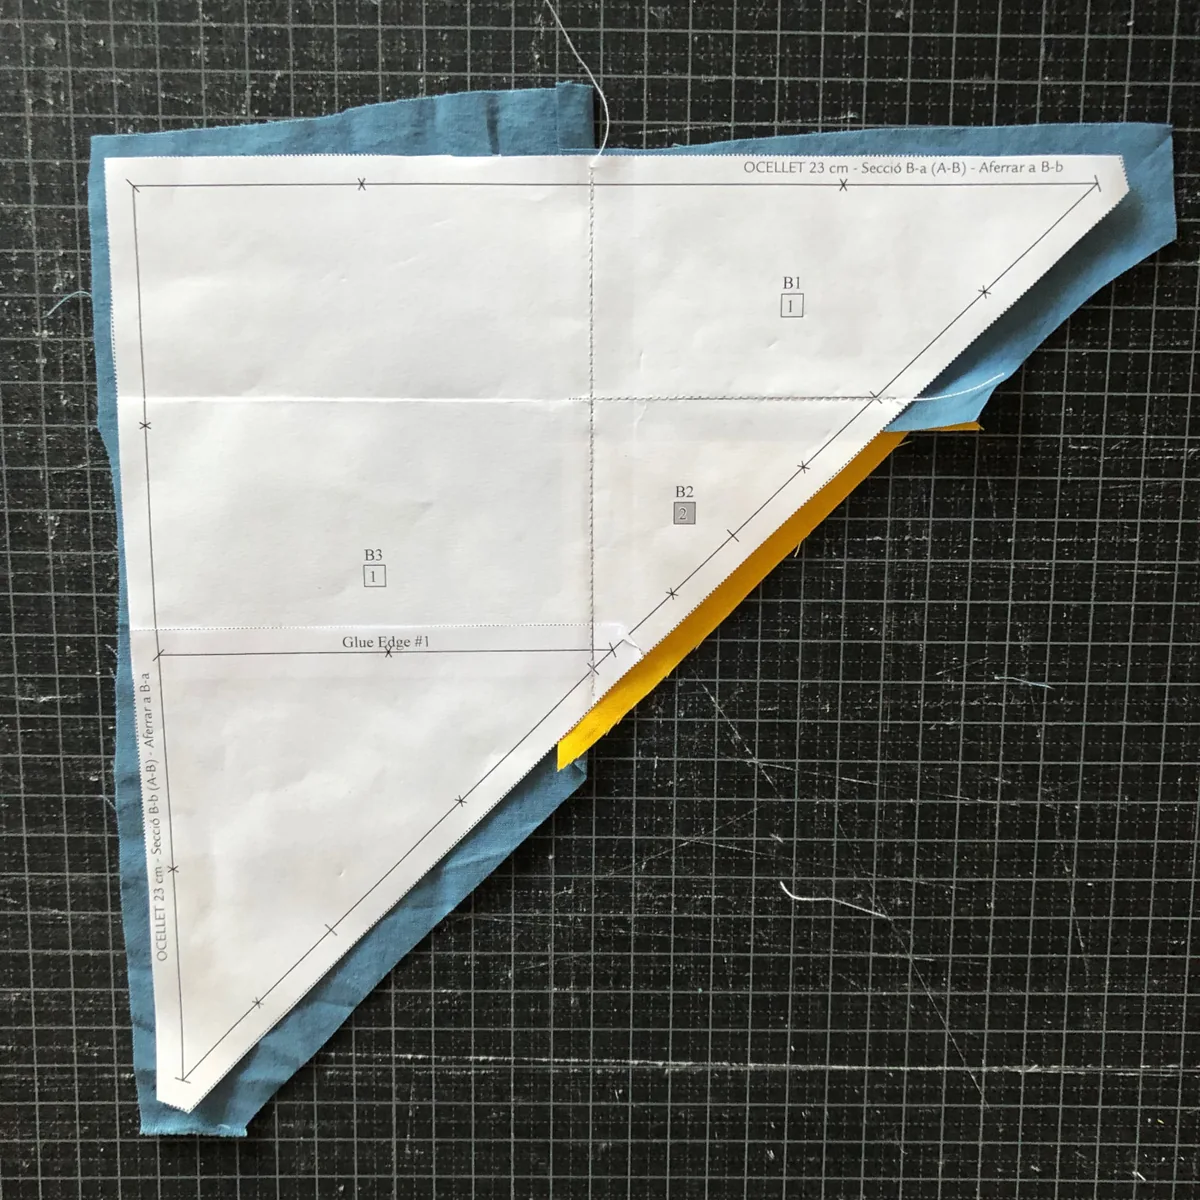
You already know how to join the first three fabrics. Now it is your turn: finish Section A by adding A4, A5 and A6, and then sew Section B, which has three fabrics: B1, B2 and B3.
Try it on your own first. It is the best way to find out how much you have learned. If you get stuck, write to me and I will be happy to help.
When both sections are finished, they should look like the ones in the photos.
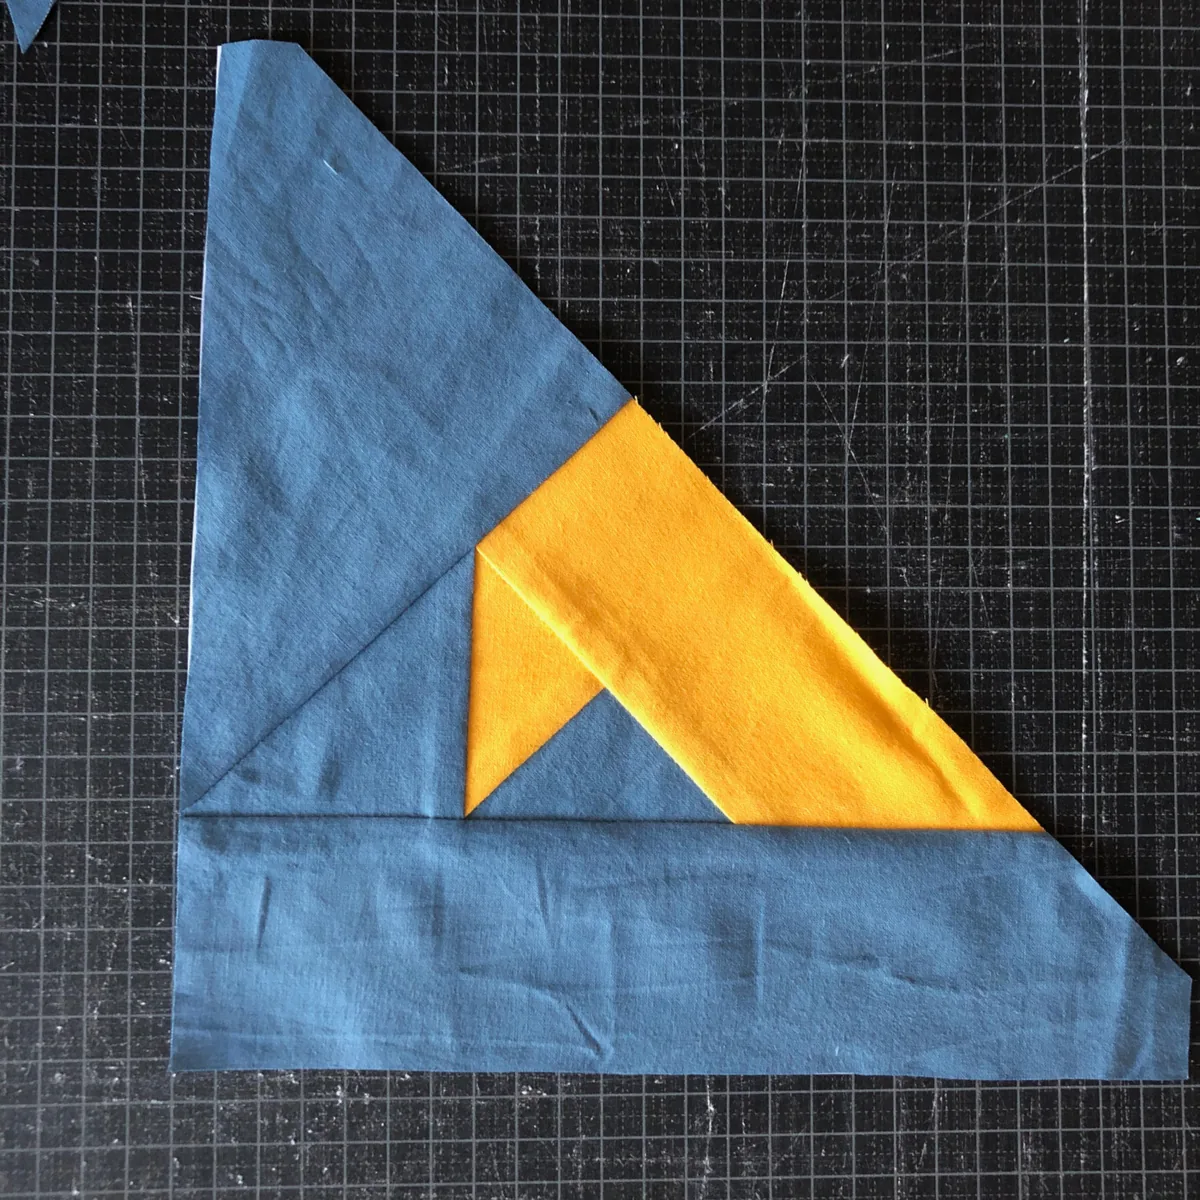
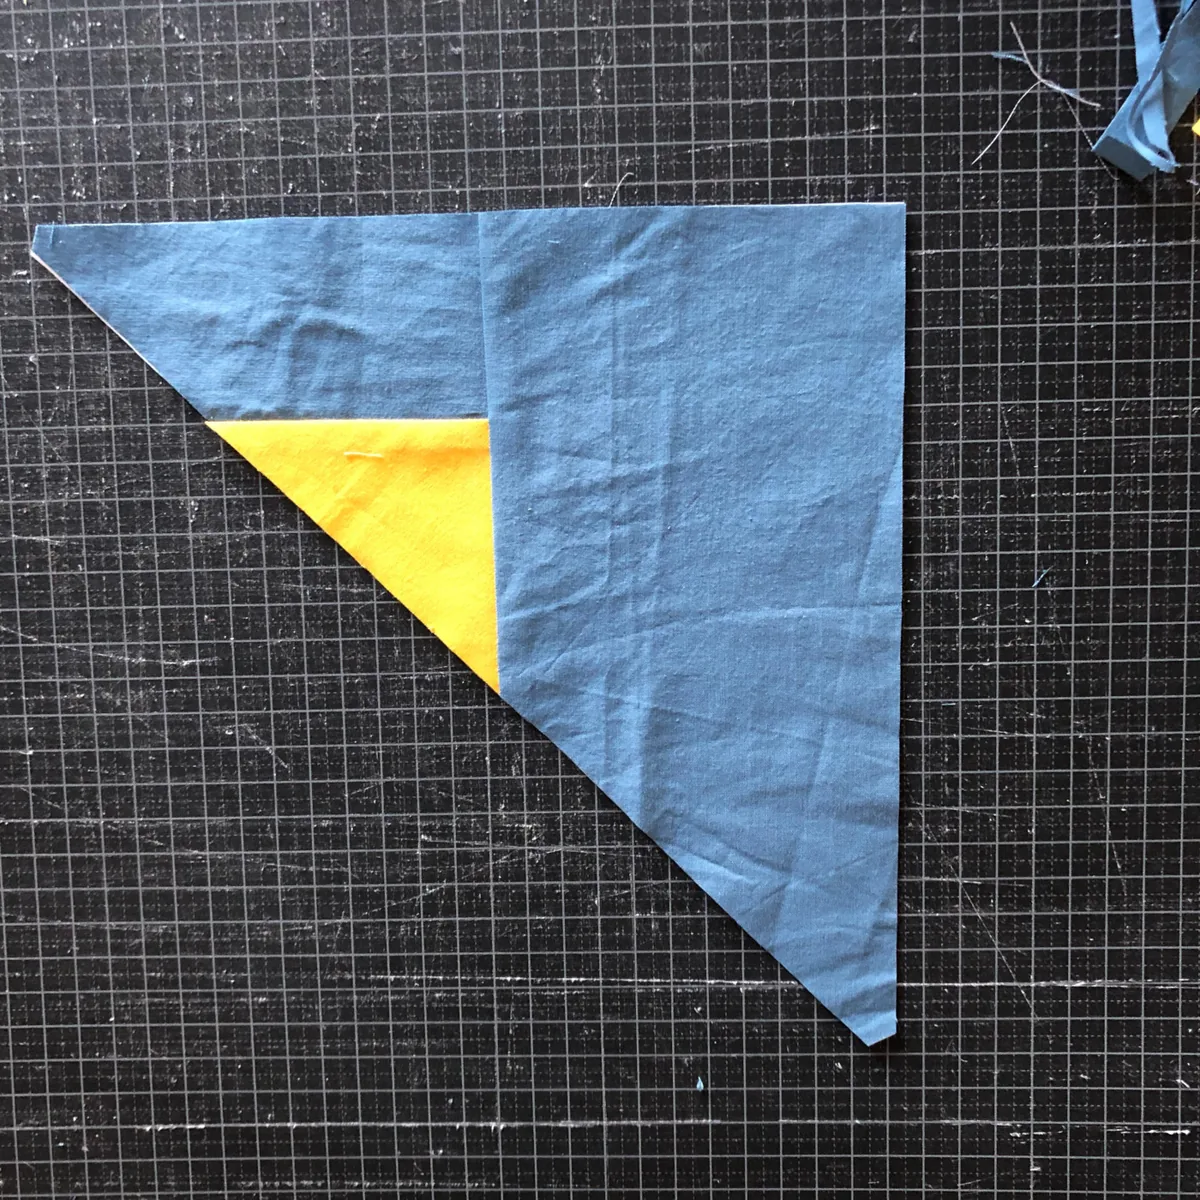
Joining the Sections
Lay out the two sections as shown in the diagram on page 3 of the pattern. With only two sections it is easy, but in a pattern with many sections this diagram is a great help.
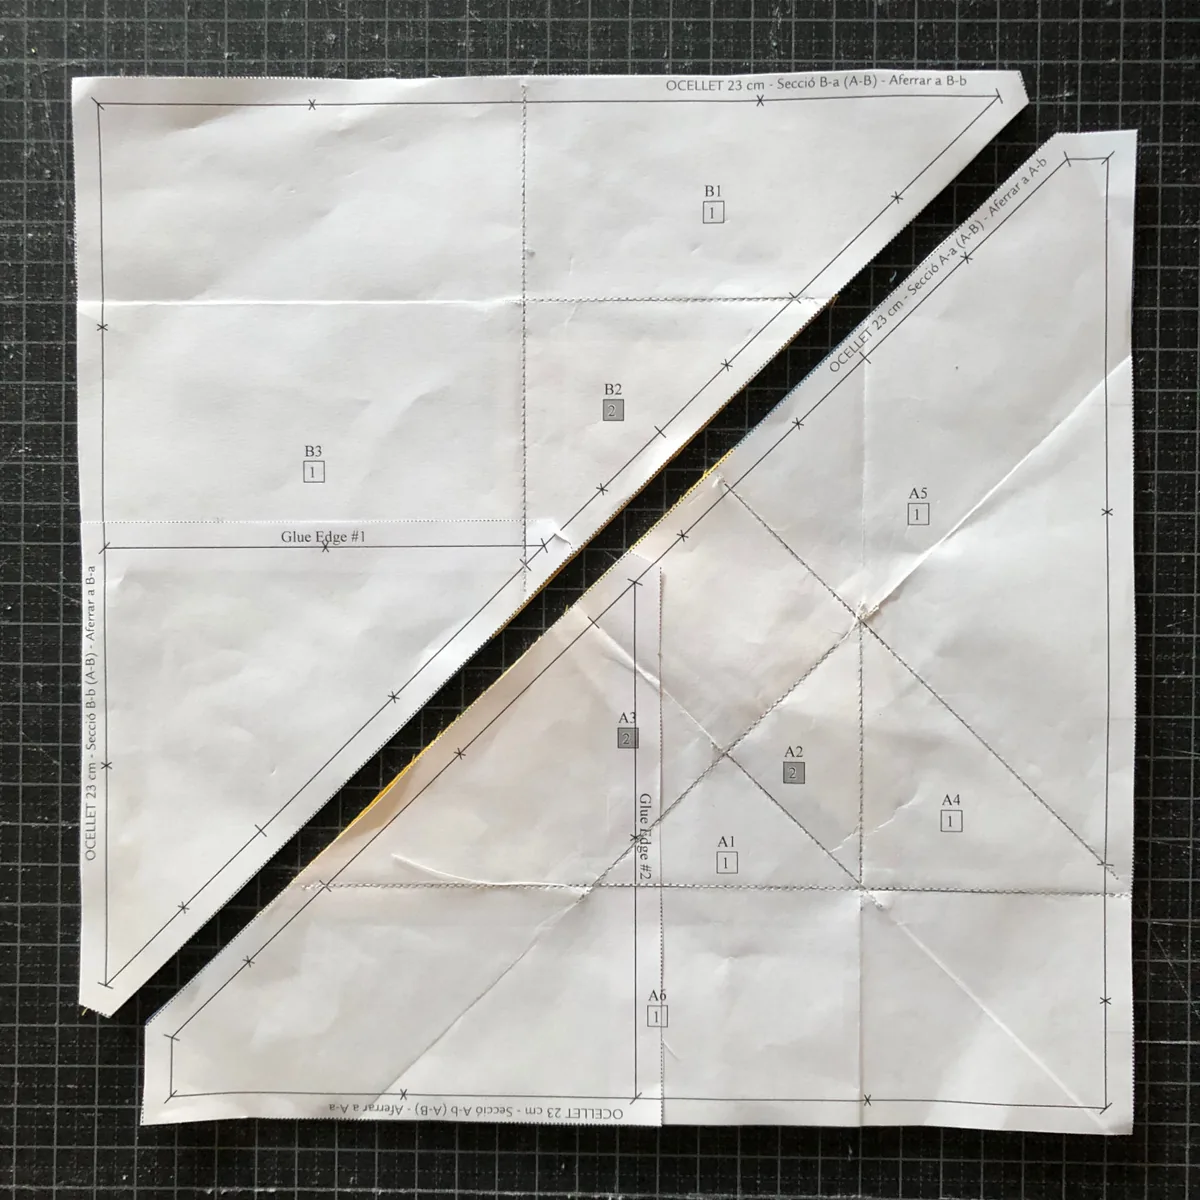
Turn both sections over so the fabric is facing up. You can already see the bird!
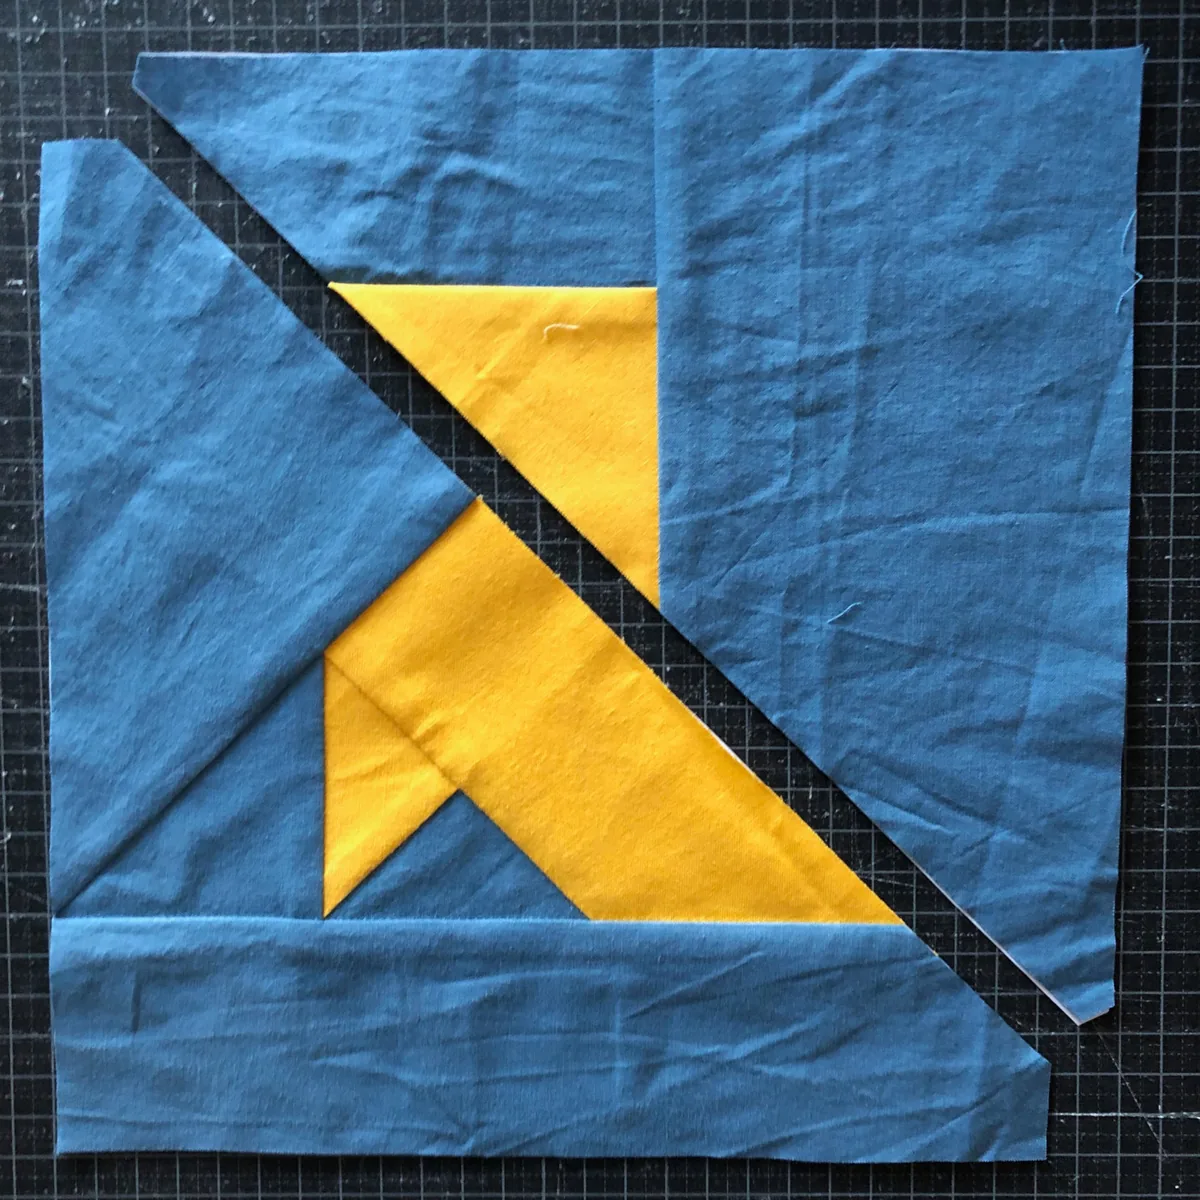
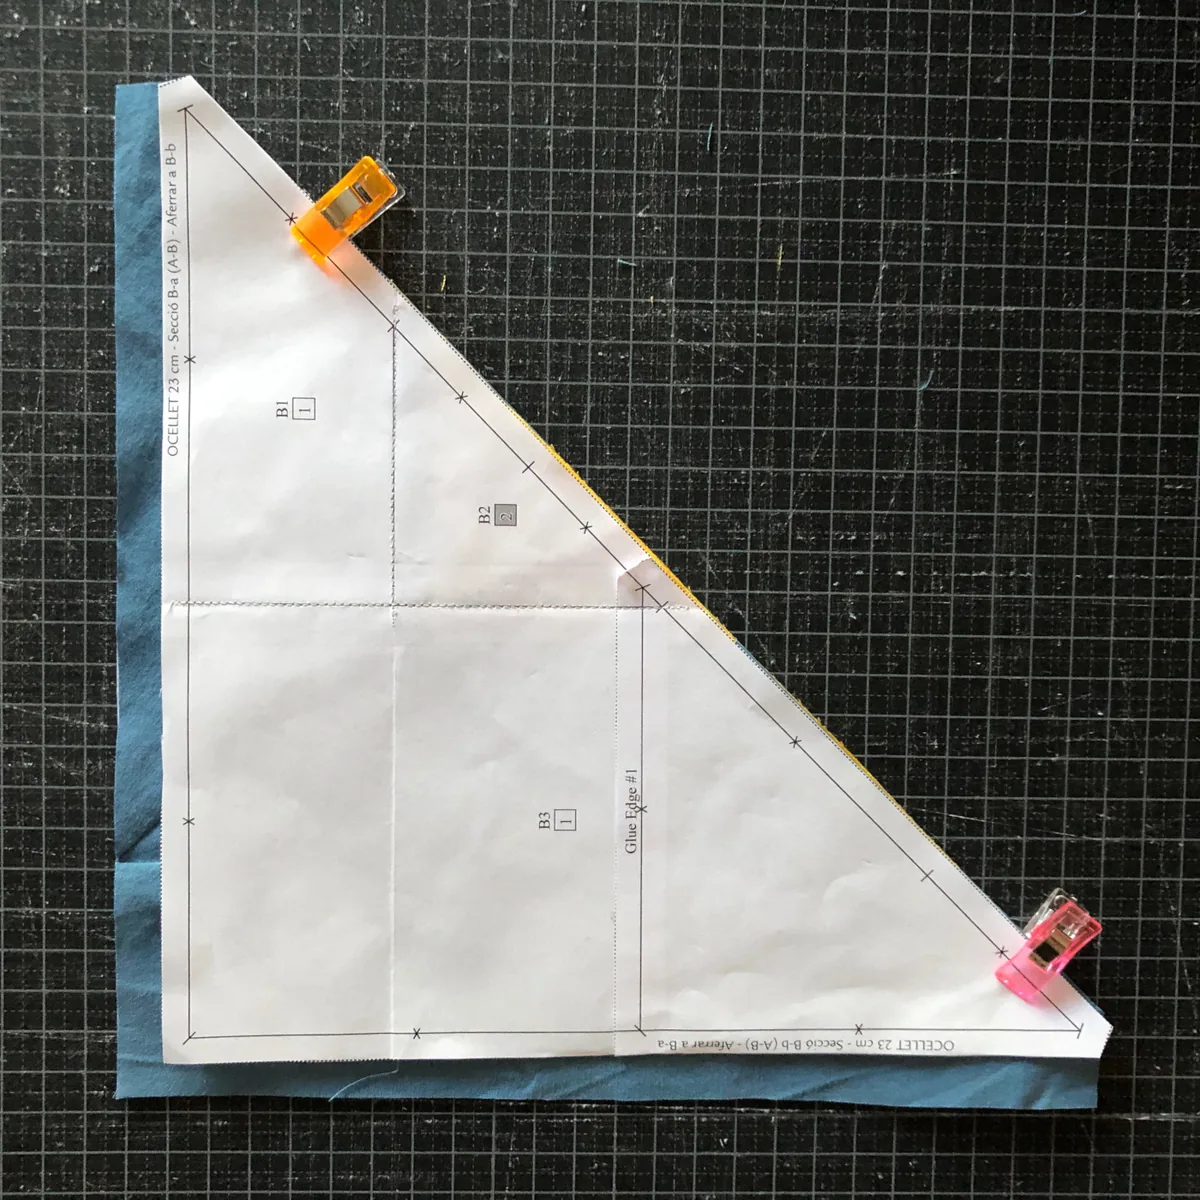
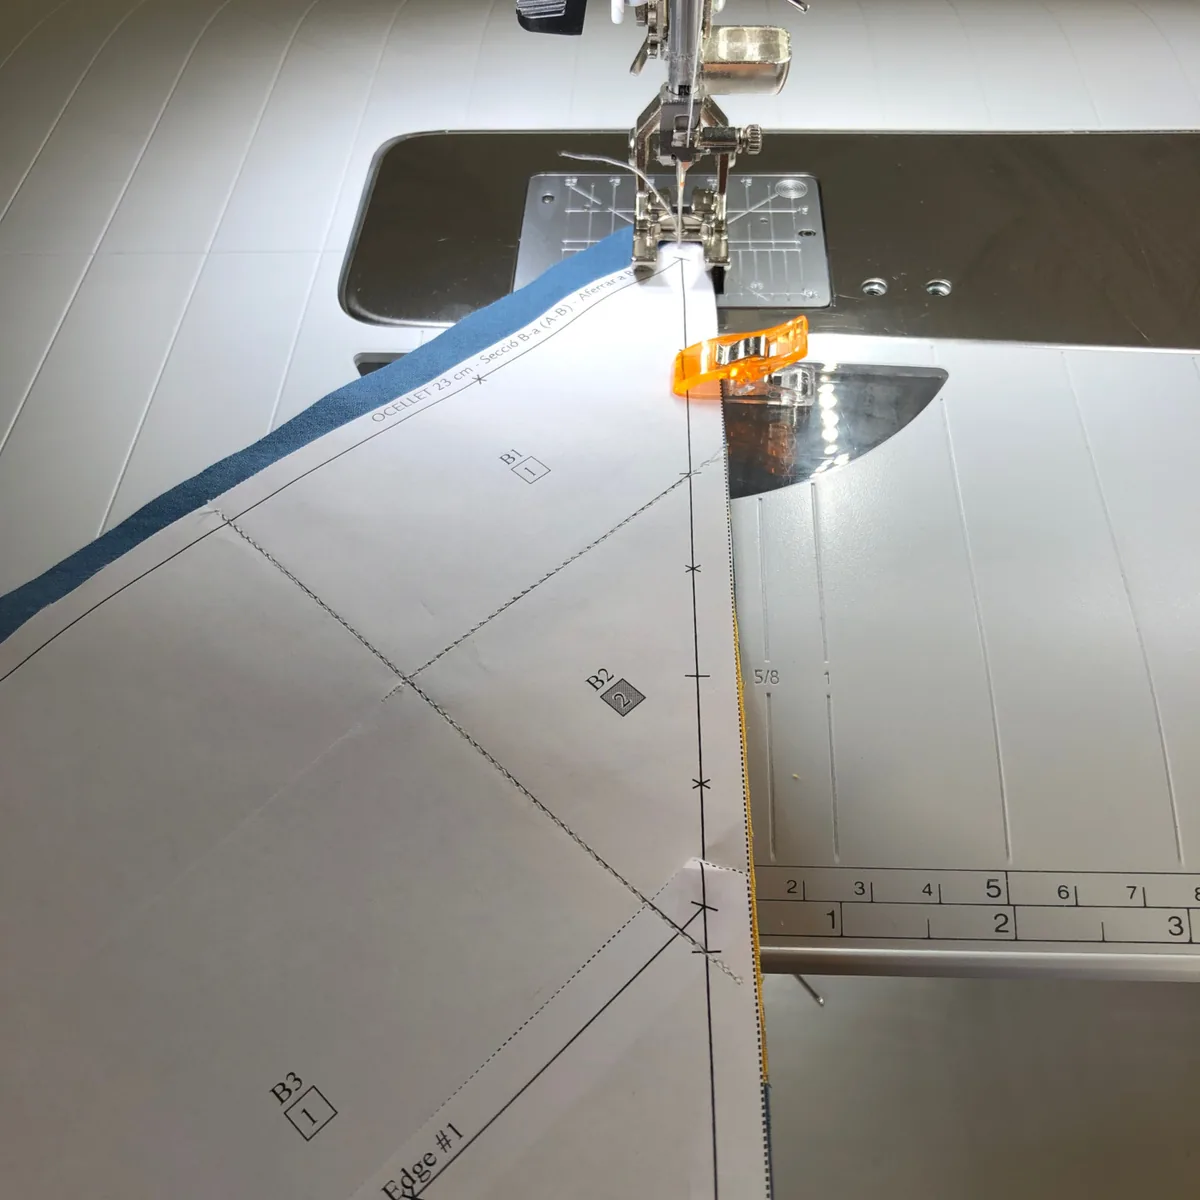
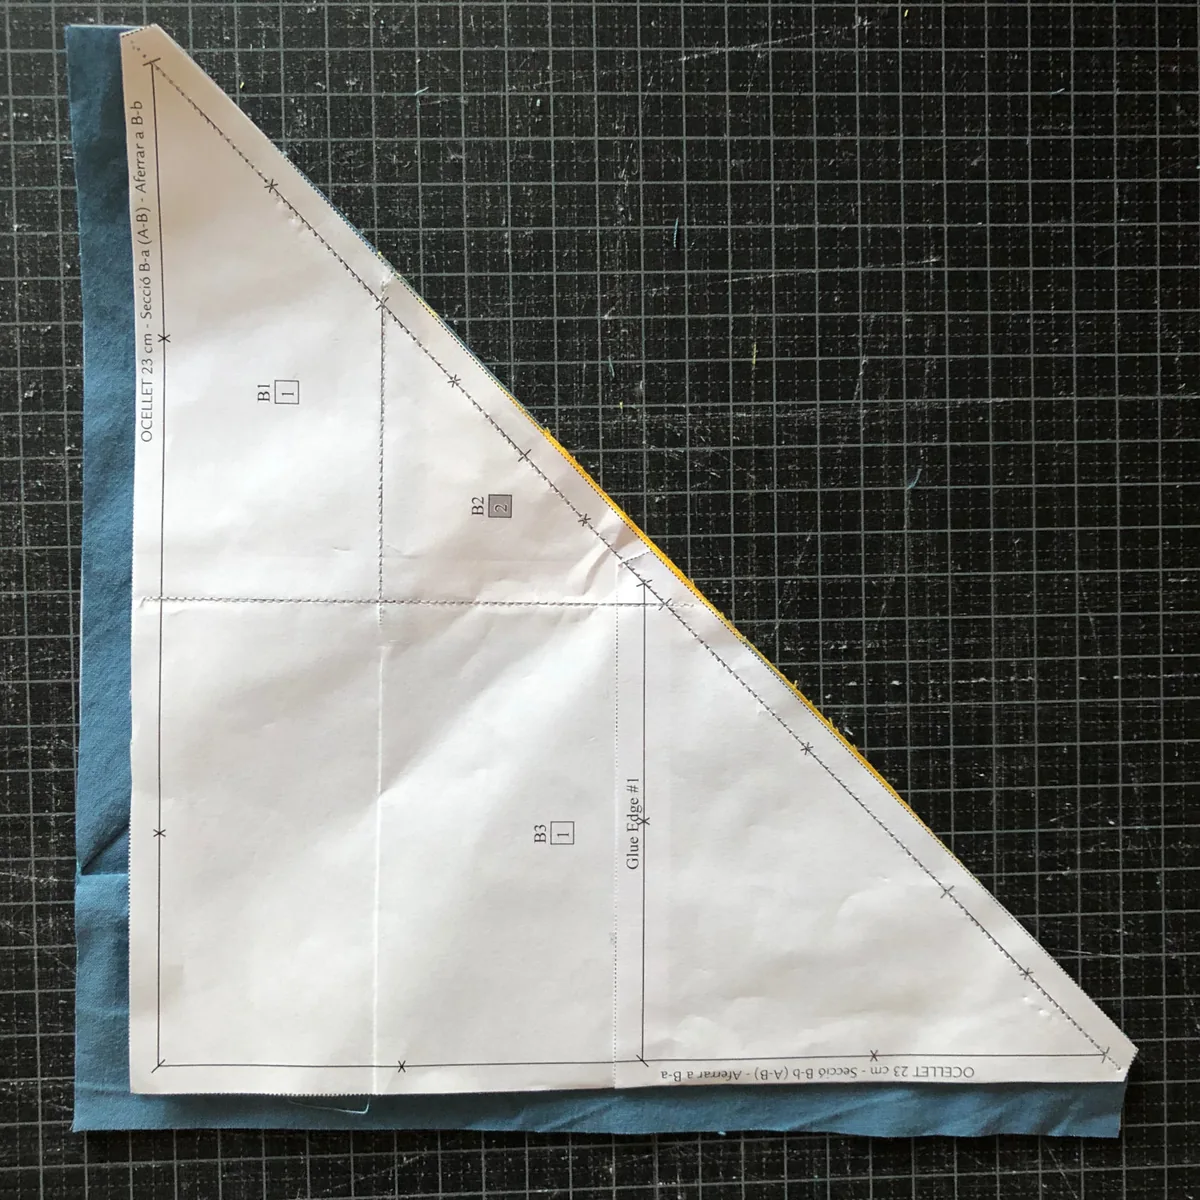
Place one section on top of the other, right sides together, and make sure the edges and both ends match exactly. Hold them together with clips or pins.
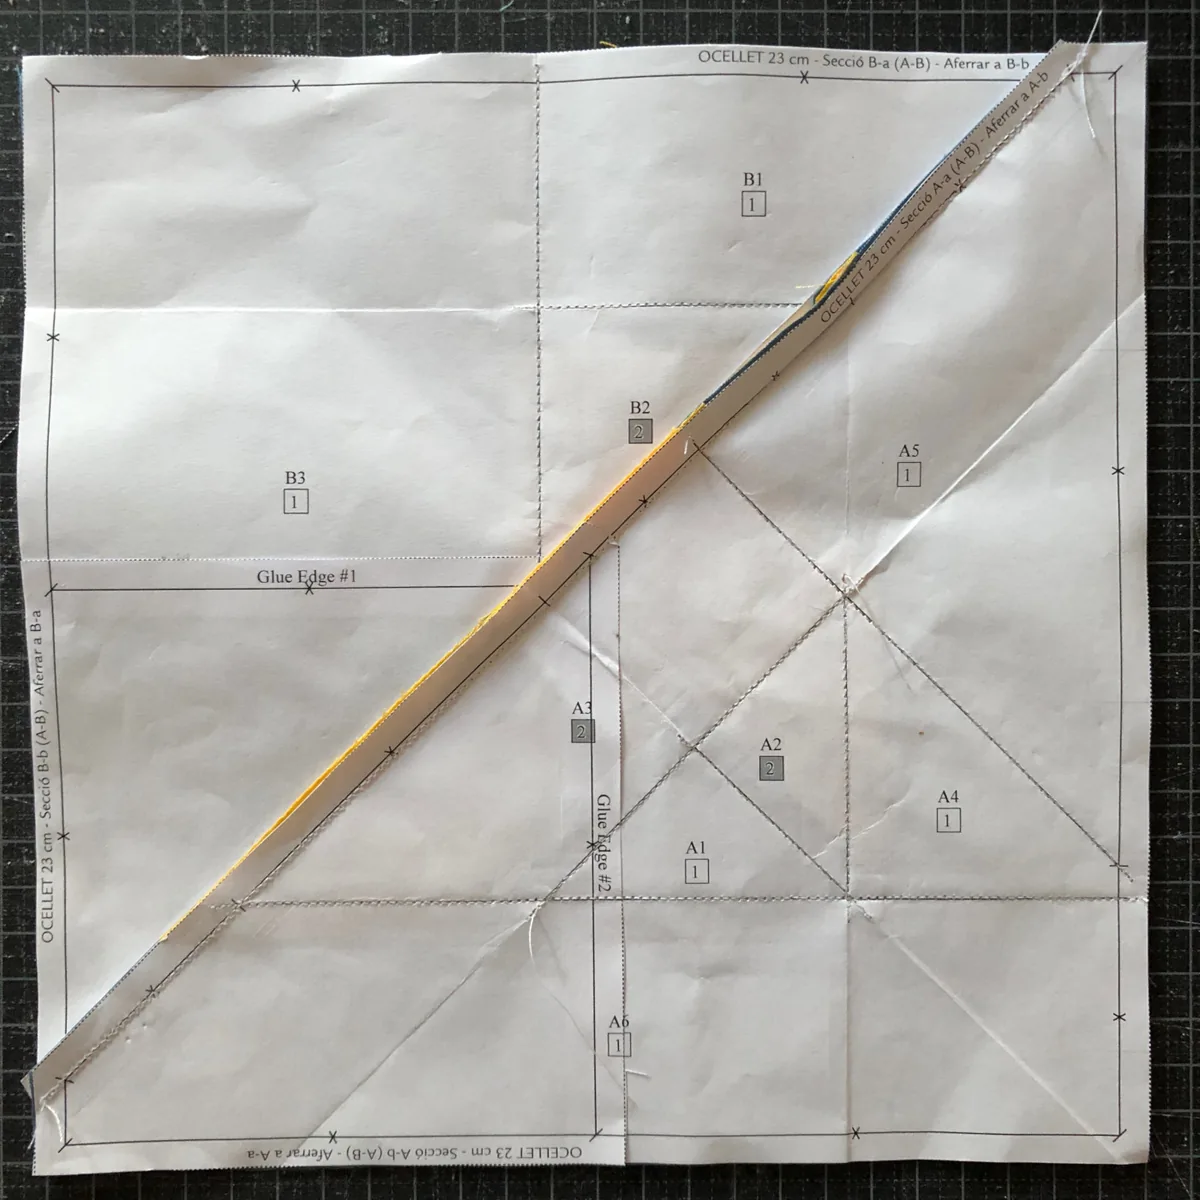
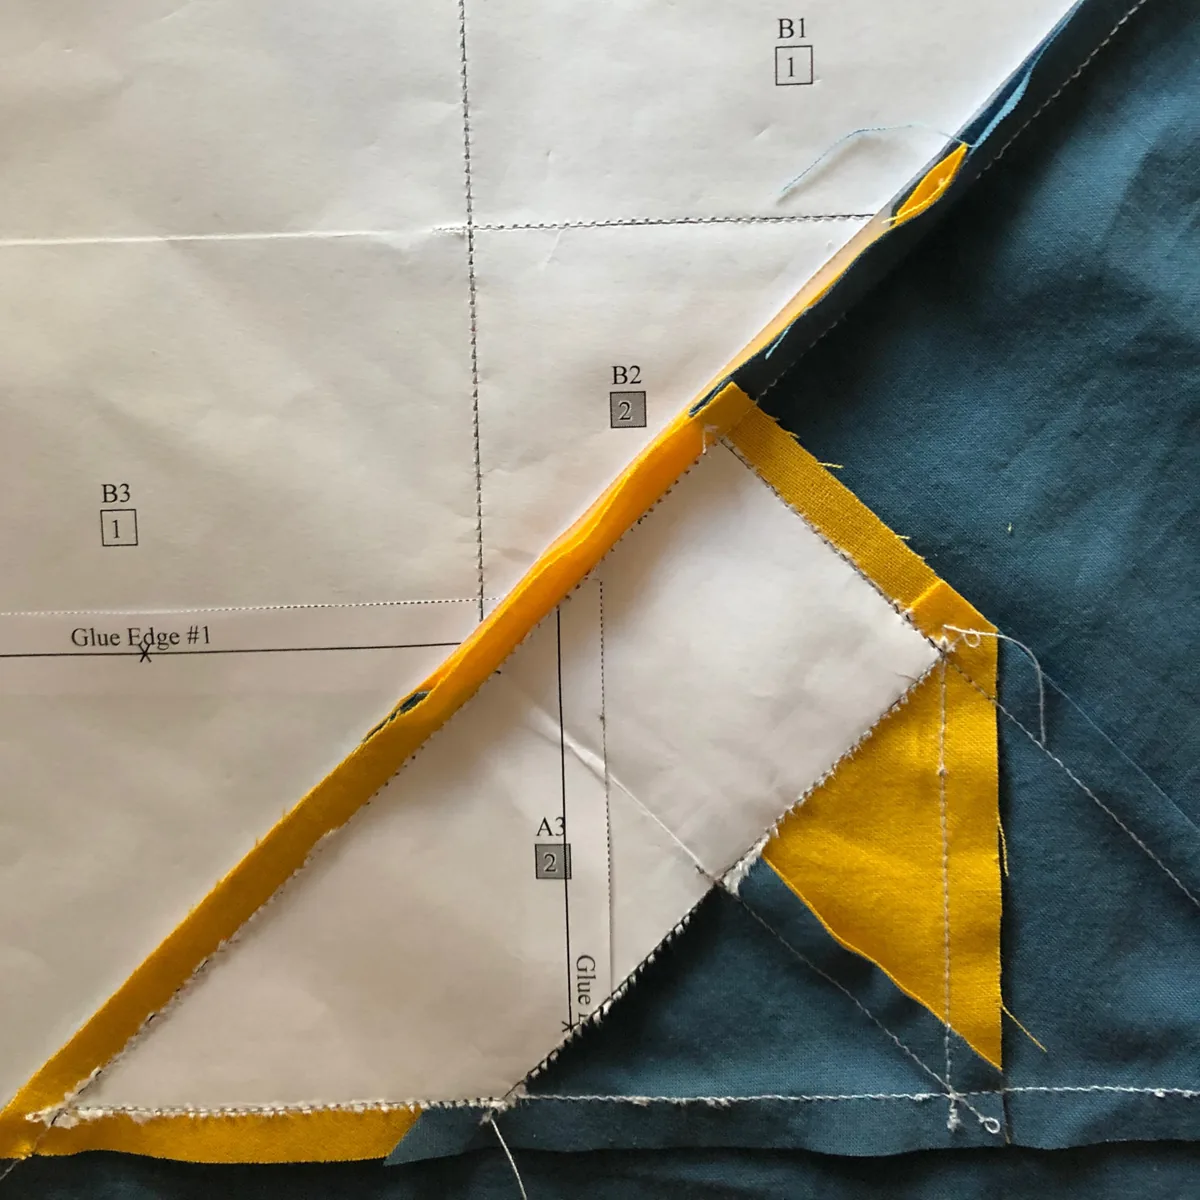
Sew on the seam line printed on the section paper, starting a little before the line and finishing a little after it. Then check that the stitching also runs along the printed line on the paper of the section underneath. This is what keeps the design accurate. If it is off, unpick the seam and sew it again.
Removing the Paper
Open the two sections and press the seam allowance to one side. I look at the front of the block and choose the side that looks best. Some patterns tell you which way to press.
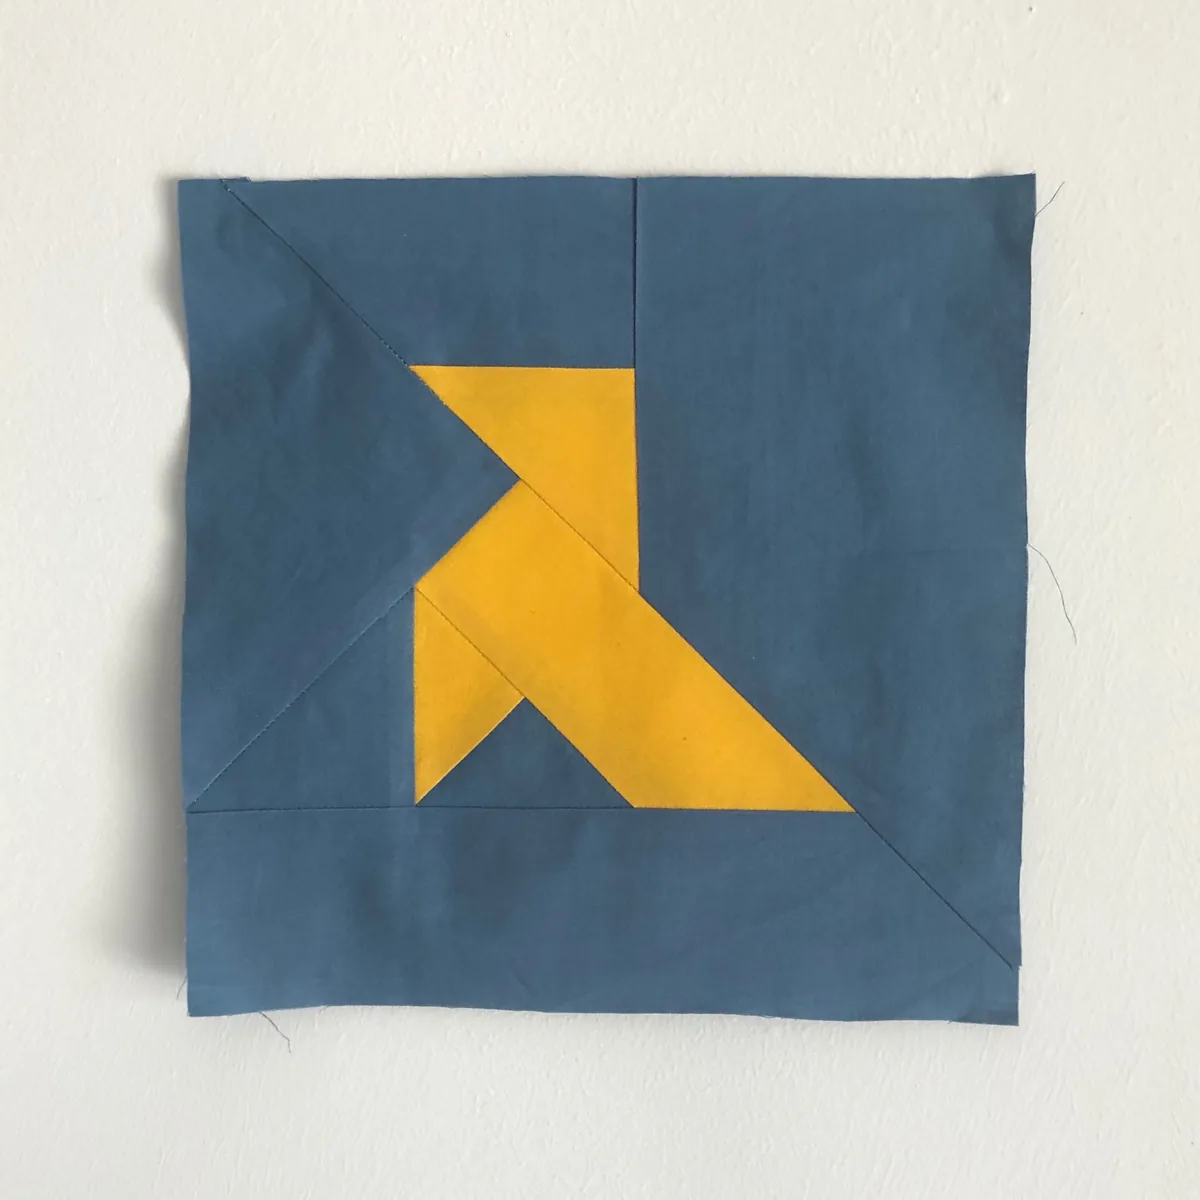
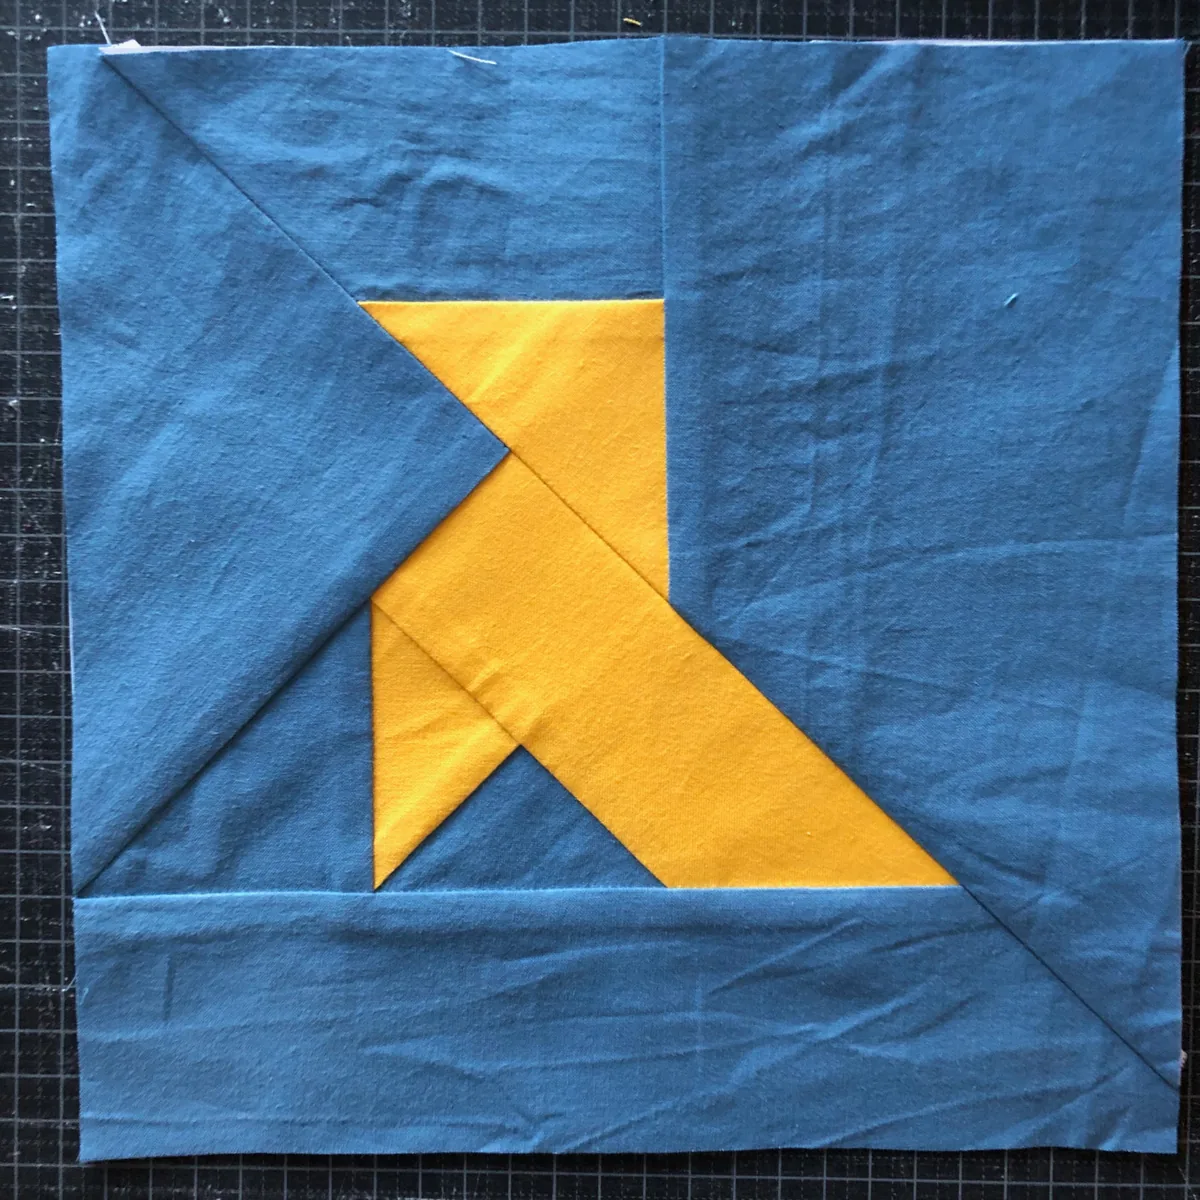
Your bird now faces the same way as on the pattern cover, not mirrored as in the section papers.
It is time to tear away all the paper from the back. It can be a little tedious, but children usually love this job!
Give the block one last press with the iron, and your Origami Bird is finished.
What Will You Make with Your Origami Bird?
A tote bag, a backpack, a cushion, or a whole flock of birds for a quilt: there are so many options.
I hope this tutorial has made you want to keep exploring foundation paper piecing. You can also combine it with other techniques, such as curves or appliqué, to create designs that are truly your own.
I would love to see what you make. Share it on Instagram and tag me, @quiltilus. Happy sewing!